You hit a wall in a CPU‑bound game and the frame rate tanks while your GPU sits at fifty percent. That is the classic symptom of a processor that cannot hold its boost clocks under load. What is intel performance tuning for gaming if not the toolkit that lets you reclaim those lost frames? It is a set of software and firmware controls that adjust voltage, power limits, and frequency behavior on Intel Core K‑series and select mobile chips.
Manufacturer specifications list a 100 °C junction maximum and a default PL2 of 253 W on a Core i9‑14900K. Most coolers cannot sustain that power without throttling. The sections below walk through the decision tree that matches your hardware to the right tuning approach.
What Is Intel Performance Tuning for Gaming
Intel performance tuning for gaming is the process of adjusting CPU voltage, power limits, and boost behavior to raise sustained clock speeds in games. It uses tools like Intel Extreme Tuning Utility and motherboard BIOS settings. The goal is higher 1 percent low frame rates without instability.
Proper tuning reduces heat and fan noise at the same performance level. It applies to desktop K‑series and unlocked HX mobile processors.
Problem / Pain Point – Why Frame Drops & Throttling Limit Your Game
Games such as Cyberpunk 2077 and Hogwarts Legacy hammer a few threads with heavy AVX workloads. Stock power limits force the CPU to drop frequency once the thermal budget fills. You see stutters, inconsistent 1 percent lows, and fans ramping to maximum.
Laptop owners face an extra layer of locked PL4 limits that no Windows tool can override. Small form factor builds hit VRM thermal walls before the CPU even reaches its junction max. These symptoms share a root cause: the default V/F curve is conservative for the worst silicon.
Your chip likely has headroom that the factory profile leaves on the table. Identifying which limit hits first, package power, VRM temperature, or core temperature, decides the tuning path you should take.
Common Bottleneck Signals
| Symptom | Likely Limit | Quick Check |
|---|---|---|
| Clocks drop at 100 °C | Core thermal | HWInfo core temps |
| Clocks drop at 70–80 °C | VRM thermal | HWInfo VRM temps |
| Clocks drop at fixed wattage | PL1/PL2 cap | XTU power graph |
| Stutters in AVX scenes | AVX offset too high | Disable offset, retest |
Core Explanation / How It Works – Intel Performance Tuning Basics & Key Technologies
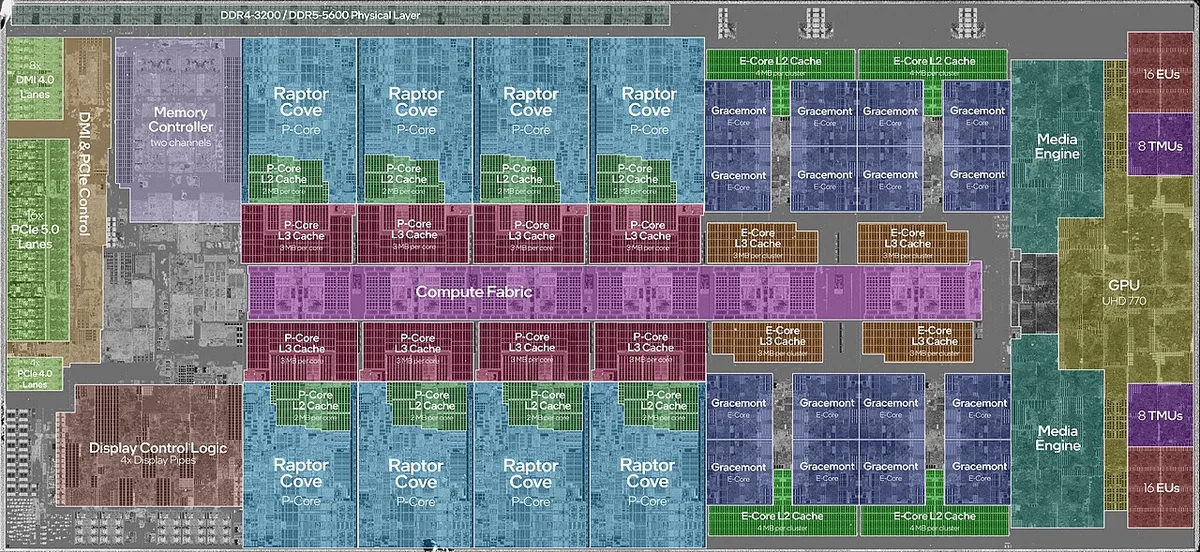
Intel exposes three layers of control. The deepest layer lives in the microcode and defines Thermal Velocity Boost, Adaptive Boost Technology, and Turbo Boost Max 3.0. These features raise single‑core and multi‑core ratios opportunistically when temperature and power allow.
The middle layer is the BIOS where you set PL1, PL2, Tau, IccMax, and per‑core ratios. The top layer is Intel Extreme Tuning Utility (XTU), a Windows application that mirrors most BIOS knobs and adds real‑time telemetry. Dynamic Tuning Technology (DTT) serves the same role in thin‑and‑light laptops but is usually locked by the OEM.
Each layer overrides the one above it, so a BIOS PL2 of 200 W will cap XTU even if you type 250 W. Understanding that hierarchy prevents wasted testing cycles.
Key Technologies at a Glance
| Technology | What It Does | Tuning Relevance |
|---|---|---|
| Thermal Velocity Boost | +100–200 MHz below 70 °C | Requires strong cooling |
| Adaptive Boost Technology | All‑core max ratio at higher TDPs | Limited by PL2 |
| Turbo Boost Max 3.0 | Favors best two cores | Per‑core tuning amplifies it |
| AVX Offset | Reduces ratio during AVX | Lower offset helps gaming |
| DTT | OEM power/thermal policy | Mostly locked on laptops |
Features / Components – XTU, DTT, Adaptive Boost, Thermal Velocity Boost & Tuning Controls
Intel Extreme Tuning Utility is the primary interface for most enthusiasts. It exposes core ratio limits, core voltage offset, cache ratio, VCCSA, VCCIO, and power limits in a single window. Changes apply instantly without a reboot, which speeds up the test loop.
BIOS tuning mirrors these options but persists across operating system reinstalls and sleep cycles. Performance Maximizer runs an automated stress sequence and writes a single BIOS profile; it is convenient but opaque. Adaptive Boost and Thermal Velocity Boost are not directly editable, they activate when your settings create the right thermal and power window.
VCCSA and VCCIO voltages control the memory controller and system agent; pushing them above 1.25 V on LGA1700 risks degradation. IccMax sets the absolute current ceiling; raising it without VRM headroom triggers throttling. The table below maps each control to its typical gaming impact.
Tuning Controls and Typical Gaming Impact
| Control | Typical Range | Gaming Impact |
|---|---|---|
| Core Voltage Offset | -0.020 V to -0.100 V | Lowers temps, raises sustained boost |
| Per‑Core Ratio | Stock to +400 MHz on best cores | Improves 1 % lows in thread‑heavy titles |
| AVX Offset | 0 to 3 | Lower offset = higher AVX clocks |
| PL1 / PL2 | 125 W / 253 W (stock) to 200 W / 250 W | Higher PL2 extends multi‑core boost |
| VCCSA / VCCIO | 1.05 V to 1.25 V | Stabilizes high‑frequency DDR5 |
| Ring Ratio | Stock to +200 MHz | Minor frame pacing improvement |
Step‑by‑Step Process – Decision‑Tree Workflow for Safe, Measurable Tuning
Start by capturing a baseline. Run Cinebench R23 multi‑core and note package power, peak temperature, and score. Launch a 10‑minute OCCT small FFT test while logging VRM temperatures in HWInfo.
If VRM temps exceed 90 °C, stop, your board cannot handle higher PL2. If core temps hit 100 °C, improve cooling before tuning. Once thermals are acceptable, enter BIOS and set PL1 equal to PL2 at the CPU spec maximum (253 W for 13th/14th gen K‑series).
Disable AVX offset. Save and boot into Windows. Open XTU and apply a -0.020 V core voltage offset.
Run a 30‑minute RealBench stress test. Stable? Decrease offset in -0.010 V steps until instability appears, then back off one step.
Next, raise the ratio on the two best cores by +100 MHz each. Test with 30 minutes of your most CPU‑bound game. If stable, repeat on the next best cores.
Finally, re‑enable AVX offset at 1 or 2 if heavy AVX workloads crash. Document every setting in a text file. Retest after any microcode or BIOS update, Intel’s 0x12B microcode changed voltage behavior on 13th/14th gen.
Decision Tree Quick Reference
| Condition | Action |
|---|---|
| VRM > 90 °C in OCCT | Stop, do not raise PL2 |
| Core = 100 °C in OCCT | Improve cooler, then continue |
| Stable at -0.050 V offset | Try -0.060 V, test 30 min |
| Crash in AVX game | Raise AVX offset to 1 |
| Crash in non‑AVX game | Reduce core ratio on weakest core |
| Settings lost after sleep | Move final values to BIOS |
Mistakes to Avoid – Common Undervolting, BIOS, and Profiling Errors
Applying a large negative offset in one jump causes silent data corruption that shows up as random game crashes days later. Always step in -0.010 V increments with a stability test at each step. Leaving AVX offset at the motherboard default of 3 costs 300 MHz in the very workloads that limit 1 percent lows.
Setting PL2 higher than your cooler can dissipate guarantees throttling, the CPU will hit 100 °C and drop clocks below stock. Ignoring VRM temperatures is the most common oversight; a 20‑phase VRM on a budget board can hit 110 °C while cores sit at 70 °C. Saving an XTU profile without writing the same values to BIOS means a Windows update or sleep cycle wipes your tune.
Running Performance Maximizer on a system with a locked BIOS writes a profile that never activates. Pushing VCCSA above 1.30 V for DDR5‑7200 often degrades the memory controller within months. Skipping the post‑microcode retest leaves you exposed to the 13th/14th gen instability that Intel patched in 0x12B.
Each of these mistakes has a simple fix: test incrementally, monitor VRM temps, mirror XTU to BIOS, and revalidate after firmware changes.
Use Cases / Who It’s Right For – Gamers, Streamers, SFF Builders, and Laptop Owners
Intel performance tuning is not a one‑size‑fits‑all upgrade. The right approach depends on your hardware, your games, and your tolerance for risk. Competitive players who chase the lowest 1 percent lows in esports titles gain the most from per‑core ratio adjustments.
A player in CS2 can raise the ratio on the two best cores by 100 MHz and see frame times tighten without touching voltage. These players also benefit from disabling the AVX offset, because the heavy vector instructions in Source 2 are rare.
AAA gamers playing Cyberpunk 2077 or Hogwarts Legacy will feel the difference when they raise PL2. The CPU stays at higher clocks during dense city sections. The trade‑off is heat.
A 280 mm AIO can handle the extra wattage; a stock air cooler cannot. If your cooler is marginal, focus on a negative voltage offset instead. You will keep the same boost clocks while dropping package power by 15 to 20 W.
For a deeper dive into related tuning, check our GPU undervolting guide. It shows how to lower GPU voltage for similar gains.
Streamers who run OBS alongside a game need stable AVX performance. Encoding with Quick Sync uses AVX instructions and can cause clock drops if the offset is too conservative. Setting the AVX offset to 1 or 2 keeps thekeeps the clocks stable during extended encoding sessions, preventing the frame-time spikes that degrade stream quality.
Streamers can pair this with a modest undervolt of -0.030 V to keep package power under 120 W while maintaining 60 fps in most titles. SFF builders face a different constraint: limited VRM headroom and compact cooler sizes. On a mini-ITX board with a single-fan cooler, raising PL2 often triggers VRM throttling before the CPU hits its thermal limit.
For those systems, the decision tree favors a smaller voltage offset (-0.010 V to -0.020 V) and leaving PL2 at stock, then monitoring VRM temperatures in HWInfo. If VRM climbs above 85 C, the tune should revert to stock to avoid long-term degradation. Laptop owners with unlocked HX-series CPUs can adjust PL2 in BIOS if the vendor has not locked the option, but many pre-built laptops enforce a hard PL4 ceiling that XTU cannot override.
In those cases, the only actionable tweak is the negative offset and AVX offset adjustment, which can yield a 3-5% 1 percent low improvement without risking instability.
Expert Tips / Pro Advice – Leveraging Microcode, VRM Health, and Real‑World Benchmarks
Microcode 0x12B changed the voltage‑frequency curve on 13th and 14th generation CPUs. After any BIOS update that includes this microcode, re‑run your stability suite. A tune that passed before the update may now crash in AVX workloads.
Treat every microcode revision as a new baseline. VRM thermal health is the silent killer of long‑term stability. A VRM running at 95 C under load will degrade faster than one at 75 C, even if the CPU cores are cool.
Point a case fan at the VRM heatsink if your board allows it. This simple airflow tweak can drop VRM temps by 8‑12 C and unlock higher sustained PL2. When benchmarking, use a fixed‑scene game benchmark rather than a synthetic test alone.
Shadow of the Tomb Raider built‑in benchmark, Cyberpunk 2077 benchmark, and the CS2 cl_showfps 2 log capture real frame‑time behavior. Run each test three times and take the median 1 percent low. Single runs vary by 2‑3 percent.
Document your final settings in a text file stored on a USB drive. Include BIOS version, microcode revision, XTU version, cooler model, and ambient temperature. This log saves hours when you rebuild or troubleshoot months later.
For stress‑testing methodology, our CPU stress test guide details the exact workloads and durations we trust.
Pro‑Level Tuning Checklist
| Item | Target | Tool |
|---|---|---|
| Core voltage offset | Stable at lowest negative step | XTU / BIOS |
| VRM temperature (load) | < 85 C | HWInfo |
| Core temperature (load) | < 85 C sustained | HWInfo |
| AVX offset | 0‑1 for gaming | BIOS / XTU |
| Memory Gear | Gear 1 ≤ 4000 MT/s | BIOS |
| Microcode revision | Latest 0x12B or newer | BIOS / Intel ARK |
Frequently Asked Questions
Does Intel Performance Tuning Void the Warranty?
Intel states that overclocking can void the processor warranty if damage is traced to operation outside specifications. The Magnuson‑Moss Warranty Act limits blanket denials in the United States, but manufacturers may still refuse RMA if they detect physical evidence of excessive voltage. In the EU, the seller bears the burden of proof for two years.
Keep your tune conservative and document stock‑equivalent thermals to protect your position.
Can I Tune a Non‑K Intel CPU?
Non‑K desktop CPUs lock the ratio multiplier. You can still adjust PL1, PL2, and voltage offsets on B660, H670, and Z790 boards, but frequency ceiling remains fixed. The gains are smaller, typically 2‑4 percent in 1 percent lows from undervolting alone.
Laptop non‑HX chips are almost always fully locked.
How Often Should I Retest Stability?
Retest after every BIOS update, microcode update, Windows feature update, and cooler remount. A quarterly RealBench run catches silent degradation early. If you change thermal paste or case airflow, treat it as a new baseline.
Is XTU or BIOS Better for Daily Use?
BIOS settings survive OS reinstalls, sleep cycles, and driver crashes. XTU is faster for iteration. Best practice: dial in XTU, then copy the final values into BIOS.
Disable XTU auto‑apply on boot to avoid conflicts.
What Cooling Do I Need for a 14900K Tune?
A 360 mm AIO or high‑end dual‑tower air cooler is the minimum for any PL2 increase. With a -0.050 V offset and stock PL2, a 280 mm AIO can work. Monitor VRM temps, board choice matters as much as the cooler.
Can Tuning Fix Stutter in Unity or Unreal Engine Games?
Yes. Stutter in CPU‑bound scenes often comes from boost down‑clocking when a heavy thread spikes. A negative offset keeps clocks higher at the same power.
Per‑core tuning on the best two cores helps the main render thread and the job system thread stay at peak frequency.
Final Recommendation / Decision Guide – When to Tune, When to Stop, and Next Steps
Start with the decision tree. If your VRM hits 90 C in a stock OCCT run, stop. Improve case airflow or accept stock limits.
If cores hit 100 C, upgrade cooling before touching voltage. If thermals are healthy, apply a -0.020 V offset and test. Stable?
Step down in -0.010 V increments. Unstable at the first step? Your silicon is average; keep stock voltage and focus on AVX offset reduction.
For esports players, disable AVX offset entirely and raise the best two cores by +100 MHz. For AAA gamers, raise PL2 to 200 W if your cooler holds core temps under 85 C. For streamers, set AVX offset to 1 and undervolt -0.030 V.
For SFF builds, leave PL2 stock, undervolt -0.010 V, and add a VRM fan. For locked laptops, undervolt only. Write every value to BIOS.
Save the log. Retest after each firmware change. The goal is not the highest benchmark score, it is the highest stable 1 percent low in the games you actually play.
When the next BIOS drops, you have a process, not a guess.