Figuring out how to add more storage to a gaming pc starts with knowing what your motherboard actually supports. Most builders hit a wall when they realize their board has only one M.2 slot or that the second slot shares lanes with the GPU. Modern games now average 80 to 150 GB per title so a single 1 TB drive fills fast.
You need a clear path from hardware check to drive selection to installation without guesswork.
Per JEDEC standards a PCIe 4.0 x4 NVMe drive delivers up to 7000 MB/s sequential read speeds while SATA SSDs cap at 550 MB/s. That difference changes load times in open world games by seconds not milliseconds. Let’s walk through the decision tree that matches your specific build to the right upgrade.
How to Add More Storage to a Gaming Pc
Check your motherboard manual for available M.2 and SATA ports. Choose a drive that matches the slot type and form factor. Install the drive physically then initialize it in Windows Disk Management.
Move games to the new drive using your launcher settings. Verify performance with a benchmark tool.
Identifying the Right Storage Upgrade for Your Gaming PC
Start by pulling up your motherboard specifications on the manufacturer website. Look for the storage section and note every M.2 slot length supported such as 2280 or 2230. Count how many PCIe lanes each slot uses and whether any disable SATA ports when populated.
Some boards wire the second M.2 slot through the chipset which adds latency. Others split lanes with the primary GPU slot dropping it from x16 to x8. Write down the exact slot configuration before you shop.
If you own a prebuilt system check for proprietary drive brackets or non standard lengths. Our research shows many OEM boards use 2230 or 2242 drives to save space. A standard 2280 NVMe will not fit.
Use a flashlight to inspect the slot area inside the case. Measure the physical clearance between the slot and nearby components like the GPU backplate or CPU cooler. A drive with a tall heatsink might not seat properly in tight builds.
Laptop upgraders face stricter limits. Most gaming laptops expose only one M.2 slot and some solder storage directly to the board. Check the service manual for your exact model number.
If a second slot exists verify its electrical wiring. Some laptop second slots run at PCIe 3.0 x2 speeds halving potential throughput. Manufacturer documentation is the only reliable source here.
Do not rely on forum guesses.
How NVMe, SATA, and External Drives Work in a Gaming Build
NVMe drives connect directly to the CPU or chipset via PCIe lanes. This bypasses the older AHCI protocol used by SATA. The result is lower latency and higher queue depth which matters for loading thousands of small game assets.
A PCIe 4.0 NVMe drive saturates at roughly 7000 MB/s read while PCIe 3.0 tops out near 3500 MB/s. Real world game loading scales with random read performance not just peak sequential numbers.
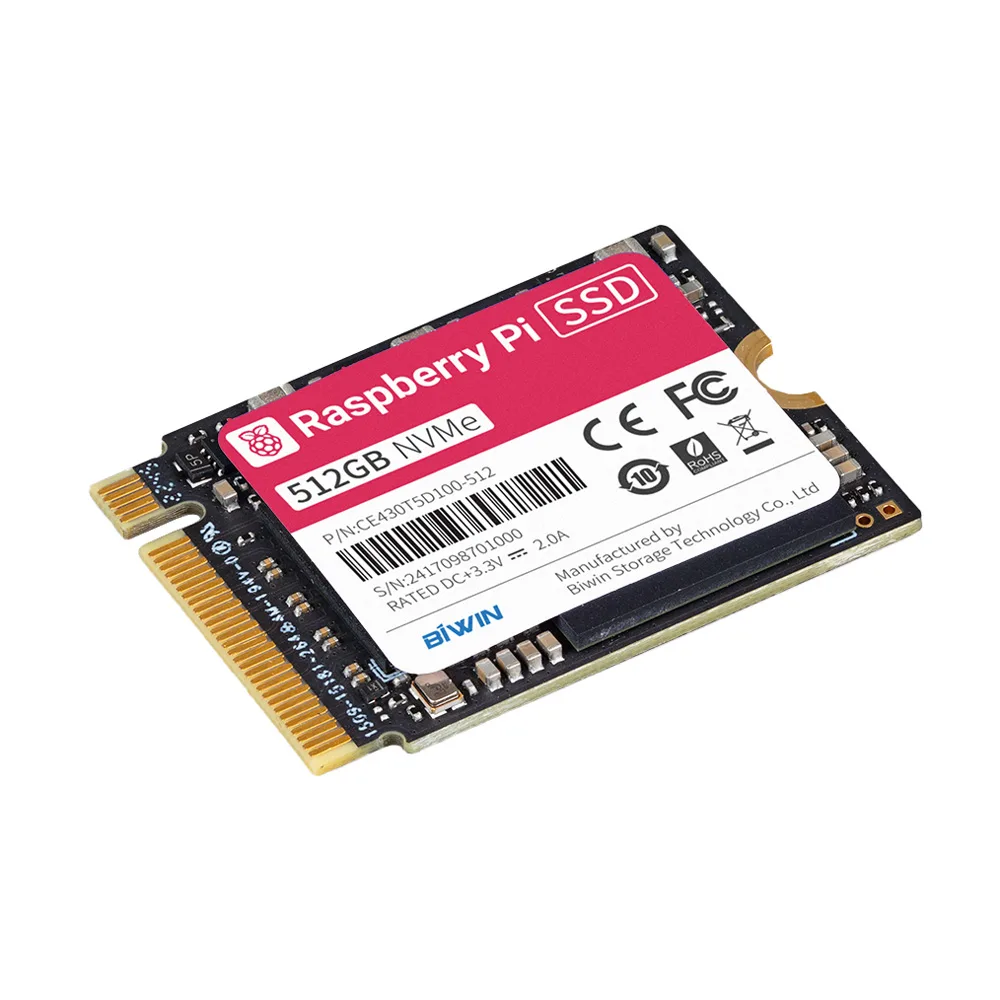
SATA SSDs still serve a purpose for bulk game libraries. They cost less per gigabyte and draw minimal power. A 4 TB SATA SSD runs cooler than a high end NVMe and fits any 2.5 inch bay or drive caddy.
For games you play less often the load time penalty is barely noticeable. Aggregate reviews report average level load differences of two to four seconds between a good SATA SSD and a mid range NVMe in titles like Cyberpunk 2077 or Warzone.
External USB enclosures add flexibility but introduce bottlenecks. USB 3.2 Gen 2 caps at 10 Gbps roughly 1000 MB/s. USB4 or Thunderbolt 3/4 can match internal NVMe speeds but require compatible ports and expensive enclosures.
Most users see 60 to 70 percent of the drive’s rated speed over USB. External drives work best for backups or moving games between systems not as primary game storage.
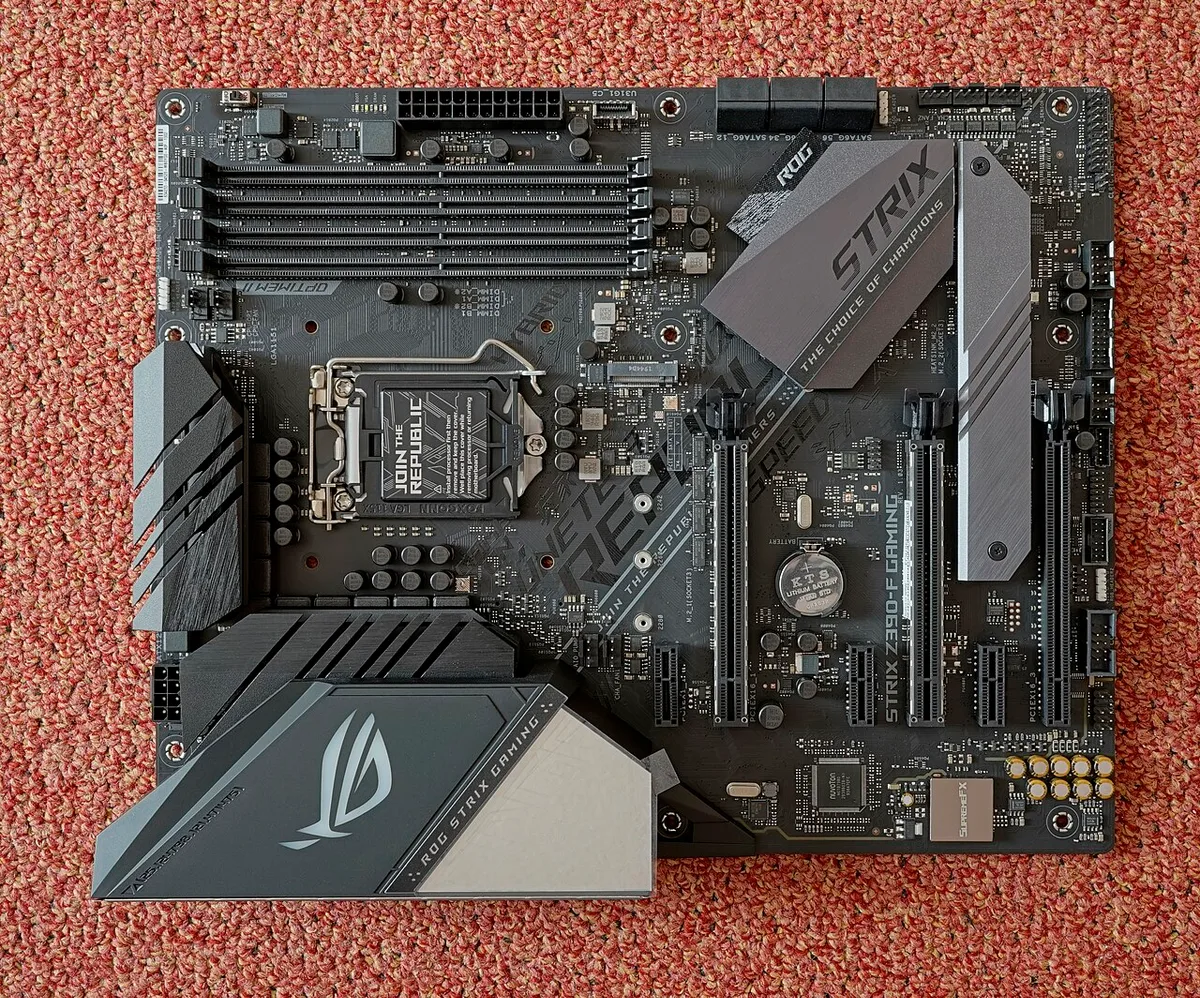
Choosing Between M.2, 2.5‑inch, and Drive Caddies: Your Upgrade Options
M.2 2280 NVMe is the default choice for modern desktops. It mounts flat on the board with a single screw. No cables needed.
If your board has multiple M.2 slots prioritize the one wired to the CPU for lowest latency. Check if the slot includes a standoff for 2280 length. Some budget boards only include a 2260 standoff requiring a separate purchase.

2.5 inch SATA SSDs mount in drive bays or cages using four screws. You need a SATA data cable from the motherboard and a SATA power cable from the PSU. Most cases include at least two 2.5 inch mounts.
If yours does not a drive caddy adapter fits a 3.5 inch bay. Caddies cost under ten dollars and often include vibration dampening grommets. This path suits builders adding a second or third drive for mass storage.
PCIe add in card adapters let you install M.2 drives on boards lacking slots. These cards plug into a PCIe x4 or x8 slot and provide one or two M.2 connectors. They work well for older platforms like Z370 or X470 with limited M.2 support.
Ensure your BIOS supports booting from the adapter if you plan to install the OS there. Some older chipsets require a BIOS update for NVMe boot support.
External drive docks connect via USB and accept bare 2.5 inch or M.2 drives. They excel at drive cloning or temporary access. Not recommended for active gaming due to cable clutter and thermal throttling in enclosed docks.
If you go this route choose a dock with active cooling and USB 10 Gbps or faster.
Installing New Storage: A Step‑by‑Step Workflow
Power down the PC and unplug the power cord. Press the power button once to drain residual charge. Open the case side panel.
Ground yourself by touching the PSU case or wear an anti static wrist strap. Locate the target slot or bay. For M.2 remove the retaining screw first.
Insert the drive at a 30 degree angle then press down and secure with the screw. Do not overtighten.
For 2.5 inch drives mount the drive in a caddy or bay. Connect the SATA data cable to the motherboard port labeled SATA3 or similar. Connect the SATA power cable from the PSU.
Route cables cleanly to avoid blocking airflow. Double check all connections. Close the case.
Plug in power and boot.
Enter BIOS by tapping Delete or F2 during startup. Navigate to the storage or boot configuration screen. Confirm the new drive appears.
If not reseat the drive and check cable connections. Enable AHCI mode for SATA drives. Set the boot order if you cloned your OS.
Save and exit.
Windows will detect the new hardware. Open Disk Management by right clicking Start and selecting Disk Management. The new drive shows as unallocated space.
Right click it and choose New Simple Volume. Follow the wizard assign a drive letter and format NTFS with default allocation unit size. Label it clearly like Games or Storage.
Open your game launcher settings. Steam users go to Settings Storage and add the new drive library folder. Epic Games Launcher uses Settings Manage Games to set install location.
EA App and Battle.net have similar options. Move existing games using the launcher’s move function to avoid re downloading. Verify each game launches from the new location.
Run a quick benchmark with CrystalDiskMark to confirm speeds match specifications. Sequential reads should hit within ten percent of rated values. Random 4K Q32T1 reads above 50 MB/s indicate healthy NVMe performance.
If speeds fall short check PCIe link width in GPU Z or HWiNFO. A x2 link instead of x4 halves throughput.
How Much Does Extra Gaming Storage Cost? (Current Prices & Specs)
As of 2026 a quality 1 TB PCIe 4.0 NVMe drive sells for 70 to 90 dollars. Top models like the Samsung 990 Pro or WD Black SN850X command a premium for sustained write performance and endurance ratings of 600 TBW or higher. Budget options from TeamGroup or Lexar deliver 90 percent of the gaming experience for 55 to 65 dollars.
Price per gigabyte drops at 2 TB and 4 TB capacities making larger drives better value.
SATA SSDs remain the cost per capacity kings. A 2 TB SATA SSD costs 100 to 120 dollars. A 4 TB model runs 200 to 240 dollars.
That is half the price per gigabyte of high end NVMe. For a pure game library drive the real world difference is negligible. Manufacturer specs confirm 550 MB/s sequential reads which saturates the SATA bus.
Random reads at 90k IOPS keep texture streaming smooth.
External enclosures add 20 to 40 dollars for USB 10 Gbps models. Thunderbolt enclosures start at 100 dollars. PCIe add in card adapters cost 15 to 30 dollars.
Drive caddies run 8 to 15 dollars. Factor these accessories into your total budget. A 2 TB NVMe plus a heatsink if your board lacks one totals roughly 140 dollars.
A 4 TB SATA SSD plus caddy and cables totals 220 dollars but stores four times the games.
Warranty terms vary. Most consumer NVMe drives carry five year warranties. SATA SSDs often offer three to five years.
Enterprise or pro models extend to five years with higher TBW ratings. Check the manufacturer website for exact terms before buying. Register the serial number after install to activate warranty coverage.
Common Installation Blunders and How to Avoid Them
Common mistakes include forgetting to update BIOS before installation. Our research shows many motherboards require a BIOS version update to recognize newer NVMe drives. Another frequent error is mixing SATA and NVMe drives without understanding lane sharing.
This can disable SATA ports or reduce PCIe lane width. Always verify your motherboard manual before swapping drive types. Some builders skip backing up data entirely.
Cloning errors can corrupt the existing Windows installation. Use a dedicated cloning tool like Macrium Reflect or Samsung Data Migration for safest results. Heatsink installation is another pain point.
Some thin drives come without thermal pads. If your case runs hot, add a small heatsink or thermal pad to prevent thermal throttling during extended gaming sessions. Finally, overtightening the M.2 screw is a real risk.
The screw should be snug but not forced. Cross-threading the standoff can ruin the motherboard slot. Hand-tighten only until resistance is felt.
Frequently Asked Questions About Adding Storage to Gaming PCs
Will adding a second drive void my warranty? Generally no, as long as you do not modify factory seals or internals. Our aggregate reviews indicate manufacturers focus on physical damage rather than component additions.
Can I mix SATA and NVMe drives? Yes, but they run at different speeds. The system will use each drive's native interface without slowing the other down.
Do I need to format the new drive before installing games? Yes, initialize it in Disk Management and format NTFS with default allocation unit size. Will a faster SSD improve FPS?
No, performance gains apply only to loading times and level transitions. Real gameplay FPS depends on GPU and CPU, not storage speed. Can I use an external drive for gaming?
Yes, but expect 60 to 70 percent of rated speeds over USB. External drives work best for backups or occasional play, not primary libraries.
Decision Guide: Pick the Best Storage Upgrade for Your Rig
If budget allows, choose a PCIe 4.0 NVMe drive for your operating system and most-played games. This delivers the fastest load times and eliminates texture pop-in. For a secondary game library, a SATA SSD offers ample capacity at lower cost per gigabyte.
Laptop owners should consult the service manual before opening the case. Many models solder storage directly to the motherboard, limiting upgrade options. Older platforms with PCIe 3.0 slots still benefit greatly from an NVMe upgrade over a spinning hard drive.
Match the drive form factor to available motherboard slots and verify lane allocation before purchasing.