You can buy a great cooler and still fail the build if the case will not close. The fix is simple: learn how to check cpu cooler and case clearance before you order parts. A few minutes with a spec sheet and a ruler saves returns, bent pins, and forced panels.
Manufacturer clearance numbers usually assume a specific fan and motherboard layout, so treat them as a starting point. As of 2026, many mid-tower cases list 160 mm to 175 mm of cooler room, while tall air coolers often land near 158 mm to 165 mm. That tiny gap is where mistakes happen.
Let's walk through the check in order.
Why a Millimeter of Clearance Can Ruin a Build
Cooler clearance is the empty space between the top of the CPU cooler and the case panel or fan above it. The problem is that this space is usually measured in millimeters, not inches. A 3 mm difference can turn a clean build into a panel that bows outward.
The damage is not always obvious right away. A heatsink can scrape a side panel, a fan can rub a cable, or a tower can press against RAM. In tight builds, even a small lean can strain the CPU socket or the motherboard tray.
Common clearance failures include these:
- A tower cooler hits tall RGB RAM modules.
- A top exhaust fan steals space from a tall air cooler.
- A front-mounted radiator blocks a long graphics card.
- A side panel bulges because the cooler overhang was ignored.
- A pump head on an AIO collides with a VRM heatsink.
The One Rule That Solves 90% of Clearance Problems
The rule is simple: leave a buffer. Do not chase a perfect fit on paper. Aim for at least 5 mm to 10 mm of extra space after you account for fans, RAM, and real mounting offsets.
That buffer matters because spec sheets are tidy and real builds are messy. Motherboard standoffs, socket position, and cable routing all eat space. A cooler that "fits" at 160 mm can fail at 160 mm once the top fan is installed.
Use this quick decision table before buying:
| Check | What to confirm | Safe target |
|---|---|---|
| Cooler height | From CPU IHS to cooler top | At or below case spec |
| Case clearance | From motherboard tray to panel or fan | At least 5 mm above cooler |
| RAM height | From slot base to top of DIMM | Below cooler overhang zone |
| Top fan stack | Fan plus radiator or panel | Cooler plus 5 mm to 10 mm buffer |
| Dry fit | Cooler on motherboard outside case | No tilt, no contact |
Before choosing a tower cooler, review how to choose an air cooler for your gaming PC so the cooler matches your case and RAM.
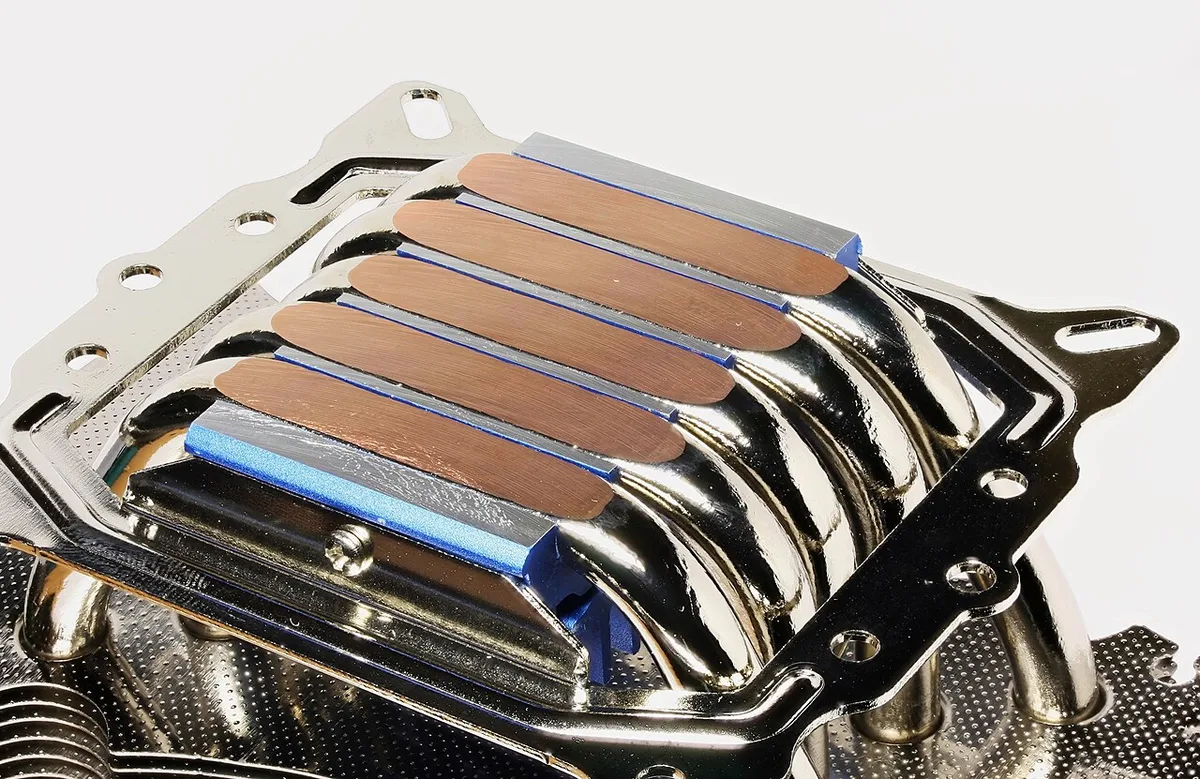
Image source: Wikimedia Commons / D-Kuru (CC BY-SA)
Why Photos and Diagrams Matter More Than Specs Here
Specs tell you the number. Photos show you the shape. That difference matters because clearance is a spatial problem, not just a measurement problem.
A diagram can show where the heatsink overhangs the RAM slots. A build photo can show whether a top fan leaves room for a tall cooler. A motherboard manual can show socket offset, which changes how close the cooler sits to the GPU.
Look for these visual clues when checking clearance:
- The cooler's base is centered over the CPU socket.
- The fins do not hang over the first RAM slot.
- The top fan has visible gap above the cooler.
- The side panel closes without pressure.
- The radiator leaves room for the graphics card.
If you are planning the whole airflow path, check how to plan airflow in a gaming PC case before finalizing cooler placement.
Step-by-Step: How to Check CPU Cooler and Case Clearance
Follow these steps in order. Do not skip the dry fit.
- Find the cooler height in the manufacturer spec sheet.
- Find the case CPU cooler clearance in the case spec sheet.
- Subtract the cooler height from the case clearance.
- Check the result against your buffer target.
- Measure RAM height if you plan to use tall DIMMs.
- Check whether the cooler overhangs the RAM slots.
- Add top fan thickness if a top exhaust fan is installed.
- Add radiator thickness if using an AIO.
- Dry fit the cooler on the motherboard outside the case.
- Test the side panel before final assembly.
Use a digital caliper for the small measurements. A ruler is fine for rough checks, but millimeters matter here. If the margin is under 5 mm, choose a shorter cooler or a lower-profile fan.
When checking the rest of the build, verify RAM and motherboard compatibility in minutes and CPU and motherboard compatibility in minutes so socket and slot layout do not surprise you.
For official fit data, start with the manufacturer spec sheets from brands like Noctua or Fractal Design.
Key Identifiers: What to Measure and Where
The trick is measuring from the right place. Cooler height is usually measured from the CPU IHS to the top of the heatsink or fan. Case clearance is usually measured from the motherboard tray area to the side panel or top fan mount.
Here are the key identifiers to check:
| Identifier | Where it matters | Typical concern |
|---|---|---|
| Cooler height | From CPU IHS to top of cooler | Must fit inside case spec |
| Case clearance | From tray area to panel or fan | Must exceed cooler height |
| RAM height | From slot base to DIMM top | Must clear cooler overhang |
| Top fan stack | Fan plus panel or radiator | Often reduces real clearance |
| Socket offset | CPU socket position on board | Changes cooler lean and fit |
| GPU length | From slot bracket to front | Matters with front radiators |
Measure RAM before you assume a tower cooler will fit. Tall memory with RGB or tall heatspreaders can block installation even when the cooler height looks fine. If your graphics card is long, also check GPU and motherboard compatibility easily before adding a front radiator.

Image source: Wikimedia Commons / William C. Shrout
As of 2026, the safest habit is to treat every clearance number as a best case. Measure the part, measure the case, and leave a little room. That small habit prevents most forced fits and panel damage.
Common Visual Mistakes That Wreck Clearances
Visual checks beat guesswork every time. Many builders look at the cooler and assume it fits. The common error is trusting the headline number without checking the shape.
The biggest visual mistakes are easy to spot once you know them.
- Ignoring top fan thickness and measuring only the case panel.
- Measuring from the motherboard tray instead of the CPU IHS.
- Overlooking RAM overhang under a tower heatsink.
- Forcing a side panel that bows outward.
- Missing radiator contact with a long graphics card.
- Forgetting that cable routing can steal space near the cooler base.
A photo of the installed cooler tells you more than a spec sheet. If the fins touch the RAM, the build is wrong. If the side panel needs pressure to close, the build is wrong.
Clearance Reference Guide by Cooler Type and Case Size
Use this table as a starting point, not a guarantee. Real fit depends on motherboard offset, RAM height, and fan thickness.
| Cooler type | Typical height | Best case match | Main watch-out |
|---|---|---|---|
| Low-profile top-down | 45 mm to 70 mm | SFF and slim cases | Weak airflow in tall cases |
| Single-tower air cooler | 120 mm to 150 mm | Mid-tower cases | RAM overhang |
| Dual-tower air cooler | 155 mm to 170 mm | Roomy mid-tower or full-tower | Side panel and top fan clearance |
| 240 mm AIO | Radiator plus 25 mm fan | Most mid-tower cases | Front GPU length |
| 360 mm AIO | Radiator plus 25 mm fan | Full-tower or wide mid-tower | Top VRM heatsink clearance |
For exact cooler heights, check the manufacturer spec sheets from brands like Noctua.
Real Build Scenarios: SFF, Tall RAM, and Top-Mounted AIO
Small builds need the most care. A 120 mm tower in a 140 mm SFF case leaves only 20 mm. That sounds fine until a top exhaust fan takes 25 mm.
Tall RAM is the classic air cooler trap. A 50 mm DIMM set can block a 165 mm tower even when the case spec looks generous. In that case, a low-profile cooler or shorter memory is the safer choice.
Top-mounted AIOs need stack math. A 27 mm radiator plus a 25 mm fan uses 52 mm. If the case top clearance is 60 mm, you have 8 mm of margin.
That is tight but workable.
Fan layout matters too. Review best fan placement for a gaming PC before locking the radiator position.
Frequently Asked Questions
How much clearance should I leave above a CPU cooler?
Leave at least 5 mm to 10 mm after accounting for fans and real mounting offsets. That buffer covers spec sheet optimism, motherboard offset, and cable routing. If the margin is smaller, choose a shorter cooler or a slimmer fan.
Does case clearance include the top fan?
Sometimes it does, and sometimes it does not. Check the case manual and photos before trusting the number. If a top fan is installed, subtract its thickness from the listed clearance.
Can tall RAM block an air cooler?
Yes. Tower coolers often overhang the first RAM slot. Tall RGB or heatspreader modules can hit the fins during installation.
Measure RAM height before buying a tower cooler.
Is an AIO easier to fit than a tower cooler?
It depends on the case. An AIO moves heat to the radiator, but the radiator and fan stack still need space. A tower cooler is simpler, yet it needs vertical room and RAM clearance.
What tool is best for measuring cooler clearance?
A digital caliper is best for small gaps. A ruler works for rough checks, but millimeters matter here. Use the caliper on cooler height, RAM height, and fan thickness.
Final Verdict: The Clearance Check You Should Never Skip
The check is simple and worth doing every build. Measure the cooler, measure the case, check RAM height, and add fan thickness. Then dry fit outside the case and test the side panel.
Use this final checklist before ordering:
- Cooler height is below case clearance.
- At least 5 mm to 10 mm of buffer remains.
- RAM height clears the cooler overhang.
- Top fan and radiator stack fits.
- Dry fit shows no tilt or contact.
- Side panel closes without pressure.
If any item fails, change the part before assembly. A small swap now prevents a forced fit later.
1 thought on “How to Check CPU Cooler and Case Clearance Before Buying”
Comments are closed.