Figuring out how to choose components that fit a gaming pc power budget feels less like shopping and more like solving a puzzle with expensive pieces. You’ve got a set amount of money, maybe $800 or $1,200, and you need to squeeze every frame per second out of it without frying your wallet or your hardware. Most people mess this up by picking flashy parts first and worrying about compatibility later.
That approach usually leads to regret. As of 2026, the gap between entry-level and high-end performance is wider than ever, making smart allocation critical. We’ll walk through a step-by-step workflow to match your specific dollar limit to real-world wattage needs.
This ensures you’re not paying for unused horsepower or risking instability from an undersized unit. Let’s map your cash to actual FPS targets.
how to choose components that fit a gaming pc power budget
Start by defining your resolution and refresh rate goals. Allocate 40-50% of your total budget to the graphics card. Calculate the system's peak wattage using manufacturer TDP specs.
Add 30% headroom to determine the necessary power supply unit rating. Select a CPU that balances cost against GPU potential. Verify physical clearance and connector types before purchasing.
Stop Guessing: Map Your Budget to Real-World Performance Targets
Most builders start with a number in their head, say $1,000, and immediately browse GPUs. That’s backwards. You need to reverse-engineer the build from your performance goal down to the price tag.
Ask yourself what you actually play. Are you grinding competitive shooters at 240Hz? Or are you exploring open-world titles at 4K?
These two scenarios demand vastly different component mixes. A competitive shooter prioritizes low latency and high framerate, which leans heavily on the CPU and fast RAM. An AAA title at ultra settings relies almost entirely on raw graphical throughput from the GPU.
If you misidentify your primary workload, you’ll overspend on parts that don’t move the needle for your games.
Our research indicates that players often overestimate their need for top-tier CPUs while underestimating VRAM requirements for modern textures. At 1080p, a mid-range CPU paired with a strong GPU yields better results than a flagship CPU with a weaker card. Conversely, at 4K, the CPU matters far less because the bottleneck shifts to pixel rendering.
Here’s a quick breakdown of typical allocations based on resolution:
| Target Resolution | Primary Bottleneck | Recommended GPU Budget Share | CPU Priority |
|---|---|---|---|
| 1080p @ 144Hz+ | CPU / Latency | 35-40% | High (Fast single-core) |
| 1440p @ 144Hz | Balanced | 45-50% | Medium (Good multicore) |
| 4K @ 60Hz+ | GPU / VRAM | 55-60% | Low (Any modern quad-core+) |
Don’t lock into these percentages rigidly. Treat them as starting points. If you find a great deal on a CPU bundle, shift some funds there.
But always check if that shift compromises your ability to afford a decent PSU or enough storage. The goal is synergy, not just spending maximum dollars on one part.
Before we dive into specific components, let’s address the elephant in the room: marketing hype. Manufacturers love throwing big numbers around. "Up to 500 Watts" sounds impressive until you realize it’s only during synthetic stress tests that no gamer will ever run.
We need to look past the box art and understand what your system actually draws when you’re playing Cyberpunk or Call of Duty.
The Golden Rule of Allocation: Why the GPU Always Comes First
In nearly every custom gaming build scenario, the graphics processing unit deserves the largest slice of your pie. It’s the component responsible for rendering images, calculating lighting, and handling geometry. No other part impacts visual fidelity and framerate as directly.
If you skimp here, no amount of CPU power will save you from stuttering slideshows.
Think of the GPU as the engine of your car. You can have the fanciest interior and the smoothest suspension, but if the engine is weak, you won’t go anywhere fast. For gamers, "fast" means maintaining stable framerates above your monitor’s refresh rate.
Dropping below that threshold introduces input lag and tearing, ruining immersion.
This doesn’t mean you ignore the CPU. A severe mismatch causes bottlenecks. However, diminishing returns kick in quickly with processors.
Moving from a mid-range Ryzen 5 or Core i5 to a flagship chip might yield only 5-10% more FPS in most titles, yet costs double. That extra money is better spent upgrading your GPU tier or increasing VRAM capacity.
We see many beginners fall into the trap of "future-proofing" by buying an expensive motherboard or CPU now, leaving pennies for the video card. Don’t do this. Technology moves too fast.
By the time you upgrade that GPU in three years, your "future-proof" CPU will likely be outdated anyway. Focus on today’s needs.
If your budget allows, aim for the highest tier GPU within your price range that fits your resolution target. Then, select the cheapest capable CPU that won’t hold it back. This strategy maximizes immediate gaming experience.
It also leaves room for essential stability features like adequate cooling and a reliable power supply.
Remember, a balanced build isn’t equal spending. It’s proportional spending. The GPU gets the lion’s share because it does the heavy lifting.
Everything else supports it. Keep this hierarchy in mind as we calculate actual power needs next. Skipping this step leads to unstable systems that crash under load, wasting both money and patience.
Step 1: Lock In Your Resolution and Refresh Rate Goals
Your monitor dictates everything. It sets the baseline for required performance. Trying to pick components without knowing your display specs is like cooking dinner without knowing how many guests are coming.
You might make too much or too little.
First, identify your native resolution. Is it 1920×1080 (Full HD), 2560×1440 (QHD), or 3840×2160 (4K UHD)? Higher resolutions require exponentially more GPU resources.
Pixel count quadruples from 1080p to 4K. Your graphics card must handle four times the data throughput.
Next, consider your refresh rate. Standard monitors run at 60Hz. Gaming panels offer 144Hz, 165Hz, or even 240Hz+.
To benefit from higher refresh rates, your PC must generate frames faster than the screen updates. Playing at 144Hz requires sustaining ~144 FPS minimum. Missing this target makes the high refresh rate useless.
Let’s apply this to budget planning. Suppose you have $1,000.
- Scenario A: You already own a 1080p 144Hz monitor. You prioritize CPU speed and lower-latency memory. You can spend slightly less on the GPU since the pixel load is lighter. Maybe allocate $350-$400 to the graphics card.
- Scenario B: You plan to buy a 1440p 165Hz monitor soon. The GPU becomes critical. You need more VRAM and shader cores. Allocate $450-$500 to the graphics card. The CPU can be a modest mid-range model.
- Scenario C: You want to jump straight to 4K 60Hz. This demands a premium GPU. Expect to spend $700+ on the card alone. This leaves very little for other components unless you raise the total budget significantly.
Don’t forget about upscaling technologies. DLSS (Deep Learning Super Sampling) and FSR (FidelityFX Super Resolution) allow lower-tier cards to render at higher resolutions internally. They reconstruct the image using AI or algorithms.
This effectively lowers the hardware barrier for 4K gaming.
However, rely on upscaling wisely. Native rendering always looks sharper. Use DLSS/FSR Quality modes to bridge gaps where pure brute force fails.
Check how to avoid a gpu bottleneck when choosing a cpu for deeper insights on matching processor strength to graphical output.
Once you’ve locked in resolution and refresh rate, you know exactly how much graphical grunt you need. This clarity prevents impulse buys. You stop looking at shiny boxes and start looking at spec sheets that matter for your screen.
Next, we translate those performance goals into electrical demands.
Step 2: Calculate True Power Draw (Not Just TDP)
Thermal Design Power (TDP) is a marketing term, not a hard engineering limit. It represents sustained heat dissipation capability, not necessarily peak electricity consumption. Relying solely on TDP ratings for PSU sizing is dangerous.
Modern GPUs exhibit transient spikes. These are millisecond bursts of extreme power draw that exceed rated TDP.
For example, an NVIDIA RTX 40-series card might have a TDP of 320W. During intense ray-tracing scenes, instantaneous draws can spike to 450W or higher. If your PSU can’t handle that surge, the system shuts down abruptly.
This protects components but disrupts gameplay.
To calculate true power draw, sum the following estimates:
- GPU Peak Load: Use reviews or tools like HWInfo64 logs from trusted sources. Multiply TDP by 1.2 to account for spikes.
- CPU Package Power: Look at PL2 (Power Limit 2) values from Intel ARK or AMD product pages. This is short-term boost power.
- Motherboard & Chipset: Typically 20-50W depending on features like RGB headers or extra USB ports.
- RAM: Negligible. About 2-5W per stick.
- Storage: NVMe drives draw minimal power (~5-10W). SATA SSDs similar. HDDs use more (~10-15W) but are rare in gaming builds now.
- Cooling Fans/Pumps: Each fan uses ~2-5W. AIO pumps may use 10-15W.
Add these numbers together. Let’s say your GPU peaks at 400W, CPU boosts to 150W, board/fans/storage add 50W. Total estimated load = 600W.
Now, apply efficiency losses. PSUs aren't 100% efficient. Energy converts to heat.
An 80 Plus Gold unit loses roughly 10-15% of drawn AC power as waste heat inside the brick itself. So, to deliver 600W DC to components, the wall socket provides ~700W AC.
But wait, we haven’t accounted for headroom. Running a PSU at 100% capacity generates noise and reduces lifespan. Capacitors degrade faster under thermal stress.
We recommend keeping load below 80% of rated capacity for optimal silence and longevity.
Take your calculated peak load (600W). Divide by 0.8. Result: 750W.
This is your minimum recommended PSU rating.
Do not cut corners here. Cheap units lack proper voltage regulation rails (+12V rail amperage). If the +12V rail sags under load, components receive dirty power.
This causes crashes, artifacts, or permanent damage. Always verify the +12V rail rating specifically, not just the total wattage label.
Understanding these calculations saves you from guessing. It turns abstract "power budget" concerns into concrete mathematical requirements. With this number in hand, selecting the right PSU becomes straightforward rather than risky trial-and-error.
See how to check psu compatibility with a gaming pc for connector-specific details.
Step 3: Select the PSU with Headroom, Not Just Wattage
Choosing a power supply unit involves more than picking a number off a chart. You need quality, reliability, and correct form factor. A bad PSU kills everything connected to it.
It’s the heart of your system; if it fails, nothing works.
First, decide on modularity. Fully modular cables detach completely. Semi-modular has fixed ATX/EPS cables but detachable peripherals.
Non-modular has all wires permanently attached. Modular options reduce clutter and improve airflow. For small cases or tight budgets, semi-modular offers a good balance.
Fully modular aids cable management significantly, reducing dust accumulation hotspots.
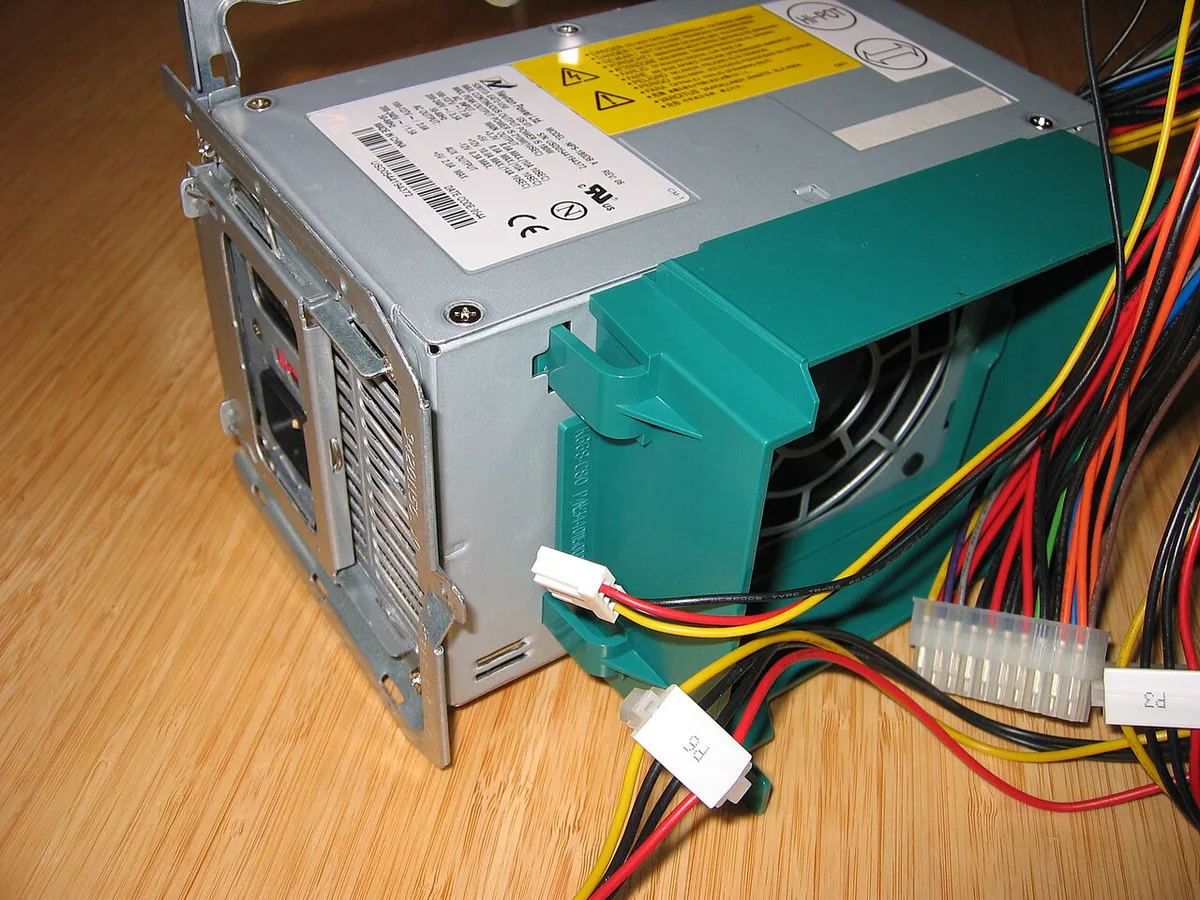
Image source: Wikimedia Commons / Hans Haase (CC BY-SA)
Second, examine the 80 Plus certification. This label guarantees minimum efficiency levels at various loads. Bronze is acceptable for entry-level builds.
Gold is preferred for mainstream rigs due to better efficiency and quieter fans at idle. Platinum/Titanium are overkill for most gamers unless running server-grade workloads. Note that certifications vary by region and test methodology.
Stick to reputable brands known for consistent QC.
Third, check connector availability. Modern GPUs often use 12VHPWR connectors. Ensure your chosen PSU includes native support or a compatible adapter provided by the manufacturer.
Do not mix adapters from different vendors unless explicitly stated safe. Incorrect pinouts can melt plugs. Also, verify EPS 8-pin (or dual 4+4 pin) availability for CPU power.
High-end motherboards may require multiple EPS inputs.
Fourth, consider physical dimensions. Standard ATX PSUs measure 150mm x 86mm x 140-160mm depth. Some compact cases accept SFX or SFX-L forms.
Measure your case’s PSU shroud clearance carefully. Deep heatsinks on GPUs sometimes encroach on PSU space. If building in a Mini-ITX chassis, review how to plan component compatibility for a mini itx gaming pc thoroughly.
Finally, warranty length reflects confidence. Top-tier units carry 10-year warranties. Mid-range typically offer 5-7 years.
Avoid anything with less than 5 years coverage unless it’s a temporary placeholder. Longer warranties suggest robust capacitor selection and rigorous testing standards.
Selecting the right PSU isn’t glamorous. But skipping due diligence here risks catastrophic failure. Spend time researching models within your calculated wattage range.
Read independent ripple/noise tests if possible. Protect your investment with clean, stable power delivery.
Step 4: Balance CPU and Motherboard Without Breaking the Bank
Once your GPU and PSU are locked in, you have a specific dollar amount left for the processor and board. This is where many builders panic and overspend on features they’ll never use. You don’t need a flagship chipset to game well.
You need compatibility and stability.
Start by matching the socket type. AMD’s AM5 platform currently supports DDR5 memory exclusively. Intel’s LGA 1700 and newer sockets vary by generation.
Always verify that your chosen motherboard physically accepts your selected CPU. Check can a newer cpu work with an older motherboard if you’re mixing generations from stock clearance sales.
Next, evaluate VRM quality. Voltage Regulator Modules convert power for the CPU. Weak VRMs throttle performance under sustained loads.
For mid-range chips like a Ryzen 5 or Core i5, basic VRMs suffice. High-end CPUs demand robust cooling and phase counts. Don’t pair a $500 processor with a $80 entry-level board.
That mismatch creates heat issues and limits boost clocks.
Feature sets matter less than you think. Do you really need Wi-Fi 6E? Bluetooth 5.3?
Multiple M.2 slots? If you plan to add storage later, ensure the board has spare slots. But avoid paying premiums for RGB headers or excessive USB ports.
Those add cost without boosting FPS.
Consider BIOS requirements carefully. Newer CPUs often require updated firmware to function on existing boards. Some manufacturers ship with outdated versions.
Verify if the board includes "BIOS Flashback" capability. This lets you update firmware without installing a compatible CPU first. It saves you from buying two processors just to boot the system once.
See how does bios version affect component compatibility for troubleshooting tips.
Finally, weigh form factor against case size. ATX boards offer expansion room. Micro-ATX saves money and fits smaller chassis.
Mini-ITX restricts connectivity but enables compact builds. Match the board to your case dimensions. Physical incompatibility stops builds dead in their tracks.
Measure standoffs and rear I/O shield alignment before checkout. A balanced approach here protects your remaining budget for RAM and storage.
Where to Cut Corners: RAM, Storage, and Cooling Trade-offs
You’ve allocated funds for the big three: GPU, CPU, and PSU. Now look at what remains. This bucket covers memory, drives, and thermal management.
These components rarely impact raw framerate directly. They affect loading times and system responsiveness instead. Knowing where to save keeps your build affordable.
Random Access Memory (RAM) speed matters, but capacity matters more. For gaming in 2026, 16GB is the absolute floor. 32GB provides breathing room for background apps and future titles. Speed differences between 3200MHz and 6000MHz show minimal gains in most games.
Don’t chase exotic kits with tight timings unless you overclock extensively. Stick to standard JEDEC profiles for reliability. Check how to check whether ram is supported by a motherboar to avoid incompatible modules.
Storage choices have simplified dramatically. NVMe SSDs dominate now. Gen 3 drives perform nearly identically to Gen 4 in everyday tasks.
Games load faster from any modern SSD compared to mechanical hard disks. Buy the cheapest reliable 1TB or 2TB NVMe drive available. Skip enterprise-grade endurance ratings unless you write terabytes daily.
Your game library won’t wear out consumer TLC NAND quickly.
Cooling presents another opportunity for savings. Stock coolers included with many CPUs handle moderate loads adequately. Aftermarket air towers cost $20-$40 and run quieter.
Liquid cooling adds complexity and pump failure risks. Reserve AIO units for high-TDP chips or aesthetic preferences. Air cooling offers better longevity per dollar spent.
Ensure your case supports the cooler height. Review how to check cpu cooler and case clearance before purchasing tall heatsinks.
Case selection shouldn’t drain your wallet either. Basic steel-and-glass boxes provide sufficient airflow. Premium aluminum cases look sharp but charge significant markups.
Focus on mesh front panels for ventilation. Ignore tempered glass side windows if budget is tight. Functionality beats flashiness every time.
Spend saved dollars on a larger SSD or extra RAM sticks. These upgrades yield tangible usability improvements over cosmetic enhancements.
Common Bottlenecks That Waste Your Money
Bottlenecking occurs when one component holds back another. The result? Unstable framerates and wasted potential.
Understanding these traps prevents costly mistakes. You might buy powerful parts that simply can’t work together efficiently. Here’s how to spot them early.
CPU-GPU imbalance tops the list. Pairing a weak processor with a top-tier graphics card creates a severe bottleneck. The GPU waits for instructions it can’t get fast enough.
Frame drops occur even though the video card isn’t fully utilized. Conversely, a monster CPU with a low-end GPU wastes processor cycles. Neither scenario improves gameplay experience meaningfully.
Aim for proportional strength based on resolution targets discussed earlier. Consult what is a balanced cpu and gpu pairing for gaming for tiered recommendations.
Memory bandwidth limitations sneak up on you. Dual-channel configurations double effective throughput. Running single-stick setups halves available bandwidth.
This impacts minimum frame rates significantly. Always install matched pairs of DIMMs. Enable XMP or EXPO profiles in BIOS for advertised speeds.
Default JEDEC settings often leave performance on the table. Verify slot population guidelines in your manual. Incorrect placement disables dual-channel mode silently.
Thermal throttling mimics hardware bottlenecks. Overheating components reduce clock speeds automatically. This protects silicon from damage but kills performance.
Poor airflow or inadequate paste application causes rapid temperature spikes. Monitor sensor data during stress tests. Clean dust filters regularly.
Reapply thermal interface material every few years. Explore what causes thermal throttling in a gaming pc to diagnose symptoms correctly.
Power delivery constraints hide within cheap PSUs. Voltage sag under load triggers instability. Components receive insufficient energy despite adequate wattage ratings.
Ripple noise corrupts sensitive circuits. This manifests as random restarts or artifacting. Invest in units with strong +12V rail regulation.
Avoid no-name brands lacking independent testing. Stable power ensures consistent performance across all subsystems.
PCIe lane saturation affects multi-device systems. Older platforms limit available lanes. Adding capture cards or multiple NVMe drives consumes resources.
The primary GPU slot may downgrade to x8 mode. Modern GPUs tolerate this minor loss. However, combining legacy peripherals with new tech requires careful planning.
Confirm lane distribution via chipset diagrams. Prevent conflicts before assembly begins.
Decision Guide: Matching Components to Specific Budget Tiers
Different price points demand distinct strategies. What works at $800 fails at $1,500. Use this framework to align purchases with financial reality.
Each tier prioritizes specific performance metrics. Adjust expectations accordingly to maximize value.
Entry-Level ($500, $700):
Focus entirely on 1080p viability. Prioritize the GPU above all else. Select a recent-generation mid-range card capable of handling current titles at medium-high settings.
Pair it with a budget quad-core or six-core processor. Integrated graphics remain viable only for esports titles. Allocate ~45% of budget to the video card.
Choose DDR4 RAM to save costs. Opt for a 500W Bronze-certified PSU. Skip fancy aesthetics.
Functional plastic cases suffice. This tier delivers solid competitive gaming experiences without breaking the bank.
Mid-Range Sweet Spot ($800, $1,200):
Target 1440p consistency. Upgrade to eight-core CPUs for smoother multitasking. Select GPUs with ample VRAM (12GB+).
Allocate ~50% of budget to graphics processing. Move to DDR5 memory for better longevity. Require a 650-750W Gold-rated unit for headroom.
Include decent aftermarket cooling. Mesh-front cases improve thermals noticeably. This bracket balances initial cost against several years of relevance.
Upscaling technologies extend usable life further.
High-End Enthusiast ($1,500+):
Chase 4K excellence or extreme refresh rates. Flagship processors minimize latency for pro-level play. Top-tier GPUs handle native ray tracing comfortably.
Allocate 55-60% of funds to visual computation. Demand premium PSUs (850W+ Platinum/Titanium). Implement advanced liquid cooling solutions.
Build inside spacious ATX towers for optimal airflow. Expect diminishing returns beyond certain thresholds. Evaluate whether marginal gains justify exponential price hikes.
Sometimes saving hundreds yields negligible perceptible difference.
Regardless of tier, always reserve contingency funds. Prices fluctuate weekly. Sales appear unexpectedly.
Having buffer capital allows seizing opportunities without compromising core specs. Never stretch budgets to the penny. Leave room for unexpected shipping fees or tax adjustments.
Smart allocation beats maximum expenditure every single time.
FAQs on Gaming PC Power Budgets
Does higher RAM speed increase FPS?
Rarely. Faster memory helps mainly in CPU-bound scenarios at lower resolutions. Most games rely heavily on GPU power.
Investing in extra capacity usually yields better results than chasing gigahertz. Stick to recommended frequencies for stability.
Can I reuse my old PSU for a new build?
Sometimes. If it meets current wattage demands and connector standards, yes. However, capacitors degrade over ten-plus years.
Risking expensive components for savings isn't wise. Test ripple levels before trusting vintage units with modern hardware.
Is integrated graphics good enough for gaming?
For light esports titles, absolutely. Competitive shooters run fine on modern APUs. AAA adventures struggle significantly.
Consider dedicated cards if you want broader library access. Integrated options serve as temporary placeholders effectively.
How much should I spend on a motherboard?
Keep it proportional to your CPU. Expensive boards don't make cheaper chips faster. Pay for necessary features like connectivity or VRM quality.
Avoid luxury branding taxes unless you specifically need those extras. Basic functionality suffices for most users.
Do I need Windows activation immediately?
No. You can install unactivated copies legally. Watermarks annoy slightly but don't hinder performance.
Save cash until final assembly checks pass. Activate later when confident everything operates correctly. Delaying software costs frees up hardware budget temporarily.