How to build a gaming pc step by step for beginners is less about memorizing parts and more about noticing what seats, clicks, and lines up correctly. A build goes smoothly when you can spot the notch, tab, and label before force is applied. This guide walks you through the process with visual cues, not guesswork.
Manufacturer documentation from Intel, AMD, and major motherboard makers sets the baseline for safe assembly. A typical beginner build takes two to five hours, depending on case size and cable routing. As of 2026, most mainstream boards use DDR5 memory and PCIe 5.0 slots.
We'll start with the visual clues that matter most.
Why Visual Cues Matter More Than Any Manual When Building a PC
Manuals are useful, but they cannot show the exact angle of your cooler or the way a cable bends inside your case. A photo, diagram, or live view helps you compare your build to a trusted reference. That comparison is where most beginner mistakes get caught.
The key skill is matching shapes before tightening anything. CPU notches, RAM tabs, M.2 keys, and PCIe latch positions all tell you whether a part is facing the right way. When the shape matches, pressure feels smooth and controlled.
When it does not, stop and rotate the part.
Good visual habits also help with airflow. You can see whether a fan arrow points outward, whether cables block intake, and whether the GPU sits level. Those small checks matter because heat and airflow are physical, not just numbers.
Use a bright workspace and a phone camera for close-up checks. A quick photo can reveal a partially seated RAM stick or a cable caught under a motherboard. That small habit saves hours of troubleshooting later.
Tools, Workspace, and the Parts You'll Handle
A calm workspace makes the build feel easier from the first minute. Clear a large table, remove clutter, and keep pets and drinks away. A clean surface also prevents screws and small parts from disappearing.
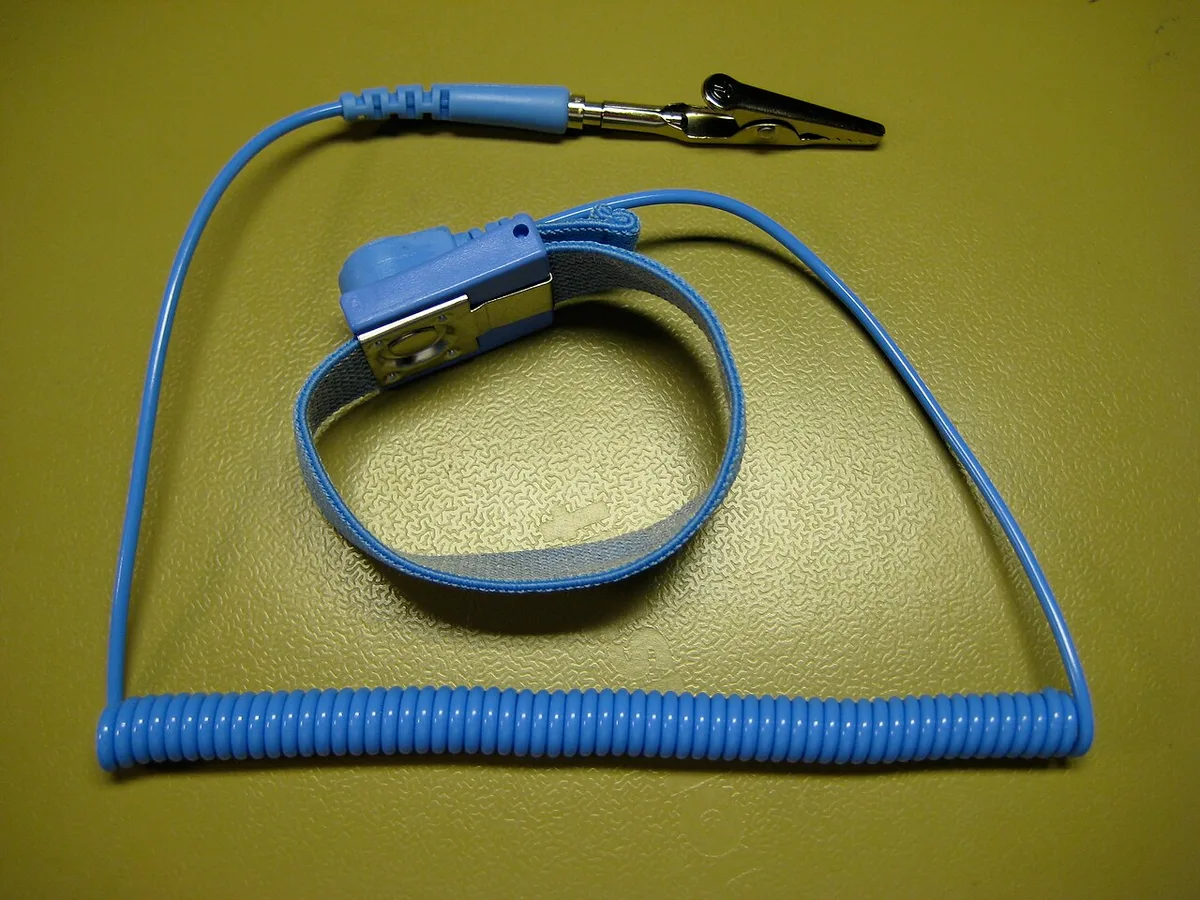
Image source: Wikimedia Commons / Kms (CC BY)
Before opening boxes, prepare a clean, static-safe workspace and gather basic hand tools. You do not need a huge toolkit. A Phillips screwdriver, zip ties, and an anti-static strap cover most beginner builds.
Keep the parts in their boxes until you need them. This protects delicate connectors and makes inventory easier. Lay out the motherboard box first, then CPU, RAM, storage, cooler, PSU, case, and GPU.
Use a magnetic tray or small bowl for screws. Sort motherboard standoffs, case screws, and M.2 screws separately. Mixing them creates frustration and can strip threads.
Check the motherboard manual for standoff locations and front-panel labels. The manual is your map, while the physical labels on the board are your confirmation. Together they keep the build organized.
Step-by-Step Visual Build Guide for Beginners
Start outside the case when possible. Installing the CPU, RAM, and M.2 SSD on the motherboard first is easier because you can see every connector clearly. It also reduces the chance of dropping tools into the case.
Preparing the Case and Motherboard Standoffs
Open the case and remove both side panels. Look for pre-installed standoffs and compare them to the motherboard manual. Standoffs should match the board's mounting holes exactly.
If a standoff is in the wrong spot, remove it before mounting the board. A misplaced standoff can short the motherboard or bend it. Use the standoff tool or pliers carefully, without scratching the tray.
Place the I/O shield if your case requires it. The metal tabs should bend inward slightly to contact the ports. Press evenly around the edges until it snaps into place.
Installing the CPU, Cooler, and Thermal Paste
Open the CPU socket by lifting the retention arm. Find the triangle marker on the CPU and match it to the triangle on the socket. The processor should drop in with no pressure.
If you are learning how to install a CPU into a motherboard, focus on alignment first and pressure second. The same rule applies when you apply thermal paste. A small pea-sized dot is usually enough for most consumer chips.
Seat the cooler evenly, tightening screws in a cross pattern. Watch the cooler base for even contact. Then connect the CPU fan cable to the header labeled CPU_FAN.
Seating RAM and the M.2 SSD
Open the RAM slots by pressing the tabs outward. Align the notch in the RAM stick with the key in the slot. Press straight down until both tabs click.
For memory placement, review how to install RAM in the correct motherboard slots before forcing anything. Dual-channel layouts often use slots two and four, but always check the manual.
For storage, remove the M.2 screw and standoff if needed. Slide the SSD into the slot at a slight angle, then press it flat and secure it. If you need more detail, see how to install an M.2 NVMe SSD.
Mounting the Motherboard and Power Supply
Lower the motherboard into the case, aligning the I/O shield and standoff holes. Start all screws by hand, then tighten them in a star pattern. Do not overtighten, because that can crack the board.
Mount the PSU with the fan facing the vent. In most cases, the fan should pull air from outside the case. Route the main cables before fully securing the unit, because access gets tight later.
Installing the GPU and Routing Cables
Remove the correct PCIe slot covers from the case. Align the GPU with the top x16 slot and press until the retention latch clicks. Then secure the bracket screws.
For detailed handling, read how to install a graphics card in a gaming PC and how to connect GPU power cables safely. The GPU should sit level, with no visible sag.
Route the motherboard power cables along the back of the case. Use zip ties to keep them away from fans. Then connect motherboard power cables and front panel case cables carefully.
Install case fans with attention to airflow direction. The arrow on the frame shows which way air moves. If you need help, review how to install case fans in a gaming PC.
First Power-On, BIOS Setup, and Windows Install
Before closing the case, connect only the essentials. Use the motherboard's built-in display output if the CPU has integrated graphics. Power on and watch for fans, lights, and a POST screen.
If nothing appears, check seating, power cables, and display input. A loose 24-pin or CPU power cable is a common cause. The debug LEDs on many boards point to CPU, DRAM, VGA, or BOOT issues.
Enter BIOS and confirm the CPU, RAM, and storage are detected. Enable XMP or EXPO if your memory kit supports it. Then install Windows from a USB drive and update drivers after the first boot.
Key Identifiers That Keep You From Breaking Parts
Every major part has a physical guide. The CPU has a triangle. RAM has a notch.
M.2 drives have a key and standoff. GPU slots have a latch. These identifiers are faster and safer than forcing a part.
Motherboard standoffs also have a visual pattern. Compare the board's holes to the case tray before tightening. This is one of the simplest checks, and it prevents serious damage.
Power connectors have shapes too. The 24-pin, CPU, and PCIe cables only fit one way. If a connector resists, rotate it and try again.
Never bend pins to make a cable fit.
Fan arrows and cable labels are easy to miss. The arrow shows airflow direction, while labels tell you where a cable belongs. Take a second to read them before connecting anything.
Common Visual Mistakes First-Time Builders Make
The most common error is forcing a part that is rotated wrong. Bent CPU pins can ruin a processor, and they are avoidable with a slow alignment check. If the part does not drop in smoothly, stop.
Another frequent mistake is poor cable routing. Cables pushed against fan blades create noise and airflow problems. Route them behind the motherboard tray and secure them with ties.
GPU sag is easy to spot after installation. A sagging card can strain the slot and look uneven. Use a support bracket if the GPU is long or heavy.
Loose RAM is another visual trap. The stick may look seated while one tab remains open. Press until both sides click, then check the height of all sticks together.
Dust and fingerprints are not just cosmetic. They can hide labels and make small parts slippery. Wipe the case with a microfiber cloth and keep hands clean during assembly.
For deeper component choices, compare how to balance gaming PC components for a target resolution with how to choose components that fit a gaming PC power budget. Those two checks keep the build practical and safe.
Official safety guidance from UL and memory standards from JEDEC support the handling rules above. Follow manufacturer documentation first, then use community photos as a secondary reference.
DIY Build vs. Prebuilt: Which One Fits Your Situation
A DIY build gives you control over every part. A prebuilt gives you convenience and one warranty. The better choice depends on your budget, confidence, and upgrade plans.
Prebuilt systems suit buyers who want plug-and-play gaming. They arrive tested, often include Windows, and avoid assembly risk. The tradeoff is less flexibility, and some use proprietary cases or power supplies.
DIY builds suit buyers who want specific parts and cleaner upgrades. You can choose the exact GPU, cooler, and case. You also learn how components connect, which helps future repairs.
Cost is not always lower with DIY. Bulk buying and labor savings can make prebuilts competitive. Compare total cost, including operating system, warranty, and shipping.
If your goal is learning and long-term upgrades, DIY makes sense. If your goal is fast, low-stress gaming, prebuilt is reasonable. Neither choice is wrong when matched to the user.
| Option | Best for | Main tradeoff |
|---|---|---|
| DIY build | Custom parts and upgrades | Assembly time and risk |
| Prebuilt | Fast setup | Less flexibility |
| Gaming laptop | Portability | Harder upgrades |
| Console | Simplicity | PC ecosystem limits |
What a Beginner Gaming Build Actually Costs
Costs change with GPU pricing and regional stock. As of 2026, entry builds usually start around $700 to $900 before peripherals. Mid-range 1440p builds often land near $1,100 to $1,600.
GPU is usually the largest line item. CPU, RAM, storage, and PSU follow. Case and cooler costs matter more in smaller builds.
| Tier | Typical target | Common budget range |
|---|---|---|
| Entry | 1080p esports | $700 to $900 |
| Mid | 1440p AAA | $1,100 to $1,600 |
| High | 4K or streaming | $1,800+ |
Do not forget OS, monitor, keyboard, mouse, and desk space. Those can add several hundred dollars. A balanced build avoids spending most of the budget on one part.
Check how to balance gaming PC components for a target resolution and how to choose components that fit a gaming PC power budget before buying. Also verify PC part compatibility.
Energy efficiency labels from ENERGY STAR can help when comparing PSUs and monitors. Efficiency affects heat and long-term power use.
Pro Tips From Hands-On PC Builds
Test before final cable cleanup. Connect CPU, RAM, storage, and GPU outside the case on the motherboard box. This makes troubleshooting easier if the board does not POST.
Keep the motherboard manual open during the build. It shows slot priority, fan headers, and front-panel pinouts. Those details prevent hours of guessing.
Update BIOS only when needed. If the board supports the CPU out of the box, do not rush a firmware update. If not, use BIOS flashback or install an older supported CPU first.
Use the correct order for assembling a gaming PC to avoid removing parts twice. For cooling, follow how to install a CPU cooler. For memory, check how to check whether RAM is supported by a motherboard.
Leave slack in cables for future upgrades. A tight GPU power cable can pull loose when moving the case. Neat is good, but serviceable is better.
Safety and Handling Rules You Shouldn't Skip
Static electricity can damage sensitive parts. Work on a non-carpeted surface and ground yourself before handling components. An anti-static wrist strap adds protection, especially in dry rooms.
Never open a power supply. PSU enclosures contain high-voltage components even when unplugged. Buy a certified unit and replace it if it fails.
Watch for sharp metal edges inside the case. Use slow hand movements when routing cables. Heavy GPUs need support to avoid slot strain.
Ventilation matters after the build. Keep intake and exhaust paths clear. Do not block vents with walls, fabric, or dust buildup.
Local wall voltage affects PSU selection. Most modern units auto-switch, but verify the label. Follow UL safety guidance and manufacturer documentation.
Frequently Asked Questions
How long does a beginner PC build take?
Most first builds take two to five hours. Time increases with small cases, custom cable routing, and troubleshooting. Leaving extra time reduces rushed mistakes.
Is building a PC cheaper than buying prebuilt?
Not always. DIY can cost more or less depending on part prices and sales. Compare total cost, warranty, and software included.
Do I need special tools?
No. A Phillips screwdriver, zip ties, and an anti-static strap cover most builds. A magnetic tray helps keep screws organized.
What is the most common beginner mistake?
Forcing a part that is rotated wrong. CPU pins, RAM notches, and power connectors all have one correct orientation. Stop and realign if resistance feels wrong.
Can I upgrade later?
Yes. That is a major advantage of DIY builds. Check motherboard slots, PSU wattage, and case clearance before buying upgrades.
Should I update BIOS immediately?
No, unless needed for CPU or memory support. A stable BIOS is usually better than the newest one. Check the motherboard manual first.