How to perform the first power on of a new gaming pc is really about proving POST, not chasing high FPS. The first boot is a controlled check of power delivery, cooling, memory, and firmware before the system is asked to do anything demanding. Manufacturer specifications indicate that many first-boot failures trace back to loose cables, unseated RAM, or front-panel wiring rather than dead components.
Keep the build minimal, watch the debug indicators, and stop at the BIOS before installing Windows or tuning fan curves.
A basic POST check can often take under five minutes once cables are verified, though memory training may add several minutes. Use a known-good monitor and cable, and connect the display to the discrete GPU if one is installed. Per ESD Association best practices, handle components on a grounded surface and keep power disconnected during assembly.
If anything smells hot or sparks, cut power immediately and recheck the wiring.
how to perform the first power on of a new gaming pc
Install the CPU, cooler, one RAM stick, PSU, and GPU. Connect 24-pin ATX and CPU power. Check RAM and GPU seating.
Power on. Watch debug LEDs. Enter BIOS.
Verify temps and drives. Save settings. Then shut down and finish assembly.
The Real Goal of a First Power-On: POST, Not Full Performance
POST means Power-On Self Test. It is the firmware check that confirms the CPU, RAM, graphics, storage, and basic power rails are alive. A successful POST does not mean the build is finished.
It means the core hardware can talk to the motherboard and report for duty.
Your first boot should prove four things:
- The PSU turns on and stays on
- The CPU and RAM pass basic checks
- The GPU or onboard video outputs a signal
- The BIOS can see installed storage
If any one of those fails, stop there. Do not install the operating system yet. A clean POST also gives you a baseline before cable management hides every connector.
If you are unsure about assembly order, review the correct build sequence before powering on.
| First-boot target | What “good” looks like | What it does not prove |
|---|---|---|
| PSU behavior | Fan spins or semi-passive mode stays stable | Cable management is final |
| CPU and RAM | Debug LEDs clear and BIOS opens | Memory is fully tuned |
| Video output | Display shows BIOS screen | GPU is at full load |
| Storage | Drive appears in BIOS | OS is installed correctly |
Setup Variables That Change Your First-Boot Outcome
Small setup choices change what happens when you press the power button. A build with one RAM stick, no storage, and no case fans is easier to diagnose than a fully loaded system. That is why experienced builders often test the essentials before adding every accessory.
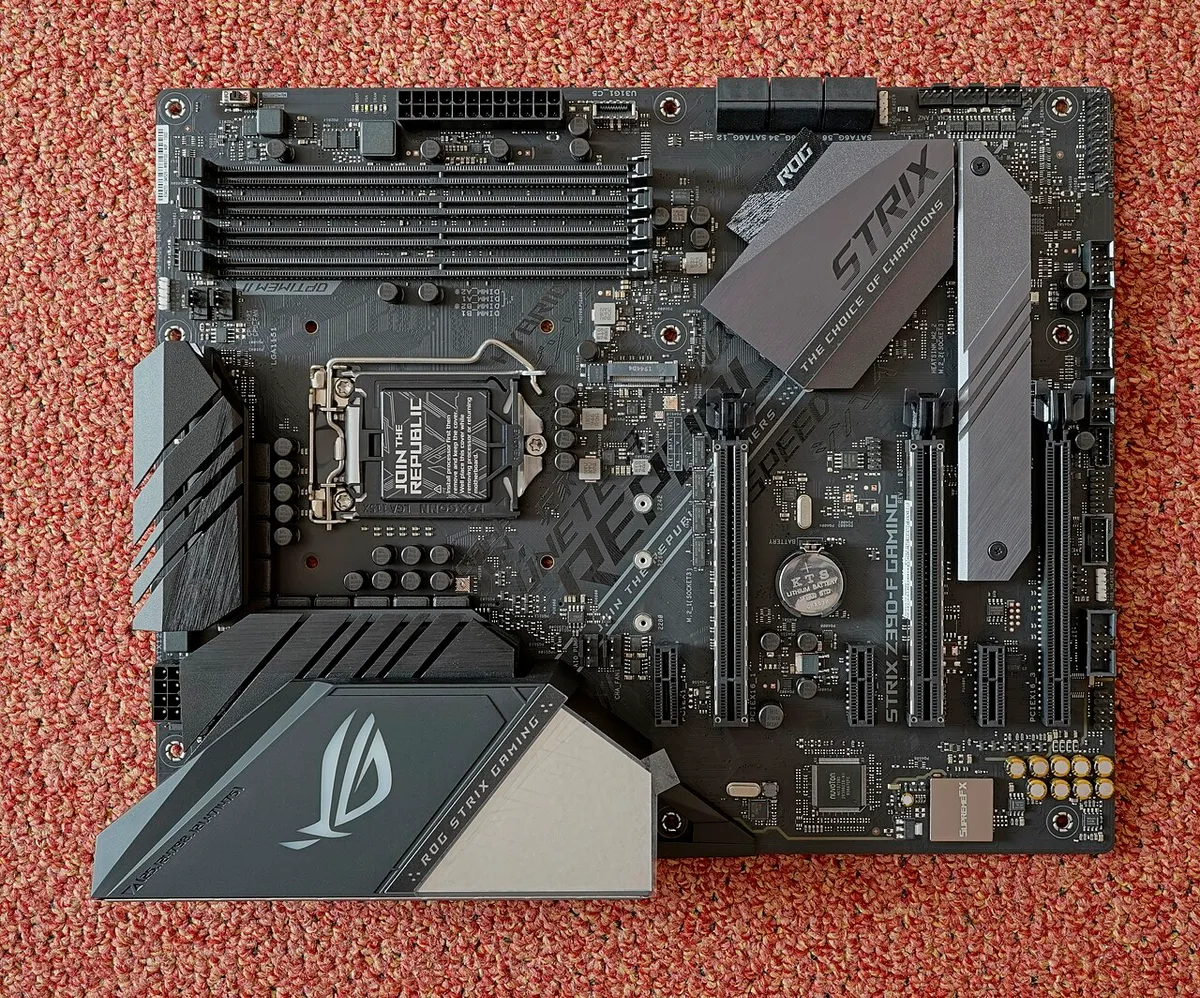
Image source: Wikimedia Commons / PantheraLeo1359531 (CC BY)
Hardware State, Cooling, and Power Configuration
Three variables matter most: hardware state, cooling, and power configuration. Hardware state means whether the CPU, RAM, GPU, and storage are seated and powered correctly. Cooling means the CPU cooler is mounted with proper pressure and the thermal paste is not excessive.
Power configuration means the right PSU cables are used and the PSU has enough wattage headroom.
Use this quick filter before the first boot:
- One RAM stick in the recommended slot
- CPU cooler mounted firmly with no wobble
- 24-pin ATX and 8-pin EPS fully clicked in
- GPU seated until the retention tab locks
- Monitor plugged into the GPU, not the motherboard, when a discrete card is installed
- Storage connected only if you plan to verify BIOS detection
If the CPU cooler is loose, stop and fix it before power. A poor thermal paste layer can also cause instant overheating during POST. For a deeper check, compare your cooler mounting against proper CPU cooler installation guidance.
For PSU fit, confirm wattage and connector support with a reliable PSU compatibility check.
| Variable | Safer starting point | Risk if ignored |
|---|---|---|
| RAM population | One stick in the primary slot | Harder to isolate a bad DIMM |
| Cooling | Light, even thermal paste and firm mount | Thermal shutdown or bent mount |
| Power | Correct cables with wattage headroom | No POST or unstable rails |
| Video output | GPU port with monitor awake | False “no signal” result |
Minimal-Boot Decision Tree: What to Test First
A minimal boot removes variables. Start outside the case if possible, or use the case with only the essentials installed. The goal is not convenience.
The goal is to learn whether the core parts work before cables and case standoffs add confusion.
Use this if/then flow:
- If the system has no display, test with one RAM stick in the primary slot
- If it still has no display, remove the GPU and test onboard video if the CPU supports it
- If it powers on then shuts off, check CPU power and cooler mounting
- If fans spin but no BIOS appears, reseat RAM and GPU
- If debug LEDs stop on CPU, inspect socket pins and CPU seating
- If debug LEDs stop on DRAM, try another slot or stick
Breadboard vs. Installed-in-Case First Boot
Breadboarding means testing components on a non-conductive surface outside the case. It is useful when you suspect a short, a standoff issue, or a case cable problem. Installing in the case first is faster when the build is straightforward and you want to test final airflow.
Choose breadboarding when:
- The system powers on then immediately shuts off
- You see no POST with all parts installed
- A standoff may be touching the board
- Front-panel wiring is uncertain
Choose in-case testing when:
- The build is simple and parts are known compatible
- You want to test fan and cable routing early
- You already verified the CPU and RAM outside the case
A clean workspace matters here. Keep screws, tools, and spare parts organized so you do not introduce debris near the board. Good workspace preparation reduces accidental shorts and lost standoffs.
Step-by-Step First Power-On Workflow for a New Gaming PC
This workflow is for a new build that has not yet booted. Keep the side panel off and do not install every drive yet. You can add parts later after the core system proves stable.
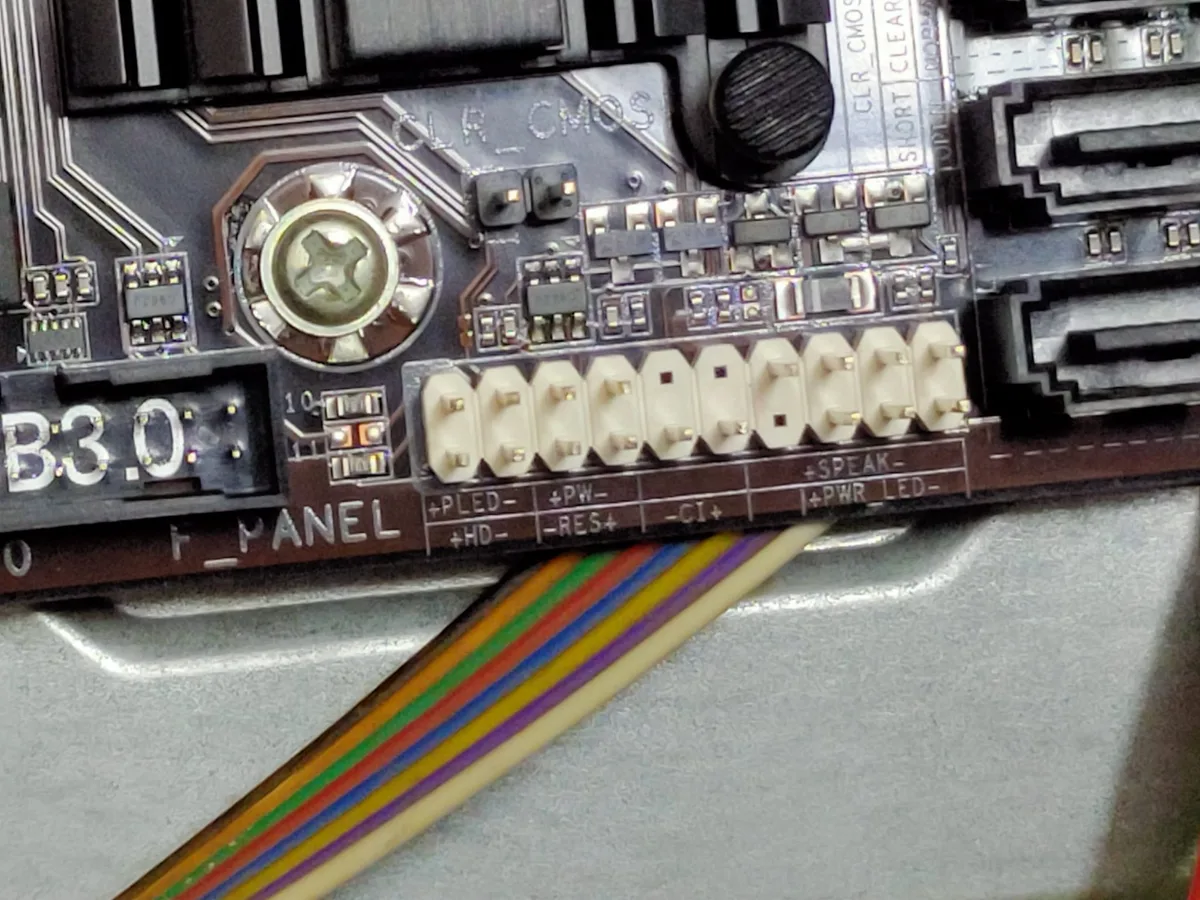
Image source: Openverse / Makarand Mane
- Inspect the motherboard for bent pins, cracked slots, or debris.
- Install the CPU and cooler with proper mounting pressure.
- Install one RAM stick in the slot recommended by the manual.
- Install the PSU and connect only 24-pin ATX and CPU power.
- Install the GPU if the CPU has no integrated graphics, then connect PCIe power.
- Connect the monitor to the correct video output.
- Connect the power cord, but keep the PSU switch off.
- Press the power button and watch the debug LEDs or listen for beeps.
- Enter BIOS if POST succeeds.
- Check CPU temperature, memory size, and storage detection.
- Save settings and perform a controlled shutdown.
- Add remaining drives, fans, and accessories one group at a time.
| Step group | What to verify | Stop if |
|---|---|---|
| Power and cooling | PSU starts, cooler spins, no burning smell | Fan wobble, heat, or shutdown |
| Memory and CPU | Debug LEDs clear | CPU or DRAM LED stays lit |
| Video and firmware | BIOS appears on screen | No signal after reseating |
| Storage and settings | Drive appears, temps look normal | Missing drive or high idle temp |
For cable routing and final assembly, use a logical assembly order so you do not block connectors with large parts. Keep the essential tools nearby, especially a Phillips screwdriver and flashlight, and avoid forcing any connector.
Reading No-POST Symptoms and Choosing the Right Fix
No POST does not always mean a dead part. It often means one connection is wrong, one component is not seated, or the monitor is looking at the wrong input. Work from the simplest cause to the most serious one.
Fans, Beeps, Debug LEDs, and Q-Codes
Fans spinning only proves that some power reached the board. It does not prove CPU power, RAM seating, or GPU power. A beep code can point to memory or video, but beep patterns vary by BIOS.
Debug LEDs are easier because they label the failing stage. Q-Codes give a numeric hint, though the manual is still required for exact meaning.
Use this symptom guide:
| Symptom | Likely cause | First action |
|---|---|---|
| Fans spin, no display | Wrong video port or unseated GPU | Check monitor input and GPU seating |
| CPU debug LED stays on | CPU power or seating issue | Reseat CPU and check EPS cable |
| DRAM debug LED stays on | RAM not seated or incompatible | Reseat one stick in primary slot |
| Boot loop | Short, cooling issue, or BIOS setting | Test minimal boot outside case |
| No fans at all | PSU switch, cable, or outlet | Check PSU switch and wall power |
| BIOS opens but drive missing | Cable or M.2 seating | Reseat drive and check BIOS settings |
If the PSU clicks off under load or smells hot, stop testing. Manufacturer documentation and safety certifications matter here, and a faulty PSU can damage other parts. Check PSU compatibility before assuming the motherboard is bad.
Per UL safety standards, damaged or overheating power supplies should not be repeatedly restarted. If you see smoke, melted plastic, or a burning odor, disconnect power and do not retry.
This batch ends after the fifth H2 section. The remaining sections will cover common mistakes, when to seek help, the final decision guide, and FAQs.
Common Mistakes That Make a Good Build Look Dead
Most "dead" builds are not dead at all. They are usually one missed connection, one unseated part, or one wrong display input. Work from the outside in before you blame a CPU, GPU, or motherboard.
A clean work surface helps prevent stray screws from shorting the board. Follow a sensible assembly sequence so large parts do not block connectors. Apply a proper paste layer before mounting the cooler.
Check cooler mounting pressure if temps spike. Keep a basic tool kit nearby for reseating parts.
Common mistakes include:
- Leaving the 24-pin ATX or 8-pin EPS partly unseated
- Forgetting GPU PCIe power cables
- Not clicking RAM fully into the slot
- Plugging the monitor into the motherboard instead of the GPU
- Mixing up front-panel power and reset cables
- Using an extra motherboard standoff that touches the board
- Overtightening the CPU cooler and bending the board
- Using too much thermal paste and creating a mess
- Assuming a semi-passive PSU fan should always spin
| Symptom | Common mistake | First fix |
|---|---|---|
| No fans at all | PSU switch off or wrong wall outlet | Check power path |
| Fans spin, no display | Wrong monitor input or GPU port | Test each port |
| CPU debug LED stays on | Missing EPS cable | Reseat CPU power |
| DRAM debug LED stays on | RAM not fully clicked | Reseat one stick |
| Immediate shutdown | Short or loose cooler | Minimal boot outside case |
If you already reseated everything, stop changing random parts. Reset to a minimal boot and add one part at a time. That isolates the mistake faster than guessing.
When to Stop, RMA, or Get Hands-On Help
Stop testing if you smell burning, see smoke, or feel unusual heat. A faulty PSU can damage the motherboard, CPU, or GPU. Per UL safety standards, do not keep restarting a power supply that trips, clicks, or smells hot.
Use this if/then guide:
- If the CPU socket has bent pins, stop and contact the CPU maker
- If the motherboard shows physical damage, stop and contact the board maker
- If a PSU smells hot or shuts off under load, stop and replace it
- If a GPU will not seat or has a cracked shroud, stop and RMA it
- If RAM fails in every tested slot, RMA the memory kit
- If the system passes minimal boot but fails only in the case, check standoffs and cables
- If you are not comfortable handling CPU pins or socket levers, get hands-on help
Before an RMA, document the issue clearly. Take photos of debug LEDs, cable connections, and any error codes. Keep the original packaging and serial numbers.
A PSU compatibility check can also help you confirm that wattage and connectors were not the real problem.
When in doubt, use a local repair shop or the part maker's support channel. A short inspection is cheaper than replacing parts blindly.
Final Decision Guide: What “Ready for OS Install” Means
Ready for OS install means the core hardware has passed a stable POST. It does not mean the build is finished. Cable management, extra fans, and lighting can wait until the system boots reliably.
Your system is ready when:
- POST completes without debug LED errors
- BIOS opens on the first or second attempt
- CPU idle temperature looks reasonable
- The correct memory capacity is detected
- The boot drive appears in BIOS
- No random shutdowns happen during idle checks
- A controlled shutdown works normally
Your system is not ready when:
- It only boots after repeated power cycles
- Memory training takes far longer than expected
- Storage disappears between boots
- Temperatures climb quickly at idle
- Debug LEDs light up intermittently
| Ready state | What to do next | What to delay |
|---|---|---|
| Stable POST | Install OS and drivers | Final cable management |
| BIOS sees drive | Set boot order | Extra RGB or fans |
| Temps stable | Run light checks | Overclocking or XMP tuning |
| Clean shutdown | Add remaining parts | Stress testing |
Set the boot order before installing the operating system. Save BIOS settings, shut down fully, then reconnect the power cord. After that, you can add drives and accessories one group at a time.
Frequently Asked Questions
How long should the first boot take?
The first boot can take from a few seconds to several minutes. Memory training often adds time before the BIOS screen appears. If nothing changes after a reasonable wait, reseat RAM and check debug LEDs.
Should I install Windows before cable management?
Yes, install the operating system after a stable POST. Cable management is easier when you know the system works. Leave the side panel off until the first full boot succeeds.
What if fans spin but there is no display?
Fans spinning only means some power reached the board. Check the monitor input, cable, and video port. If a discrete GPU is installed, connect the display to the GPU, not the motherboard.
Do I need to enable XMP on first boot?
No, leave memory at default settings during the first boot. Confirm POST, temperatures, and storage detection first. Enable XMP later after the system is stable.
Is it normal for the PSU fan not to spin?
Yes, many modern PSUs use semi-passive cooling. The fan may stay off at low load. If the PSU smells hot or shuts down, stop testing and replace it.
When should I RMA a part?
RMA a part after you isolate it in a minimal boot. Try one RAM stick, one drive, and the essential cables. If the same debug LED or failure remains, document it and contact the manufacturer.