Your gaming laptop boots fine with one RAM stick, then refuses to POST the moment you add the second. Learning how to fix laptop will not boot with two RAM sticks on a gaming laptop comes down to isolating three things: the modules, the slots, and the firmware settings that govern them.
Almost every failure traces back to one of those three. Per JEDEC's DDR4 and DDR5 SODIMM standards, a module has to match your laptop's supported speed, voltage, and rank before the board will train it reliably. Manufacturer specifications confirm that most gaming laptops only run matched pairs in specific slots.
So where do you start? With a test that removes one variable at a time.
How to Fix Laptop Will Not Boot With Two RAM Sticks on a Gaming Laptop
Test each RAM stick alone in the primary slot first. Then swap slots and retest both modules. Disable XMP or EXPO before adding the second stick.
Reseat each module until the side clips click firmly. Most dual-stick boot failures trace to one bad stick or slot.
Problem / Pain Point: Why Adding a Second Stick Breaks the Boot
Two sticks should mean more bandwidth and a smoother frame rate. Instead you get a black screen, spinning fans, and a keyboard that lights up but never hands off to Windows. That's a POST failure, not a Windows problem.
The board runs memory training at every cold boot. It reads each module's SPD chip, checks speed and voltage, then locks in a stable profile. Two sticks give it twice the data to reconcile.
If the pair doesn't agree, training fails and the boot stalls before video output.
Use the symptom table below to narrow it down before you open anything.
| What you see | Most likely cause |
|---|---|
| Blank screen, fans spin, keyboard lights up | One faulty stick or a dead slot |
| Boot loop with the logo flashing | Speed or voltage mismatch between sticks |
| Diagnostic LED or beep pattern | Poor seating or an incompatible module |
| Works with one stick, fails with two | Rank mixing or an aggressive XMP profile |
| Crashes minutes after login | Unstable timings rather than a hard failure |
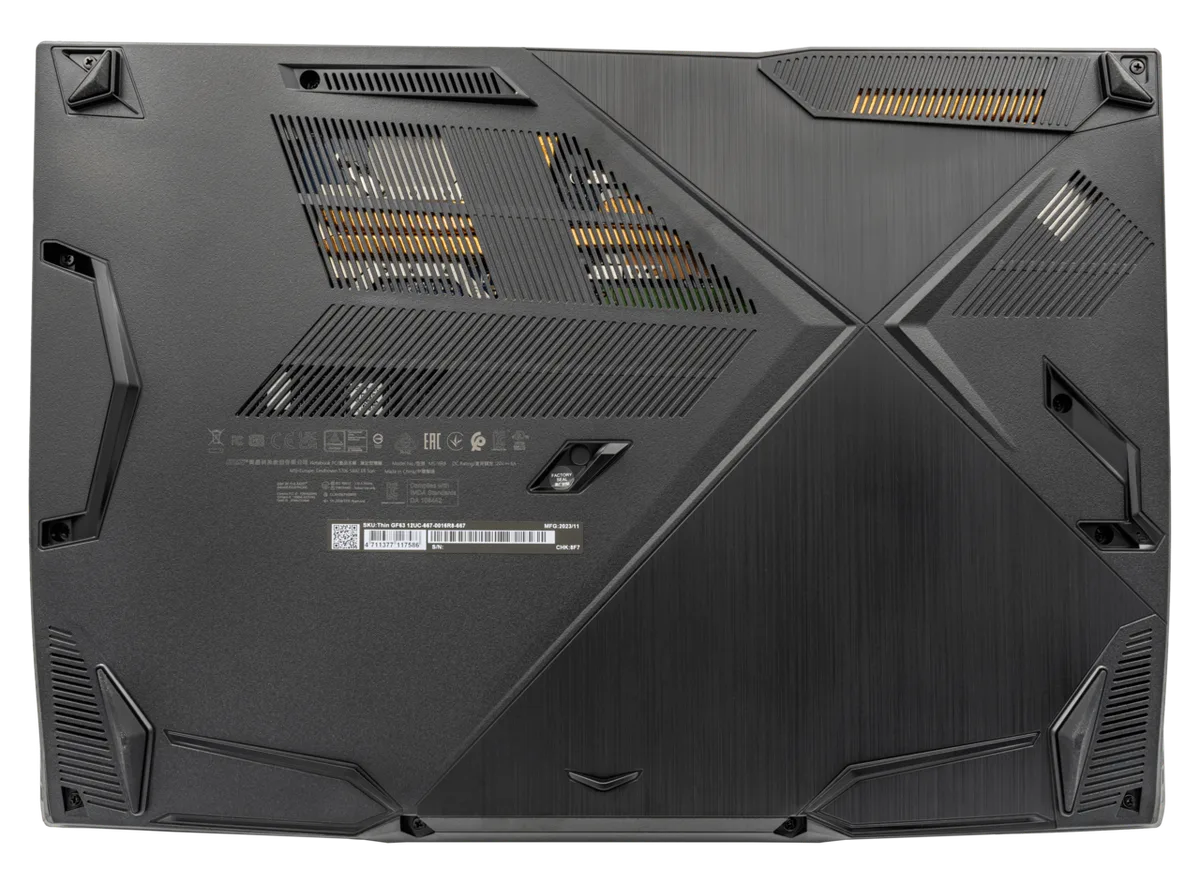
Image source: Wikimedia Commons / PantheraLeo1359531 (CC BY)
Before you blame the modules, rule out the cheap stuff. A machine that boots but stutters in games may have unrelated problems, like stuttering peripherals or power delivery quirks that have nothing to do with RAM.
Core Explanation: Dual-RAM Boot Logic and Slot Configuration
Every SODIMM carries a small EEPROM called SPD. It stores the module's native speed, timings, voltage, and rank. On a cold boot, the BIOS reads that data from both slots and runs a training routine until it finds a stable set of timings.
Single-stick boots are easy. There's one data set to work with. Two sticks mean the board has to reconcile two SPD profiles, and that's where mismatches bite.
Here's what actually causes friction:
- Different ranks. A single-rank and a dual-rank module can share a laptop but often won't train together.
- Unequal capacities. An 8GB plus a 16GB pair may run in a partial dual-channel mode, and some boards simply refuse it.
- Speed gaps. A 3200MHz stick paired with a 2666MHz stick should downclock, but not every firmware does it cleanly.
- XMP or EXPO left on. Factory overclock profiles assume a matched kit. Drop to the JEDEC baseline and the pair usually boots.
Voltage matters too. DDR4 SODIMMs run at 1.2V, and overclocked profiles push 1.35V. As of 2026, DDR5 SODIMMs carry their own power management chip on the module, so a mismatch can throw a supply fault rather than a timing fault.
That's why DDR5 dual-stick failures often look like total dead boards instead of boot loops.
Slot order is the other half of the puzzle. Most gaming laptops label the primary slot DIMM1 or Slot A, and it sits closest to the CPU. Fill that one first.
The second module goes in Slot B. If the board only accepts one stick, it's almost always Slot A that's alive. You'll feel the extra bandwidth most in demanding AAA titles, where dual-channel memory can lift minimum frame rates noticeably.
Step-by-Step Workflow: Isolating Faulty Sticks and Slots
Work through these in order. Stop the moment a step fails, because that's your culprit.
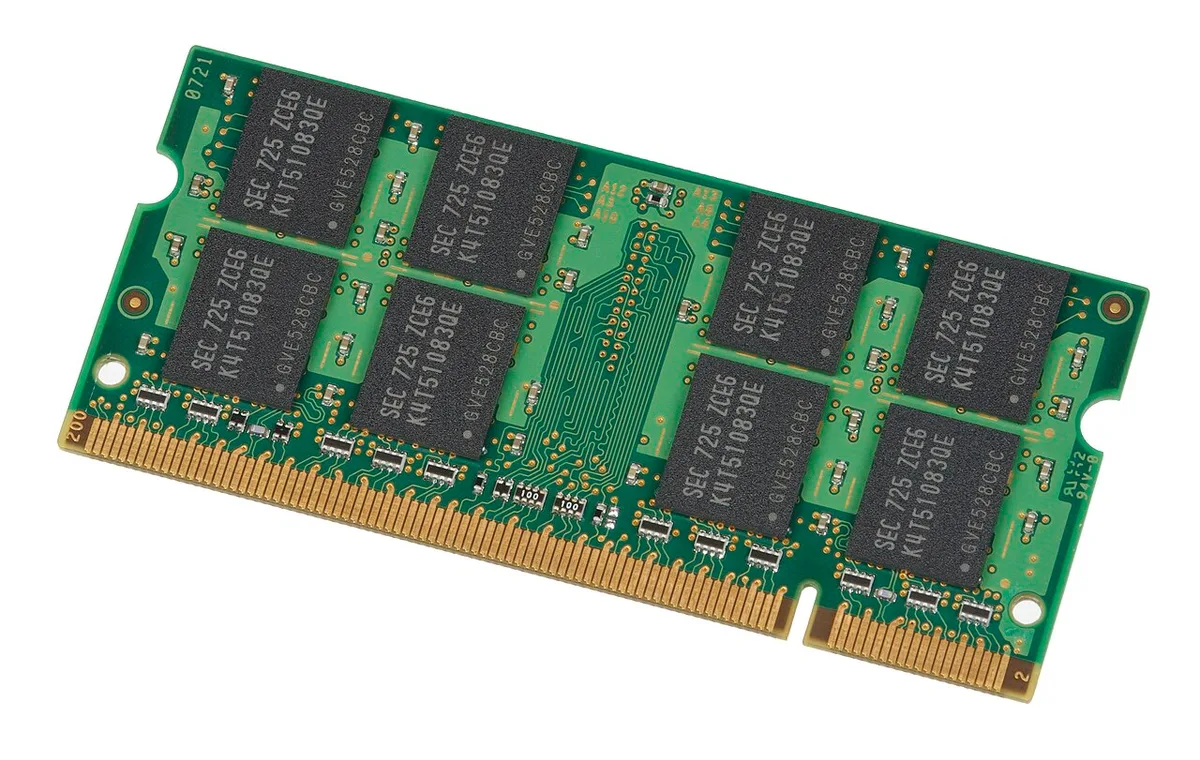
Image source: Wikimedia Commons / Evan-Amos
Step 1: Drain the power. Shut down, unplug the charger, and hold the power button for 15 seconds. This clears residual charge so the next boot runs a fresh training cycle.
Step 2: Document the layout. Photograph both slots before you touch anything. You want to reinstall each module exactly where it came from.
Step 3: Inspect the contacts. Look for bent pins, corrosion, or dust in the slot. Blow it out with compressed air held upright so no propellant sprays out.
Step 4: Test stick A alone in Slot A. If it fails to boot, move it to Slot B and try again. No boot in either slot means the stick is dead.
Step 5: Test stick B alone in Slot A. If stick B fails in both slots, that module is your fault. Replace it and you're done.
Step 6: Test stick B in Slot B. This is the step most people skip. If both sticks boot alone in Slot A but stick B fails in Slot B, the slot itself is faulty.
Step 7: Clear the firmware. If both sticks pass individually in both slots, the problem is configuration, not hardware. Reset CMOS or load BIOS defaults.
Step 8: Drop to baseline speed. Turn off XMP or EXPO. If the pair boots at JEDEC speed but not at rated speed, you've found the conflict.
Step 9: Update the BIOS. Manufacturers regularly patch memory compatibility, and a newer firmware can accept a pair the old one rejected.
Step 10: Stress test. Run MemTest86 overnight or Windows Memory Diagnostic. A machine that boots is not the same as a machine that's stable.
If both sticks pass and the board still won't take them together, check the panel first. Opening the underside of big-screen machines usually gives you direct access to both slots, and a half-seated module is far more common than a dead slot.
Mistakes to Avoid / Common Errors: Reseating, Compatibility, and BIOS Pitfalls
These are the errors we see most often in user reports and service threads. Each one is cheap to avoid and expensive to fix.
- Forcing the module in at the wrong angle. SODIMMs slide in at roughly 30 degrees, then press flat until the clips snap. Shoving one in straight can crack the slot.
- Skipping the one-stick-at-a-time test. Diving straight to a two-stick install tells you nothing about which component failed.
- Buying two separate sticks instead of a matched kit. Twin modules from different production runs can differ in rank and subtimings.
- Leaving XMP enabled during the first boot. Train at stock speed first, then raise the profile once you know the pair works.
- Ignoring a BIOS update. Memory compatibility lists change often. A firmware bump fixes plenty of dual-stick rejections.
- Assuming Slot B works. It's the slot people never test. If it's dead, no pair will ever boot.
- Reusing a stick from an older machine. An old DDR4 module at 2400MHz can drag a 3200MHz pair down, or block the boot entirely.
- Snapping the back cover back on too fast. Clips break easily, and a slightly warped chassis can press on the modules. Even chassis built to take a knock need the screws back in the right order.
One more trap: chasing a RAM fault when the real issue is elsewhere. Random controller dropouts or a laptop that wakes oddly after an upgrade aren't memory symptoms. Rule out the simple stuff before you take the panel off again.
Safety / Legal / Compliance: ESD, Warranties, and Physical Handling
Static discharge is the silent killer of RAM upgrades. You can zap a module or the motherboard slot without feeling a thing. The damage shows up later as random crashes or a slot that stops training.
Ground yourself before you touch anything. Touch the metal chassis of a plugged-in but powered-off PSU, or wear an antistatic wrist strap clipped to the same ground. Work on a clean, non-carpeted surface.
Keep the new modules in their antistatic bags until the moment they go in.
Opening the bottom panel voids the warranty on some brands. Check the manufacturer's policy first. Brands like Clevo and Eurocom often allow user upgrades without penalty.
Others place a warranty seal over a screw. If that seal is broken, support may deny a future claim even for an unrelated fault. Photograph the seal before you break it.
Keep the original RAM in case you need to restore the factory config for service.
Handle modules by the edges only. Never touch the gold contacts. If you drop a stick, inspect the notch and the contact fingers under bright light before you try it.
A bent finger can short a rail and take the slot with it.
Torque screws to the spec in the service manual if one exists. Over-tightening strips the brass inserts in the chassis. Under-tightening lets the panel flex and press on the modules.
A magnetic mat keeps screws sorted by length.
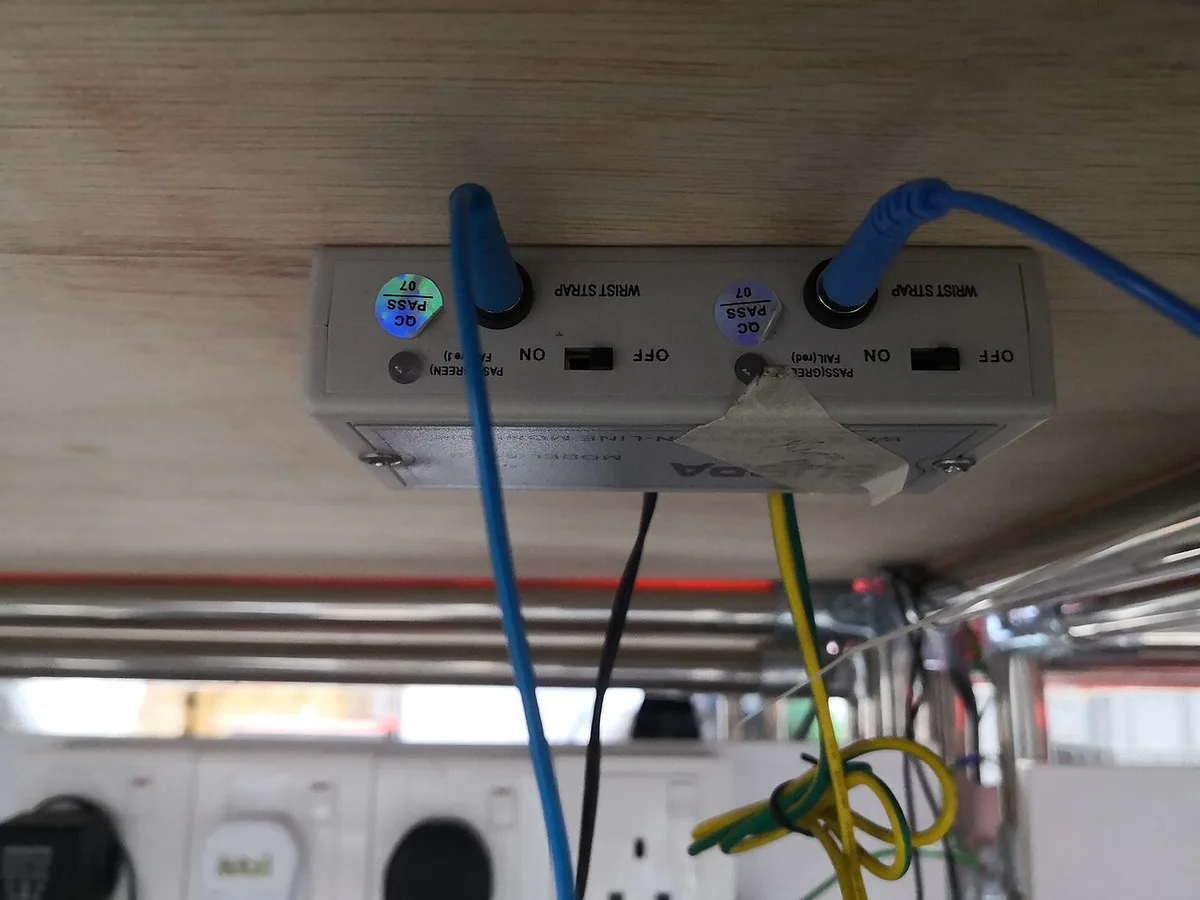
Image source: Wikimedia Commons / Encik Tekateki (CC BY-SA)
FAQs: Quick Answers to Common Boot Scenarios
Why does my laptop boot with one stick but not two?
One stick is likely faulty or the second slot has failed. Test each module alone in both slots using the workflow in the Step-by-Step section. If both sticks work solo but fail together, disable XMP and update the BIOS.
Can I mix different RAM brands or speeds?
You can, but the board will downclock to the slowest module and loosest timings. Mixed ranks or voltages often prevent training entirely. A matched kit eliminates this risk.
What if the BIOS shows the wrong speed after the fix?
Enter the BIOS and verify XMP or EXPO is enabled. Some boards default to JEDEC speeds after a CMOS reset. Manually set the profile, save, and reboot.
How do I know which slot is primary?
Check the service manual or the silkscreen near the sockets. The slot closest to the CPU is almost always Slot A or DIMM1. Fill that one first.
Should I run MemTest86 after a successful boot?
Yes. A machine that boots can still have marginal timings. Run at least four passes or the Windows extended test overnight before you trust the system for gaming.
When is it time to replace the motherboard?
If both sticks pass in Slot A but Slot B fails with known-good modules, the slot is dead. Board-level repair is rarely cost-effective on mainstream gaming laptops. Replace the board or the unit.
Final Recommendation / Decision Guide: When to Repair, Replace, or Seek Help
You have three paths once the diagnostics are done.
Path A: Replace the bad stick. If one module fails in both slots and the other passes everywhere, buy a matching replacement. A single 16GB DDR4 SODIMM runs $40 to $70 as of 2026. Match the speed, voltage, and rank of the surviving stick, or buy a new matched pair and sell the good one.
Path B: Live with one slot. If Slot B is dead but Slot A works, you can run a single high-capacity stick. A 32GB DDR4 or 48GB DDR5 module restores capacity without dual-channel bandwidth. You lose 15 to 20 percent frame-rate in CPU-bound titles, but the machine stays usable.
This makes sense on laptops where the board costs more than the machine's value.
Path C: Escalate to a pro. If both slots fail with known-good RAM, or if the board won't POST with any memory, the memory controller or PCB traces are damaged. Authorized repair starts around $300 and climbs fast. At that point, compare the quote against a replacement unit.
Our picks for custom-built powerhouses and cloud-ready options show what a similar budget buys today.
Decision rule: if the repair exceeds half the laptop's current market value, replace the machine. If it's under warranty, stop and open a ticket. If you're unsure after testing, a local shop can bench the modules in five minutes and confirm the fault before you spend more.