You’re hitting 200 frames per second, yet your aim still feels heavy and disconnected. This disconnect is the core frustration behind learning how to reduce input latency on a gaming PC. It isn’t about raw power alone.
It’s about the time gap between your mouse click and the pixel change on screen.
That gap, known as end-to-end latency, often sits between 40ms and 80ms on unoptimized systems. Pro setups push this under 20ms using specific hardware and software tweaks. As of 2026, manufacturers like NVIDIA and AMD provide tools to shave off milliseconds.
We’ll walk through the exact chain of events causing that delay. Then we’ll fix it step by step.
How to Reduce Input Latency on a Gaming Pc
To lower input lag, disable VSync globally and cap framerates slightly below your monitor's refresh rate. Enable NVIDIA Reflex or AMD Anti-Lag in supported games. Set Windows Power Plan to High Performance.
Use wired peripherals with high polling rates. Finally, adjust monitor overdrive settings to the lowest effective level. These steps minimize queue depth and system overhead effectively.
Why Your PC Feels Sluggish Even at 200 FPS
High frame rates do not guarantee low latency. Many gamers assume more FPS equals faster response. That’s only half true.
If your GPU renders frames faster than your CPU can prepare them, you create a backlog. This backlog is called render queue latency.
Think of it like a highway. Cars (frames) might be fast. But if there’s a traffic jam at the exit ramp (display buffer), they all wait.
You see smooth motion, but your inputs sit in line. The result is sluggish controls despite high numbers.
Another culprit is asynchronous shader compilation. Modern engines compile shaders on the fly. This causes micro-stutters that spike latency temporarily.
You feel a hitch, even if average FPS looks great. Understanding frame times helps spot these hidden spikes. They reveal inconsistencies that averages hide.
Also, background processes eat CPU cycles. Windows updates, antivirus scans, or RGB software can interrupt game threads. These interruptions add milliseconds of delay.
Your mouse signal waits for the CPU to free up. This creates jittery input response.
Finally, display technology adds its own layer of delay. Panel processing, scaling, and color conversion take time. A 144Hz monitor doesn’t mean zero lag.
The panel itself has an inherent response time. Combining software queues with hardware delays compounds the problem. You need to address both sides simultaneously.
Ignoring either leaves significant latency on the table.
The Input Latency Chain: Where the Delay Actually Happens
Input latency is a cumulative sum of several distinct stages. Each stage adds time. To fix it, you must identify which stage is bottlenecking your system.
The chain starts at the peripheral and ends at your eyes.
First is peripheral processing. Your mouse or keyboard sends a signal. Wired devices typically have near-zero internal delay.
Wireless tech has improved, but interference can still cause packet loss. This leads to inconsistent timing.
Next is OS handling. Windows receives the interrupt. It processes the input and passes it to the game engine.
If the system is busy, this step stalls. High CPU usage here directly impacts responsiveness.
Then comes game logic. The engine calculates where your crosshair moves. It determines new frame data.
Complex physics or AI calculations can slow this down. This is pure CPU work.
After that is rendering. The GPU draws the scene. If VSync is on, the GPU waits for the monitor’s vertical blank interval.
This waiting period is massive latency. It can add 10, 30ms depending on refresh rate.
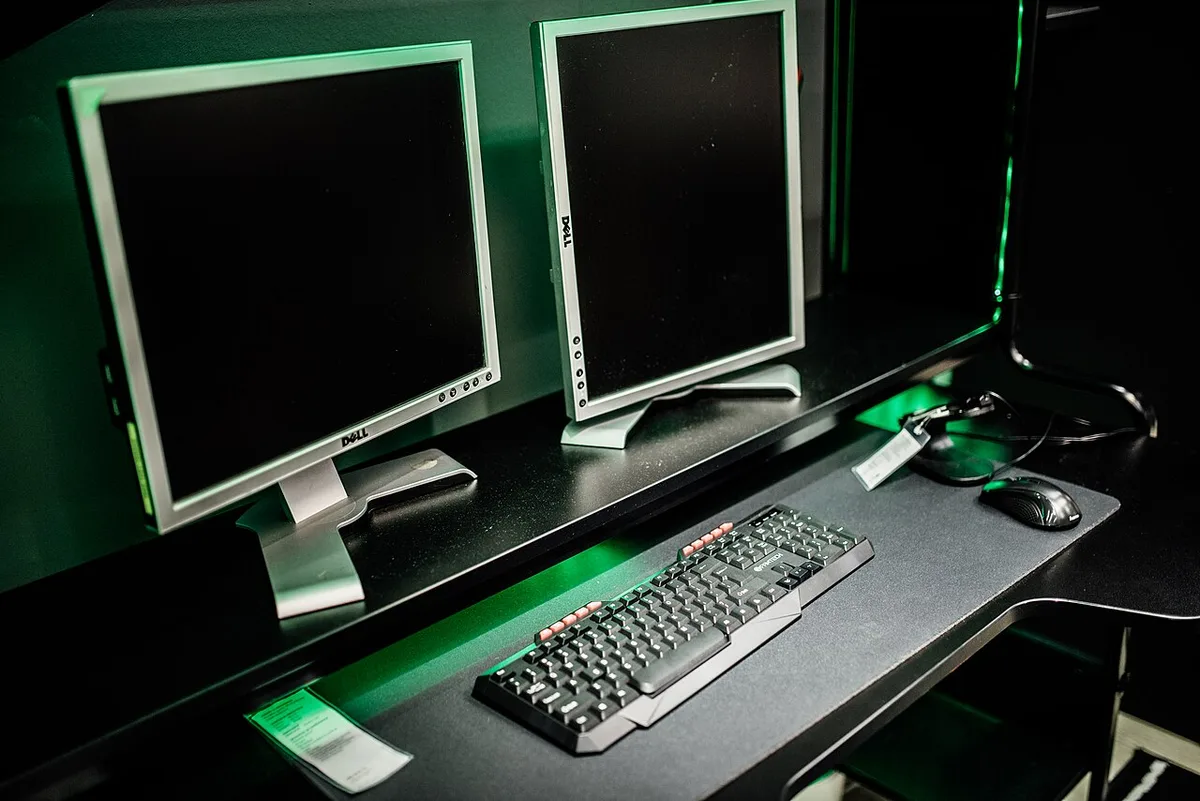
Image source: Wikimedia Commons / Shixart1985 (CC BY)
Finally, display transmission. The signal travels via DisplayPort or HDMI. The monitor processes the image.
Overdrive settings affect pixel transition speed. Poor calibration adds ghosting, which feels like lag.
| Stage | Typical Delay Range | Primary Cause |
|---|---|---|
| Peripheral | 1–5 ms | Polling rate, wireless interference |
| OS Handling | 2–10 ms | Background tasks, driver overhead |
| Game Logic | 5–20 ms | CPU load, complex simulations |
| Rendering Queue | 10–50 ms | VSync, uncapped FPS, GPU saturation |
| Display Processing | 5–20 ms | Panel response, scaler algorithms |
Understanding this breakdown clarifies why generic advice fails. Capping FPS helps the rendering stage. Disabling overlays helps the OS stage.
You must match the fix to the bottleneck. For deeper insights on signal paths, review DisplayPort vs HDMI standards. Connection type matters less than protocol efficiency.
Step 1: Establishing a Reliable Baseline Before You Tweak
You cannot improve what you do not measure. Guessing reduces effectiveness. Start by measuring your current end-to-end latency.
Use specialized tools rather than subjective feeling.
The gold standard is NVIDIA LDAT (Local Dimensional Analysis Tool). It measures photon-to-click latency accurately. However, most users lack this hardware.
Instead, use software-based estimators. Tools like Blur Busters’ TestUFO offer visual benchmarks. They don’t give precise millisecond counts but highlight relative improvements.
For quantitative data, enable the built-in overlay in supported games. NVIDIA Reflex Analyzer provides real-time latency metrics. Go to GeForce Experience settings.
Enable the in-game overlay. Launch a compatible title like Counter-Strike 2 or Apex Legends. Press Alt+Z to view stats.
Look for "System Latency."
Record this baseline number. Note your FPS, resolution, and settings. This snapshot is your reference point.
Without it, you won’t know if changes helped or hurt. Some tweaks increase FPS but raise latency. Others lower FPS but cut lag.
Only data reveals the truth.
Ensure your test environment is stable. Close all unnecessary apps. Disable RGB software temporarily.
Plug into a wall outlet, not a surge strip, to rule out electrical noise. Run the benchmark three times. Take the median value.
Ignore outliers caused by random background spikes.
If you lack Reflex-compatible games, use Fraps or MSI Afterburner. Track frametime graphs. Spiky graphs indicate inconsistent latency.
Smooth graphs suggest better stability. Correlate visual stutter with perceived lag. This method is less precise but accessible.
Focus on consistency over absolute numbers initially. Once you have a baseline, proceed to optimization. Document every change.
Re-test after each major adjustment. This iterative approach prevents compounding errors. It ensures you isolate variables effectively.
Remember, measuring FPS correctly is foundational. Bad data leads to bad decisions.
Step 2: Optimizing GPU Settings and Driver Behavior
Graphics drivers control how frames are queued and sent. Default settings prioritize compatibility, not speed. You need to override them for competitive play.
Start with NVIDIA Control Panel or AMD Software. Locate "Manage 3D Settings." Change "Power Management Mode" to "Prefer Maximum Performance." This prevents the GPU from downclocking during light loads. Downclocking introduces latency spikes when demand suddenly rises.
Keep clocks high and steady.
Next, handle Vertical Sync (VSync). Turn it OFF globally. VSync forces the GPU to wait for the monitor’s refresh cycle.
This adds significant buffer delay. Never rely on VSync for tear prevention in competitive titles. Use adaptive sync technologies instead.
Enable G-Sync or FreeSync in the control panel. Set it to "Enabled" for fullscreen applications. This allows the monitor to match the GPU’s output rate.
It eliminates tearing without the fixed delay of traditional VSync. Ensure your monitor supports variable refresh rates. Check FreeSync vs G-Sync details if unsure about compatibility.
Now, configure frame limiting. Uncapped FPS sounds good but harms latency. If FPS exceeds refresh rate, frames pile up in the queue.
Cap FPS slightly below your max refresh rate. For a 144Hz monitor, cap at 141 FPS. For 240Hz, cap at 237 FPS.
This keeps the queue shallow.
Use RTSS (RivaTuner Statistics Server) for global capping. It’s more reliable than in-game limiters. In-game limiters often fluctuate.
RTSS enforces a hard ceiling. Combine this with NVIDIA Reflex or AMD Anti-Lag. These technologies synchronize CPU and GPU.
They eliminate the render queue entirely when active.
Update drivers regularly. New drivers often include latency optimizations. Stick to Studio Drivers if you stream.
They are tested for stability. Game Ready Drivers may have newer features but occasional bugs. Choose based on reliability needs.
Clean install drivers using DDU (Display Driver Uninstaller) if switching branches. This removes residual config files that cause conflicts.
Finally, disable multi-monitor setups if possible. Secondary screens consume GPU resources. They can introduce subtle timing irregularities.
If you must use multiple displays, ensure the primary gaming monitor is set as the main display. Refer to our guide on configuring multiple monitors for best practices. Minimize desktop composition effects.
Turn off animations in Windows. These small steps reduce overall system overhead. Prioritize the GPU pipeline above all else.
Step 3: Fine-Tuning Windows OS for Minimal Overhead
Windows manages hardware interrupts and thread scheduling. By default, it balances performance with battery life and background services. Gamers need aggressive prioritization.
Switch your Power Plan to "High Performance." Open Control Panel > Hardware and Sound > Power Options. Select High Performance. This prevents CPU throttling.
Throttling causes unpredictable latency spikes. Ensure minimum processor state is set to 100%. Edit plan settings > Change advanced power settings.
Expand Processor power management. Set Minimum and Maximum to 100%.
Disable Game Bar and DVR recording. These features capture background footage. They consume disk I/O and CPU cycles.
Go to Settings > Gaming > Xbox Game Bar. Toggle it Off. Also disable Captures.
This frees up resources for the game loop.
Turn off Fullscreen Optimizations. Right-click your game executable. Select Properties > Compatibility.
Check "Disable fullscreen optimizations." This forces exclusive fullscreen mode. Exclusive fullscreen bypasses the Windows Desktop Window Manager (DWM). DWM compositing adds latency.
Exclusive mode sends frames directly to the display.
Adjust Graphics Settings. Go to Settings > System > Display > Graphics settings. Add your game executable.
Set preference to "High Performance." This ensures the discrete GPU handles the workload. Integrated graphics often cause bottlenecks. Verify this setting persists after driver updates.

Image source: Wikimedia Commons / 极客湾Geekerwan (CC BY)
Manage Startup Apps. Too many background processes compete for CPU attention. Open Task Manager > Startup tab.
Disable non-essential items. Steam, Discord, and browsers should launch manually. Auto-starting clutter increases initial load latency.
Keep the system lean.
Registry tweaks can help further. Navigate to HKEY_LOCAL_MACHINE\SYSTEM\CurrentControlSet\Services\LanmanWorkstation\Parameters. Create a DWORD named "AllowInsecureGuestAuth" and set it to 1.
This fixes network drive issues that stall IO. Be cautious with registry edits. Backup first.
Incorrect values can destabilize Windows.
Disable Nagle’s Algorithm for networking. This algorithm batches packets to reduce congestion. In gaming, immediacy matters more than efficiency.
Open Registry Editor. Go to HKEY_LOCAL_MACHINE\SOFTWARE\Microsoft\MSMQ\Parameters. Create TCPNoDelay DWORD set to 1.
Restart the computer. This reduces network input lag specifically.
Check for Windows Updates. Pending updates often run in the background. Complete them before gaming sessions.
Active Update installation consumes significant bandwidth and CPU. Pause updates during play if necessary. Use metered connection settings to prevent auto-downloads.
Finally, optimize mouse pointer precision. Go to Mouse Properties > Pointer Options. Uncheck "Enhance pointer precision." This disables acceleration.
Acceleration maps cursor movement inconsistently. Muscle memory relies on linear input. Disabling it improves aim consistency.
These OS-level changes complement GPU tweaks. Together, they create a responsive foundation. Address sudden FPS drops separately if instability persists.
OS tuning solves systemic slowness, not crashes.
Step 4: Monitor Configuration That Most Gamers Miss
Your monitor’s internal processing adds hidden delay. Manufacturers often enable features that look good but hurt responsiveness. You need to access the On-Screen Display (OSD) menu.
This is separate from Windows settings.
Start by disabling all image enhancements. Features like dynamic contrast, noise reduction, or sharpness filters require extra processing time. They force the panel to calculate pixel values before display.
Turn these off completely. Set brightness and color to neutral defaults.
Next, adjust overdrive settings carefully. Overdrive speeds up pixel transitions by applying higher voltage. It reduces ghosting.
However, excessive overdrive causes inverse ghosting. This creates bright halos around moving objects. Our research indicates that "Medium" or "Normal" is usually optimal.
Avoid "Extreme" or "Fastest" modes unless you verify zero artifacts. Test using UFO motion blur tests online.
Check your refresh rate setting in the OSD. Ensure it matches your GPU output. Sometimes monitors default to 60Hz even if capable of 144Hz.
Verify this in Windows Display Settings too. Mismatched rates cause frame pacing issues. These feel like lag even when FPS is high.
Finally, disable any input buffering modes. Some monitors have a "Game Mode" toggle. Paradoxically, this sometimes adds latency by bypassing certain scalers incorrectly.
Consult your specific manual. Often, leaving the monitor in standard PC mode yields lower latency than dedicated "Console" modes. The goal is direct signal transmission.
Minimize any intermediate processing steps within the panel itself.
Decision Matrix: Which Fix Applies to Your Specific Bottleneck?
Not every tweak helps every system. You must identify your primary constraint first. Use this logic flow to prioritize actions.
This prevents wasted effort on irrelevant settings.
Scenario A: High FPS, but inputs feel delayed.
If you’re hitting 200+ FPS but aiming feels sluggish, your bottleneck is likely the render queue. VSync might be on, or FPS is uncapped above refresh rate.
Action: Cap FPS below refresh rate. Enable NVIDIA Reflex or AMD Anti-Lag. Disable VSync globally.
This clears the backlog immediately.
Scenario B: Low FPS, stuttering, and lag.
If frames drop below 60, the issue is CPU or GPU saturation. Latency spikes occur during heavy scenes.
Action: Lower graphical fidelity. Reduce shadow quality and anti-aliasing. Close background apps.
Check for thermal throttling. Increasing raw performance reduces the time per frame. See our guide on improving FPS without upgrades for software-only gains.
Scenario C: Consistent lag regardless of game settings.
If latency remains high even in lightweight titles, the OS or peripherals are at fault.
Action: Switch to High Performance power plan. Disable fullscreen optimizations. Update chipset drivers.
Check mouse polling rate. Ensure USB ports are directly connected to the motherboard, not hubs.
Scenario D: Lag only in online multiplayer.
Local latency is fine, but hits register late. This is network jitter, not input lag.
Action: Use Ethernet instead of Wi-Fi. Prioritize gaming traffic in router QoS settings. Disable Nagle’s algorithm via registry.
Note that server distance affects this. No local PC tweak fixes bad routing.
| Symptom | Likely Cause | Primary Fix |
|---|---|---|
| Heavy aim at high FPS | Render Queue Backlog | Cap FPS + Reflex/Anti-Lag |
| Stutter + Lag | Hardware Saturation | Lower Graphics Settings |
| Constant Delay | OS/Driver Overhead | Power Plan + Clean Install |
| Online Hit Registration | Network Jitter | Ethernet + QoS Priority |
Apply fixes sequentially. Re-test after each change. Isolate variables to find the true culprit.
Don’t assume one size fits all. Tailor the workflow to your observed behavior.
Common Myths That Will Ruin Your Performance
Misinformation spreads quickly in gaming communities. Believing these myths can actively worsen your latency. Let’s debunk the most persistent errors.
Myth 1: Higher FPS always means lower latency.
This is false once FPS exceeds your monitor’s refresh rate. Extra frames just sit in the queue. They add delay without improving visual smoothness.
Capping FPS is crucial for consistent response times. Uncapped play creates unpredictable input gaps.
Myth 2: Turning off VSync always increases tearing and lag.
Traditional VSync adds lag. But modern adaptive sync (G-Sync/FreeSync) eliminates tearing without the fixed buffer delay. Using adaptive sync with a slight FPS cap is superior to either extreme.
It balances smoothness and speed perfectly.
Myth 3: RGB software doesn’t impact performance.
Background lighting controllers consume CPU cycles. They interrupt game threads. During intense moments, this causes micro-stutters.
Aggregate reviews show disabling RGB suites improves frametime consistency. Keep your system lean. Every cycle counts.
Myth 4: Wireless mice have unacceptable latency.
Modern 2.4GHz wireless tech rivals wired connections. Logitech Lightspeed and Razer HyperPolling offer sub-1ms response times. Bluetooth is slower, but dedicated dongles are excellent.
Focus on polling rate (1000Hz+) rather than cable presence. Quality wireless is viable for pros.
Myth 5: Registry tweaks yield massive gains.
Most "gaming optimization" registry hacks are placebo effects. They rarely touch the critical path of input processing. Stick to proven methods like power plans and driver settings.
Avoid obscure scripts that promise magic results. Safety and stability come first.
Ignore forum anecdotes lacking data. Trust measured outcomes. If a tip doesn’t show improvement in your baseline test, discard it.
Critical thinking saves hours of futile tweaking. Stay grounded in technical reality.
Maintenance: Keeping Latency Low Long-Term
Optimization isn’t a one-time event. Systems degrade over time. Dust, software bloat, and driver changes reintroduce latency.
Establish a routine to maintain peak performance.
Clean your hardware quarterly. Dust buildup raises temperatures. Thermal throttling reduces clock speeds.
This spikes latency unexpectedly. Use compressed air to clear fans and heatsinks. Ensure airflow remains unobstructed.
Monitor temps during gameplay. Stable clocks equal stable response times.
Update drivers strategically. Don’t chase every beta release. Wait for verified stable versions.
Read patch notes for latency-specific fixes. NVIDIA and AMD often highlight competitive improvements. Roll back drivers if new updates introduce regressions.
Stability trumps novelty.
Audit installed software monthly. Uninstall unused programs. Remove browser extensions that run in the background.
Fewer processes mean fewer interrupts. Keep your startup list minimal. Only essential services should auto-launch.
This preserves CPU headroom for gaming threads.
Re-calibrate monitor settings occasionally. Panel characteristics shift with age. Overdrive levels may need adjustment.
Re-run TestUFO benchmarks every six months. Verify that ghosting hasn’t returned. Adjust OSD settings accordingly.
Visual clarity impacts perceived latency.
Backup your optimized profiles. Save your NVIDIA Control Panel settings. Export Windows power plans.
Store configuration files safely. After major OS updates, restore these presets. This ensures you don’t lose progress.
Consistency requires preservation. Treat your PC as a precision instrument. Regular care guarantees long-term responsiveness.
Neglect leads to gradual decay. Stay proactive, not reactive.
FAQs on Reducing Input Lag
Does lowering graphics settings reduce input latency?
Yes, indirectly. Lower settings reduce GPU workload. This prevents saturation.
When the GPU isn’t maxed out, it processes frames faster. This shrinks the render queue. Less queuing means less delay.
However, if you’re already capped by CPU, graphics changes won’t help much. Balance both components for best results.
Is 1000Hz mouse polling rate worth it?
For most gamers, yes. It reduces the interval between input checks. Standard 125Hz polls every 8ms. 1000Hz polls every 1ms.
This captures movement more precisely. It feels snappier. However, it increases CPU load slightly.
Modern CPUs handle this easily. Use it if your system supports stable high-frequency interrupts.
Do I need a special monitor for low latency?
No, but it helps. Any IPS or TN panel works. Look for low GTG response times.
OLED panels offer near-instant pixel switching. They eliminate ghosting entirely. But LCDs with proper overdrive are sufficient.
Focus on refresh rate and response specs. Brand matters less than panel technology. Choose based on budget and use case.
Why does my latency spike in menus?
Menus often run at different frame rates. Or they lack vsync alignment. This creates inconsistent pacing.
Some games optimize gameplay loops poorly. Engine overhead varies by scene. This is normal.
Focus on in-game combat latency. Menu delays rarely affect competitive performance. Ignore transient spikes outside active play.
Can overclocking reduce input latency?
Directly, no. Indirectly, maybe. Overclocking increases FPS.
Higher FPS fills the pipeline faster. But if you cap FPS anyway, overclocking adds heat. Heat causes throttling.
Throttling spikes latency. Stick to stock clocks for stability. Only overclock if cooling is exceptional.
Prioritize consistency over peak numbers. Safe operation ensures reliable response times.
2 thoughts on “How to Reduce Input Latency on Gaming PC: Quick Fixes”
Comments are closed.