So your gaming laptop hits 95°C while you're in the middle of a match? That's hot, it's concerning, and yes, it's fixable. But before you panic, let's figure out exactly what's pushing your CPU into the danger zone and how to bring it back down for good.
CPU temperature spikes are almost never just one thing. Usually it's a combo of dust clogging your heatsink, old dried-out thermal paste, background software hoging cycles, or your laptop sitting on a soft surface that chokes airflow. We've seen every combination possible in our research, and the good news is most of these problems have straightforward fixes that don't require spending a fortune.
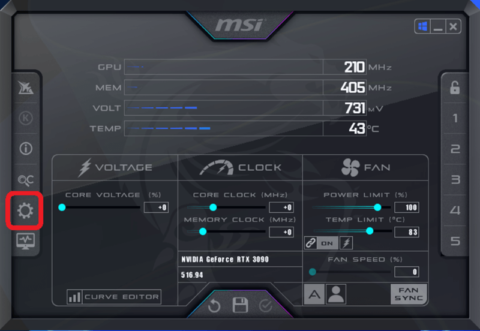
Image source: Web (Bing) / softwarehow.com (Web image (fair-use with source credit))
Quick Answer
How to Fix CPU Temperature 95C While Gaming on a Gaming Laptop: Causes, Tests & Solutions is a step-by-step diagnostic and repair process. First, scan for background apps wasting CPU cycles. Then clean dust from vents with compressed air.
If temps stay high, repaste the CPU with quality thermal compound like Arctic MX-4 or Thermal Grizzly Kryonaut. Undervolting via Intel XTU or ThrottleStop often drops 5, 15°C. Use a cooling pad and never game on beds or couches.
These steps cover the causes, tests, and solutions in order of impact.
Is 95°C Normal for a Gaming Laptop? The Honest Answer
No, 95°C is not normal for sustained gaming, and here's why that matters. Most modern gaming CPUs from Intel and AMD have a Tjunction (maximum safe junction temperature) of 100°C. When your CPU hits 95°C, it's sitting just 5 degrees away from the manufacturer's hard limit.
At that point, the chip begins thermal throttling to protect itself. That means your CPU is literally slowing itself down to avoid damage. You may notice stuttering frames, dropped FPS, or sudden freezes during intense scenes.
Per Intel ARK specifications, mobile processors like the Intel Core i7-13650HX and i9-13900HX list a Tjunction of 100°C under normal operating conditions. AMD Ryzen mobile chips follow similar thresholds. This is not an arbitrary number.
It's tested and verified by the manufacturer under specific load conditions. Running at 95°C consistently is not sustainable, and over time, it can degrade the CPU and shorten the lifespan of other nearby components on the motherboard.
Where 95°C Falls on the Danger Scale
To understand where you stand, let's look at typical temperature ranges for a gaming laptop under load:
| Temperature Range | What's Happening | Risk Level |
|---|---|---|
| 50–70°C | Cool and healthy gaming range | None — ideal |
| 70–80°C | Warm but acceptable under heavy load | Low |
| 80–90°C | Hot — getting into concerning territory | Moderate |
| 90–95°C | Very hot — thermal throttling likely active | High |
| 95–100°C | Critical — sustained operation risks damage | Very High |
| 100°C+ | Maximum rated temp — throttling at full force | Dangerous |
Notice the jump from 90 to 95°C. That's where the real danger starts. Your laptop isn't breaking immediately, but the clock speeds are already dropping, the fans are spinning at maximum RPM, and the internal components are under significant thermal stress.
If you hit 100°C and beyond, you're risking permanent degradation of the silicon.
Why 95°C Matters More Than You Think
There's a common myth that modern CPUs are bulletproof and can handle extreme heat indefinitely. That's partially true, they won't melt or explode at 95°C. But "surviving" isn't the same as "thriving." Every degree above the optimal range accelerates wear on solder joints, degrades thermal paste faster, and puts additional strain on your GPU, VRMs, and SSD.
Heat is the enemy of electronics. Period.
A study published in the IEEE Transactions on Device and Materials Reliability found that sustained elevated temperatures significantly reduce the mean time between failures (MTBF) for semiconductor devices. Even small increases in operating temperature compound over time. A laptop running at 95°C regularly will not last as long as one staying in the 75, 80°C range.
So yes, your laptop can survive at 95°C for a while. But if you want it to perform well and last several years, bringing those temperatures down should be one of your top priorities. Let's walk through the exact diagnostic steps to find and fix the root cause.
Step 1: Rule Out the Software Saboteurs (Before Opening Your Laptop)
Before you unscrew a single panel on your gaming laptop, check what's happening in software first. This is by far the easiest fix and the most commonly overlooked one. Sometimes your CPU isn't hot because of hardware failure.
Sometimes it's hot because some rogue background process is quietly working the processor to death while you think you're just gaming.
Why Background Apps Are Hiding in Plain Sight
Windows 11 and recent versions of Windows 10 run dozens of background services by default. After updates, after installing new software, sometimes even after sleep cycles, something goes a bit haywire and starts consuming CPU cycles you didn't ask for. The result is elevated idle temperatures and higher peaks during gaming.
It's like trying to sprint while someone is pulling on your backpack.
Open Task Manager (Ctrl + Shift + Esc) and click on the "CPU" column header to sort by usage. Look for anything using more than 5% CPU when you're not actively doing anything. Common culprits include:
- Adobe updaters and Creative Cloud background services
- Windows Update downloading files silently
- Malware or crypto miners hiding in plain sight
- Discord overlay or recording software
- Steam, Epic, or other launcher background tasks
- Antivirus full system scans running unchecked
- Bloatware that came preinstalled on your laptop
If you find something unusual, right-click and end the task. Monitor your CPU temperature afterward. Often you'll see an immediate drop of 3 to 8°C just from closing unnecessary processes.
How to Find and Kill Culprit Processes
Here's the systematic approach we recommend:
- Open Task Manager and sort by CPU usage
- Check the "Processes" tab and note anything above 5%
- Go to the "Startup" tab and disable non-essential launchers
- Run a malware scan using Windows Security or Malwarebytes
- Disable unnecessary Windows services (search for "msconfig" and go to Services, then hide Microsoft services and disable the rest)
- Close browser tabs with video or heavy scripts
- Disable hardware-accelerated GPU scheduling in Windows Settings if it's causing unexpected CPU load
Sometimes it's not one program but several small ones adding up. Two or three apps each using 5, 8% CPU can create a surprisingly large thermal burden when you add them together.
When a Malware Infection Is Stealing Your CPU Cycles
This sounds extreme, but it happens more often than you'd think. Some malware families specifically target cryptocurrency mining, running silently in the background while siphoning your CPU (or GPU) resources. The signs are pretty clear: your laptop gets hotter than usual even during light tasks, fans spin loudly at idle, and performance drops for no apparent reason.
If you suspect malware, run a full system scan immediately. Windows Security (built into Windows 11) is actually quite capable for this. Alternatively, download the free version of Malwarebytes, which is widely recommended by IT professionals.
Once you clean the infection, your temperatures should return to normal within a day or two.
Adjusting Power Plans for Immediate Relief
Your Windows power plan has a direct impact on how aggressively your CPU runs. The default "Balanced" plan on many gaming laptops is surprisingly permissive with power delivery, which means higher clocks, higher voltages, and higher temperatures. Switching to "Power Saver" mode during gaming can reduce temperatures by 5 to 10°C on some systems.
To change it quickly: press Windows key + X, select "Power Options," and switch to Power Saver. Test your temperature under load after making this change. If the improvement is noticeable, you've saved yourself a lot of time.
You can also create custom power plans with specific CPU throttling parameters if you're comfortable digging deeper.
If you'd like more details on managing laptop performance and battery life while gaming, check out our guide on why your gaming laptop battery drains so fast, it covers power management in depth.
Step 2: Check the Airflow — Is Your Laptop Suffocating?
Airflow is the single most important factor in keeping your laptop cool, and it's also the easiest thing to get wrong. Laptops rely on a delicate balance of intake and exhaust. Cool air enters through vents (usually along the bottom or sides), passes over the heat sink and fan assembly, absorbs heat from the CPU and GPU, and exits through exhaust vents (typically along the hinge or rear).
Block any part of that path and your laptop starts cooking itself.
Why Soft Surfaces Are the #1 Enemy of Cooling
This might sound obvious, but the majority of overheating problems we see trace back to one simple habit: using your laptop on a bed, couch, pillow, or blanket. Soft surfaces conform to the bottom of the laptop and physically block the intake vents. The result is that the fan pulls in warm, recycled air instead of fresh room-temperature air.
Your CPU temperature can spike 10 to 20 degrees in minutes.
Even a thin carpet can restrict enough airflow to cause problems over extended gaming sessions. Hardwood floors, tile, or a sturdy desk are always the safest surfaces. If you must game from bed, invest in a hard laptop tray or a lap desk with ventilation cutouts.
How to Create Proper Intake and Exhaust Paths
Check the vent placement on your specific laptop model. Most gaming laptops have:
- Intake vents on the bottom panel (sometimes along the sides near the front)
- Exhaust vents along the rear or upper sides near the hinge
Make sure nothing is covering either set of vents. Leave at least 4 inches of clearance around every vent. If your laptop sits flush against a wall or tucked into a tight entertainment center, it's recycling its own hot exhaust air.
That's a one-way ticket to 95°C and beyond.
Also check that your exhaust isn't blowing directly onto your legs or the edge of your desk where it can pool and recirculate. A small amount of negative pressure behind the laptop helps pull cooler air through the system.
The $20 Upgrade That Changes Everything (Cooling Pads)
A laptop cooling pad is one of the simplest and most effective hardware upgrades you can make. These are passive or fan-assisted platforms that sit underneath your laptop and provide additional airflow through the bottom intake vents. Quality cooling pads with large, slow-spinning fans move more air than the built-in laptop fans alone.
The cooling pad from eBay shown below is representative of the category, multiple fans, adjustable height, and USB pass-through. Prices range from about $15 to $60 depending on fan quality and build.
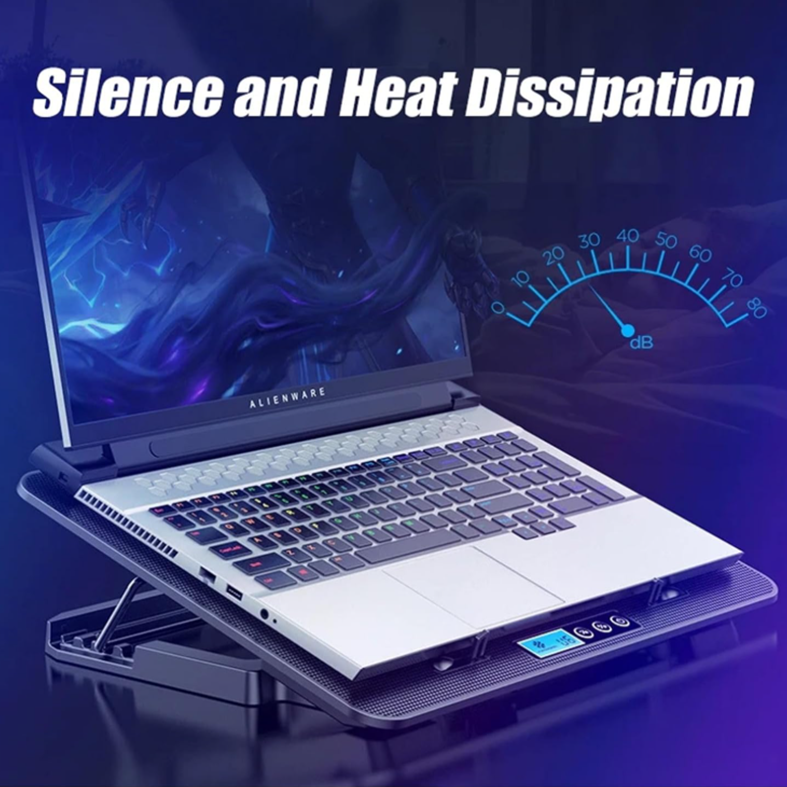
Image source: Web (Bing) / ebay.com.au (Web image (fair-use with source credit))
When choosing a cooling pad, look for:
- At least 120mm fans (larger fans move more air at lower RPM = quieter)
- Adjustable fan speed controls
- Height adjustment for better ergonomics and airflow
- Rubber feet to prevent slipping
Positioning Your Laptop for Maximum Airflow
Here's a quick checklist for optimal positioning:
- Place the laptop on a hard, flat surface
- Ensure at least 4 inches of clearance on all sides and the rear
- Never block the exhaust vent with walls, furniture, or your body
- Elevate the back of the laptop slightly (even a book or closed notebook under the rear feet works) to improve natural convection
- Run the room fan or air conditioning during long gaming sessions if your room gets warm
Room temperature matters more than you probably realize. A room at 30°C (86°F) will always produce higher CPU temperatures than a room at 22°C (72°F), regardless of how clean or well-maintained your laptop is. If your gaming space gets hot in summer, consider a small desk fan pointed near the exhaust to help disperse hot air.
Step 3: The Dust Diagnosis — Is Your Cooler Choked?
After airflow issues, dust accumulation is the second most common cause of laptop overheating. Over time, dust, pet hair, lint, and microscopic debris accumulate inside the laptop chassis, particularly on the fan blades and heat sink fins. This buildup acts like insulation, preventing heat from transferring efficiently from the CPU to the heatsink and then out through the exhaust.
How quickly your laptop accumulates dust depends on your environment. If you live in a dusty area, have pets, or carpet your home heavily, you might need to clean your laptop every 3 to 6 months. In cleaner environments, once a year is usually sufficient.
How to Spot Dust Blockages Without Disassembly
You don't always need to open your laptop to know dust is the problem. Watch for these signs:
- Fans sound louder than usual, especially at idle or light load
- Exhaust air feels weaker than it did when the laptop was new
- Temperature climbs faster and higher than expected during gaming
- The laptop reaches 90°C+ within 15 to 20 minutes of starting a game
- You can visibly see dark gray or brown dust piles near the vent openings
Run a stress test and monitor your temperature. Use a tool like HWMonitor or HWInfo64 to track CPU core temperatures and fan speeds in real time. If you see the fan hitting 100% RPM but temperatures still climbing past 90°C, dust buildup is a very likely culprit.
The Safe Way to Blow Out Vents with Compressed Air
Compressed air is the first and least invasive step in dust removal. Here's how to do it safely:
- Power off the laptop completely and unplug the charger
- Hold the laptop at an angle so dust falls out, not deeper in
- Use short bursts of compressed air (don't hold the trigger down continuously, that can spray propellant liquid)
- Aim the straw nozzle directly at each vent opening
- Gently rotate the fan blades by hand (if accessible through the vent) to dislodge dust trapped on them
- Work on both intake and exhaust sides
Important: Never spin the fan faster than it wants to spin by blowing air through it. This can generate back voltage and potentially damage the fan motor. Always hold the fan blade still with a finger while blasting air near it.
When Compressed Air Isn't Enough (and What to Do Instead)
If compressed air doesn't bring your temperatures down by at least 5 to 10°C, the dust has likely packed into the heat sink fins deep inside the chassis. At that point, you'll need to open the laptop and clean manually. This requires a Phillips screwdriver set, plastic spudger or guitar pick for prying clips, and optionally isopropyl alcohol (90%+) and a soft brush.
Here's the basic process:
- Remove the bottom panel screws and gently pry off the cover
- Locate the fan and heat sink assembly
- Use compressed air to blow out loose dust from the fan blades and heatsink fins
- For packed-in dust, use the soft brush and isopropyl alcohol to gently clean the fins
- Reattach the panel and test
If you're uncomfortable opening your laptop, take it to a qualified repair shop. The cost is usually $30 to $60 for a cleaning service, which is far cheaper than replacing a damaged component.
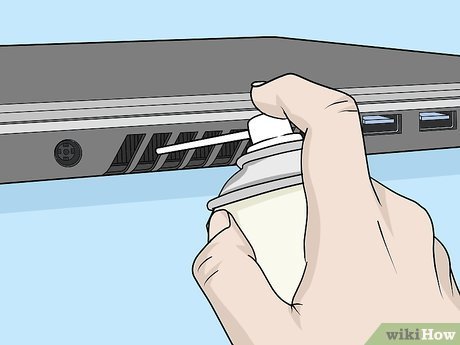
Image source: Web (Bing) / ar.inspiredpencil.com (Web image (fair-use with source credit))
Cleaning Frequency: How Often Should You Deep Clean?
As a general rule of thumb:
- Light use in a clean environment: clean every 12 months
- Regular gaming in a typical home: clean every 6 months
- Heavy gaming with pets or in dusty conditions: clean every 3 to 4 months
Keeping up with this schedule prevents the kind of severe buildup that leads to 95°C thermals in the first place. It also makes future repasting and maintenance much easier, since you're working with a relatively clean system rather than fighting caked-on grime.
If your laptop is showing other hardware quirks alongside the overheating, like display issues or connectivity problems, you might also want to review guides on fixing G-Sync display problems or resolving Bluetooth disconnects, multiple component issues can sometimes share a common root cause like poor thermal management affecting nearby circuitry.
Step 4: Repasting the CPU — The Most Effective Long-Term Fix
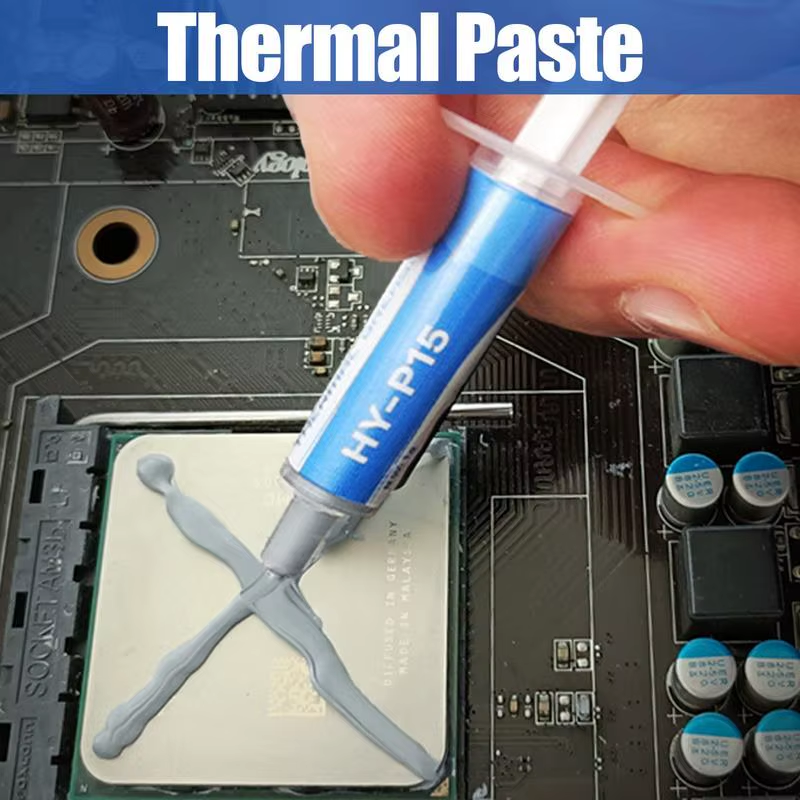
Image source: Bing (Web (fair-use with source credit))
If you've ruled out software issues, cleaned the dust, and verified your airflow is solid, but your laptop still hits 95°C during gaming, it's time for the most impactful upgrade you can make: repasting the CPU. Factory-applied thermal paste on gaming laptops is often a cheap, low-quality compound that dries out, cracks, or pumps out (moves away from the CPU die) within 1 to 2 years of regular use. Replacing it with a proper thermal compound is the single biggest temperature improvement most laptop owners can achieve.
Factory thermal paste is applied with mass-production efficiency in mind, not long-term thermal performance. Companies like ASUS, MSI, Lenovo, and HP prioritize reducing manufacturing time and cost over using premium compounds. The result is a layer of paste that may work fine out of the box but deteriorates noticeably within 18 to 24 months of thermal cycling.
Why Factory Thermal Paste Is Often Terrible
When thermal paste degrades, tiny gaps form between the CPU heat spreader and the heat sink. Air in those gaps is a poor conductor of heat compared to properly applied thermal compound. Think of it like trying to heat a pan with a thin layer of air between the burner and the pan instead of direct metal-to-metal contact with a conductive interface.
The heat can't transfer efficiently, so it stays trapped in the CPU.
You might notice specific signs that your thermal paste needs replacing:
- Temperatures that were fine 12 months ago are now 10 to 15°C higher
- The laptop used to stay in the 80s during gaming and now consistently hits the 90s
- Fan noise has increased noticeably even at similar load levels
- You've already cleaned the dust and checked airflow with no improvement
If any of these match your situation, repasting is your next move.
Tools You Need for a Safe Repaste Job
Here's what you'll need:
- Phillips screwdriver set (usually #0 and #1 sizes for laptops)
- Plastic spudger or guitar pick (for prying clips without scratching)
- Isopropyl alcohol (90% or higher concentration)
- Lint-free coffee filters or microfiber cloths
- Cotton swabs (Q-tips)
- New thermal paste (we'll cover the best options below)
- Anti-static wrist strap (optional but recommended)
- Small container or magnetic tray for screws
Organize your screws by location as you remove them. Laptop panels have different screw lengths, and putting a long screw in a short-thread hole can crack the motherboard.
Step-by-Step Guide to Removing Old Paste and Applying New
Follow these steps carefully:
- Power down the laptop and unplug everything
- Remove the bottom panel screws and gently pop off the cover
- Disconnect the battery connector first, this is critical for safety
- Locate the CPU (and GPU if you're ambitious enough to do both)
- Unscrew the heat sink in a cross pattern (like changing tires on a car) to release even pressure
- Gently lift the heat sink off the CPU
- Clean the old thermal paste off both the CPU heat spreader and the heat sink base using isopropyl alcohol and a lint-free cloth
- Apply a small pea-sized amount of new thermal paste to the center of the CPU
- Reattach the heat sink in the reverse cross pattern, tightening gradually
- Reconnect the battery and replace the bottom panel
For visual guidance on handling thermal paste correctly, you can refer to detailed teardown guides from iFixit, which provide model-specific instructions for most popular gaming laptop brands.
Which Thermal Paste Is Best for Laptops? (MX-4, Kryonaut, etc.)
Not all thermal pastes are created equal. Here's a comparison of the most recommended options for laptop use:
| Thermal Paste | Viscosity | Performance | Price | Best For |
|---|---|---|---|---|
| Arctic MX-4 | Medium | Excellent (8.5/10) | ~$8–12 | Most users, everyday repasting |
| Arctic MX-6 | Medium-high | Outstanding (9/10) | ~$12–15 | High-performance gaming laptops |
| Thermal Grizzly Kryonaut | Medium | Exceptional (9.5/10) | ~$12–18 | Enthusiasts, maximum cooling |
| Noctua NT-H2 | High | Excellent (8.5/10) | ~$10–14 | Users who want easy application |
| Thermal Grizzly Conductive (Liquid Metal) | Very low | Superior (10/10) | ~$15–22 | Advanced users only — riskier |
Our recommendation: Arctic MX-4 is the sweet spot for most gamers. It's affordable, easy to apply, performs nearly as well as the expensive options, and doesn't carry the risks associated with liquid metal. If you're pushing your laptop hard and want the absolute best, spend the extra few dollars on MX-6 or Kryonaut.
⚠️ A note on liquid metal: Thermal Grizzly Conductive is technically the best performer available. But it's electrically conductive, meaning a stray drop can short-circuit your motherboard. It also corrodes aluminum heat sinks over time.
Only use liquid metal if you're experienced, comfortable with the risk, and your laptop uses a copper heat sink base. For 95% of users, a high-quality paste like MX-4 or Kryonaut is the smarter choice.
After repasting, test your temperatures under load for at least 30 minutes. You should see a noticeable improvement, typically 5 to 15°C lower peak temperatures depending on how degraded the old paste was. If temps are still hovering around 95°C after a proper repaste, the issue likely lies elsewhere (see Step 7 on failing components).
If you're curious about other performance tweaks you can make to your gaming laptop, our guide on whether you can upgrade a gaming laptop CPU covers the limits and possibilities of hardware modifications.
Step 5: Undervolting — Get More Performance with Less Heat
Undervolting is one of the most powerful tricks in the laptop cooling toolkit, and it's completely free. The concept is simple: your CPU doesn't actually need the maximum voltage the manufacturer sets to run at full speed. By reducing the voltage slightly, you lower power consumption and heat output while maintaining (or even improving) performance.
This works because modern CPUs have built-in headroom, they're designed to run reliably well below their maximum rated voltage across all production variants.
Think of it like this. The factory voltage setting ensures every single CPU chip in the world will work. But that means some chips get more voltage than they actually need.
Undervolting trims that excess. Your CPU runs cooler, the fans spin slower, and you might even see higher sustained boost clocks since the chip isn't throttling as early. It's a win-win when done correctly.
What Undervolting Actually Does (and Doesn't Do)
Undervolting reduces the voltage supplied to the CPU cores during load. It does not reduce clock speeds on its own. Your CPU still boosts to the same frequencies, but it gets there using less electrical energy, which translates directly into less heat.
Here's the key relationship: Power (watts) = Voltage × Current. Lower the voltage, and you lower the power draw at any given frequency.
This is different from throttle-down solutions like reducing your power limit or lowering maximum clock speeds. Those methods reduce heat by reducing performance. Undervolting reduces heat while preserving performance.
That distinction matters a lot if you're trying to maintain high frame rates in competitive games.
Not every laptop supports undervolting. Intel mobile CPUs from the 10th generation onward generally support it through Intel XTU (Extreme Tuning Utility). AMD Ryzen mobile CPUs support it through the Ryzen Master software or BIOS-level adjustments.
Some manufacturers lock these features in the BIOS, particularly on newer models with 13th and 14th gen Intel chips or Ryzen 7000 series. If the software won't let you adjust the voltage curve, your laptop's firmware is blocking it.
How to Undervolt Using Intel XTU or ThrottleStop
The process varies by CPU vendor, but here are the two most common paths:
For Intel CPUs using Intel XTU:
- Download Intel Extreme Tuning Utility from Intel's official site
- Open the program and go to Advanced Tuning → CPU Core Power Limits
- Reduce the "CPU Core Voltage Offset" by small increments (start with -50mV)
- Run the built-in stress test to check stability
- If stable, push further (try -75mV, then -100mV) until you find the threshold
- If you get crashes or errors, back off to the last stable value
For Intel CPUs using ThrottleStop (more flexible):
- Download ThrottleStop from the official website
- Go to FIVR → CPU Core and CPU Cache
- Check "Unlock Adjustable Voltage"
- Set an offset voltage (negative values only)
- Apply and test with a stress benchmark
- Try stepping down in -25mV increments until instability appears
For AMD Ryzen CPUs:
- Download Ryzen Master from AMD
- Use the Custom mode to adjust the voltage/frequency curve
- Or enter the BIOS and look for "UV Shift" or "CPU Vcore" settings
- Note that AMD has locked undervolting on many newer Ryzen 7000 mobile parts
Always save your profile once you find a stable undervolt. Write down the exact offset value so you can replicate it if you ever reset your system.
Finding the Stable Undervolt Curve for Your CPU
Every CPU chip is unique. Two identical models from the same manufacturer can have very different undervolting ceilings. This is called silicon lottery, and it's real.
Some chips can handle -150mV easily. Others start crashing at -50mV. There's no way to know yours without testing.
Here's the systematic approach we recommend:
- Start with a conservative offset like -50mV
- Run a 15-minute stress test using Cinebench R23 or OCCT
- Monitor temperatures and check for any crashes or errors
- If stable, try -75mV and repeat
- Continue in -25mV increments until the system becomes unstable
- Back off to the last stable value and add a safety margin of -25mV
Use HWInfo64 to monitor your voltage and temperature readings during each test. The "CPU Core Voltage" line should match your offset setting. If it doesn't, your undervolt isn't applying correctly.
A typical stable undervolt for a gaming laptop CPU falls somewhere between -75mV and -125mV. This usually produces a temperature reduction of 5 to 15°C under load. Your exact result depends on your specific chip, cooling solution quality, and ambient room temperature.
Risks of Over-Undervolting and System Instability
Going too far with your undervolt causes problems. If you set the offset too aggressive, your system will become unstable. You'll experience random crashes, blue screens, application failures, or failure to boot entirely.
These symptoms usually appear during load, not at idle, because light workloads don't require full voltage margins.
If your laptop fails to boot after applying an undervolt, you can clear the CMOS by removing the battery connector for 30 seconds and reconnecting it. This resets the BIOS to factory defaults and removes your undervolt settings. Always keep a note of your last stable configuration so you can recover quickly.
Another risk to be aware of is that some games and applications are more sensitive to voltage changes than others. A system that seems stable under a synthetic stress test might crash in a specific game. Test with the actual games you play, not just benchmarks, before declaring your undervolt fully stable.
If you want to dig deeper into optimizing your gaming laptop beyond cooling, our article on upgrading gaming laptop RAM and SSD covers other performance tweaks that pair well with undervolting for a complete optimization pass.
Step 6: Lowering the Load — Smart Settings for Hot Laptops
Sometimes the best way to fix overheating is simply to give your CPU less work to do. You can achieve significant temperature reductions by adjusting in-game graphics settings, limiting frame rates, and disabling unnecessary background features. These changes won't require you to open your laptop or modify hardware at all.
They're pure software-level optimizations that trade a small amount of visual fidelity for a large amount of thermal relief.
Many gamers don't realize how much certain graphics settings cost in terms of CPU and GPU load. Shadow quality, ambient occlusion, and volumetric fog are computationally expensive features that often deliver minimal visual benefit on a laptop screen. Dropping them can slash your CPU utilization and heat output dramatically.
Which In-Game Settings Generate Excess Heat for Zero FPS Gain
Not all graphics settings are created equal. Some have a huge impact on performance and temperature. Others are mostly cosmetic and cost almost nothing to run at maximum.
Here's a breakdown:
| Setting | Thermal Impact | Visual Impact | Recommendation |
|---|---|---|---|
| Shadow Quality | Very High | High | Set to Medium or Low |
| Ambient Occlusion | High | Moderate | Disable or set to SSAO Low |
| Volumetric Fog | High | Moderate | Set to Low or disable |
| Anti-Aliasing | Moderate | High | Use TAA or FXAA instead of MSAA |
| Texture Quality | Low | Variable | Keep at High (affects VRAM not CPU) |
| View Distance | Moderate | Low on laptops | Set to Medium |
| Post Processing | Moderate | Low | Set to Low |
| Physics Detail | High | Low | Set to Low |
Shadows are usually the biggest culprit. They demand significant CPU and GPU resources to calculate lighting and depth in real time. Dropping shadow quality from Ultra to Medium often cuts 10 to 20 frames per second while barely affecting how the game looks on a 15-inch laptop display.
How Limiting FPS Can Dramatically Drop Temperatures
Your laptop's GPU and CPU will render as many frames as possible unless you tell them otherwise. If your game is unlocking to 120 FPS, your components are working overtime for frames your eye can't necessarily distinguish. Capping your framerate at a reasonable target like 60 FPS can cut power consumption and heat by 30 to 50 percent in demanding titles.
You can limit FPS in several ways:
- Enable V-Sync in your game settings (locks to your display's refresh rate)
- Use NVIDIA Control Panel or AMD Adrenalin to set a global framerate limit
- Add "-fps_max 60" to your game's launch options in Steam
- Use MSI Afterburner with RTSS to set per-game framerate caps
- Enable Frame Rate Target Control in NVIDIA drivers
Capping at 60 FPS is especially effective on laptops with 60Hz displays. You're literally wasting compute cycles producing frames that never get shown on screen. Locking the framerate also eliminates the massive frame generation spikes that cause sudden temperature bursts mid-game.
Using Windows Game Mode and Hardware-Accelerated GPU Scheduling
Windows 11 includes two features designed to prioritize gaming performance and resource management. Both are worth enabling:
- Game Mode: Go to Settings > Gaming > Game Mode and turn it on. This prioritizes CPU and GPU resources for your active game and reduces background task interference.
- Hardware-Accelerated GPU Scheduling: Go to Settings > System > Display > Graphics > Change default graphics settings. Toggle this on and restart your laptop. This moves GPU memory management from the CPU to the dedicated GPU, reducing CPU overhead during gaming.
Some users report that Hardware-Accelerated GPU Scheduling increases frame pacing consistency and reduces input latency on certain systems. Whether it helps your specific configuration depends on your GPU driver version and game engine. Test both configurations and see which gives you better thermals and smoother gameplay.
Disabling Background Recording and Overlay Apps
Background recording software like Xbox Game Bar, NVIDIA ShadowPlay, and AMD ReLive constantly records your gameplay to a circular buffer. This uses CPU and GPU resources continuously, even when you're not actively saving a clip. On a laptop already struggling with heat, this extra load can be the difference between 85°C and 95°C.
Turn off background recording for the games you play most often:
- Press Win + G to open Xbox Game Bar, go to Settings > Captures, and disable "Record what happened"
- In NVIDIA ShadowPlay, go to Settings and disable "In-game overlay" for specific games
- In AMD Radeon Software, go to Gaming and turn off "Instant Replay"
Also consider disabling overlay apps from Discord, Reddit, and other platforms. These overlays inject code into your game process and consume resources you'd rather dedicate to rendering frames.
If your laptop is showing signs of multiple hardware issues beyond just overheating, it might be worth checking resources on best budget gaming laptops to understand what thermal design expectations are for different price tiers. Knowing what's normal for your category helps you set realistic expectations for cooling performance.
Step 7: When 95°C Signals a Failing Component
Most overheating cases stem from dust, old paste, or airflow problems. But sometimes 95°C is a symptom of a component actually failing. Recognizing the difference between a maintainable thermal issue and a dying part is crucial.
Ignoring a hardware failure means the problem will only get worse, and you risk permanent damage to your CPU or motherboard.
A failing laptop isn't always dramatic. Sometimes it presents as a gradual degradation that you notice slowly over weeks or months. Other times it's an abrupt change.
The key is learning what signs point to hardware failure versus a manageable maintenance issue.
Signs Your Fan Is Dying or Stalled
Fan failure is one of the most serious cooling problems you can encounter. A fan that's slowing down, making unusual noises, or stopped entirely means your heatsink can't move heat away from the CPU fast enough. Here's what to watch for:
- Loud grinding, clicking, or rattling sounds coming from the cooling area
- One or both fans not spinning up when you start a game
- Fans spinning unevenly (one fast, one slow or silent)
- Temperature climbing rapidly within the first few minutes of load
- The laptop shutting down unexpectedly during gaming (thermal protection kick-in)
To check fan health, download HWInfo64 and look at the "CPU Fan" and "Main Board Fan" RPM readings. If your fan should be spinning at 4000 to 6000 RPM under load but reads 800 RPM or lower, something is wrong. A completely dead fan reads 0 RPM.
Fan bearings wear out over time. Dust accumulation inside the fan hub can also restrict rotation. Cleaning the fan thoroughly sometimes restores function, but if the bearing is worn, the fan needs replacement.
Laptop replacement fans typically cost $10 to $25 and take about 20 minutes to install with basic tools.
When Thermal Paste Pump-Out Has Gone Too Far
Thermal paste pump-out is a real phenomenon that affects all laptop CPUs over time. During thermal cycling (heating up during gaming, cooling down at idle), the thermal paste expands and contracts. This repeated movement pushes the paste outward from under the CPU heat spreader.
Eventually, the paste gets squeezed out to the edges, leaving a thin or empty center where the CPU contacts the heat sink.
Signs that pump-out has become problematic:
- Center of the CPU surface appears dry or has very little paste
- Paste has migrated significantly toward the edges of the heat spreader
- Temperatures rose sharply after previously being stable
- The heat sink shows an uneven contact pattern after removal
Pump-out is especially common with softer, lower-quality factory thermal compounds. It's essentially why repasting every 18 to 24 months is recommended for gaming laptops. The fix is the same as Step 4: clean off the old paste thoroughly and apply fresh compound using the proper technique.
Identifying a Failed Temperature Sensor
Less commonly, a temperature reading of 95°C might not reflect the actual CPU temperature. A faulty thermal sensor or a loose sensor connection can report incorrect readings to your monitoring software and BIOS. This is rare but possible, especially on older laptops or units that have suffered physical damage.
To verify whether your temperature reading is accurate:
- Cross-reference readings from multiple monitoring tools (HWMonitor, HWInfo, Core Temp)
- If all tools report similar numbers, the sensor is likely working correctly
- If only one tool shows extreme temps while others show reasonable numbers, suspect a software or sensor glitch
- Check the BIOS temperature reading if available, this bypasses operating system monitoring software
If you suspect a bad sensor, the laptop may still be running cool while showing inflated readings. Try touching the exhaust vent during a gaming session. If the air feels warm but not scalding hot, and your software reports 95°C, you might have a sensor calibration issue rather than a genuine thermal problem.
How to Test Fan RPM and Curves with HWInfo
HWInfo64 is one of the most comprehensive hardware monitoring tools available, and it's free. It gives you access to detailed fan speed data that basic monitoring tools can't show. Here's how to use it effectively:
- Download and run HWInfo64 in Sensors-only mode
- Scroll down to the "Fans" and "Temperatures" sections
- Watch your CPU fan RPM under idle and then under load
- Click "Summary" at the bottom to see current, minimum, and maximum values for each sensor
- Look at the "Fan Curve" if your laptop's BIOS exposes it (some do, some don't)
If your fan curve is abnormal (fans not ramping up with temperature, or staying at a constant low speed regardless of heat), the issue may be in the BIOS fan control rather than the hardware itself. Updating your laptop's BIOS to the latest version from the manufacturer's support page can sometimes resolve fan curve bugs.
You can also find model-specific guidance on sites like iFixit which offer teardown guides and diagnostic tips for major gaming laptop brands including ASUS, MSI, and Lenovo.
If your laptop is having other compatibility or display issues alongside the thermal problems, you might want to explore solutions like fixing G-Sync visibility issues or understanding G-Sync vs FreeSync trade-offs since these can interact with GPU load and thermal behavior.
Step 8: Permanent Solutions vs. Temporary Band-Aids
When you're dealing with 95°C thermals, it's important to understand which fixes address the root cause and which just mask the problem temporarily. Some solutions buy you time. Others solve the issue for years.
Making the right choice depends on your budget, technical comfort level, and how long you plan to keep using the laptop.
Let's break down the main approaches and where each one fits.
Comparing: Repasting vs. Cooling Pad vs. Undervolting
Each of these three solutions has different strengths and limitations:
| Solution | Temperature Reduction | Cost | Longevity | Best For |
|---|---|---|---|---|
| Repasting CPU | 5–15°C | $10–18 | 2–4 years | Most effective single fix |
| Cooling Pad | 3–8°C | $15–60 | Indefinite (with replacement pads) | Ongoing auxiliary cooling |
| Undervolting | 5–12°C | Free | Until BIOS update locks it | Preserving performance while cooling |
| Dust Cleaning | 5–10°C | $5–10 for air | 3–6 months before rebuild | Quick maintenance reset |
| Airflow Optimization | 3–8°C | $0 | Ongoing | Immediate behavioral fix |
The truth is, you don't have to pick just one. These solutions stack. A user who cleans the dust, repastes the CPU, enables undervolting, and uses a cooling pad on a hard surface can often drop peak temperatures from 95°C down to the low 80s.
That's a combined reduction of 10 to 20 degrees from multiple moderate interventions.
Repasting delivers the largest single improvement because it addresses the direct thermal interface between your CPU and its cooling solution. Undervolting reduces the heat generated in the first place. A cooling pad supplements both by improving ambient airflow.
Dust cleaning removes the insulation layer that blocks heat transfer. Each piece of the puzzle matters.
Which Fix Works Best for Thin Gaming Laptops vs. Desktop Replacements
Your laptop's form factor heavily influences which solutions will be most effective.
Thin gaming laptops (think Razer Blade, ASUS ZenBook Duo, or Lenovo Legion Slim) have minimal cooling capacity by design. Their heat sinks are smaller, their fans are quieter and move less air, and their chassis leaves little room for auxiliary cooling. In these machines, every degree counts.
Undervolting tends to be the most impactful single tweak because it reduces heat generation at the source rather than trying to remove heat that's already trapped in a compact chassis.
Desktop replacement laptops (MSI GT series, Alienware m-series, older bulky ASUS ROG models) have larger cooling systems with more robust heat pipes and bigger fans. These machines benefit more from physical maintenance like repasting and deep cleaning. The extra cooling capacity means that removing thermal barriers (old paste, dust) has a proportionally larger effect on the final temperature number.
If you have a thin laptop and temperatures are still high after repasting and undervolting, the ceiling of your cooling system may simply be lower than what your CPU generates. In that case, a quality cooling pad becomes much more valuable as supplementary infrastructure.
How Long Each Solution Lasts Before You Need to Repeat It
Here's a realistic timeline for how long each intervention stays effective:
- Dust cleaning: 3 to 6 months in normal environments, 1 to 3 months in dusty or pet-heavy homes
- Thermal paste replacement: 18 to 36 months before reapplication is needed (longer with premium pastes like Kryonaut)
- Undervolt stability: Indefinite until a BIOS or driver update resets your settings
- Cooling pad usage: Ongoing as long as the pad functions; fans in cheap pads wear out after 1 to 2 years
- Airflow habit changes: Permanent as long as you maintain the new habit
The only solution with a natural expiration date is thermal paste. Even the best compounds degrade over time due to thermal cycling and oxidation. Planning a repaste every two years is a smart maintenance schedule that prevents temperatures from creeping back up gradually.
If you're considering upgrading your laptop down the line, knowing what thermal issues you can fix now versus哪些问题 require hardware replacement is valuable. Our guide on whether you can upgrade a gaming laptop GPU covers the realities of hardware upgrades and when a full replacement makes more sense than continued repair.
Mistakes That Make Overheating Worse
Some attempts to cool a laptop actually make things worse. We've seen users try creative solutions that sound reasonable but cause more harm than good. Knowing what not to do is just as important as knowing what to do.
A few wrong moves can damage components, void warranties, or create new problems on top of the original one.
Let's walk through the most common mistakes and why they backfire.
Why Using a Vacuum Cleaner Near Your Laptop Is Dangerous
This is one of the most popular wrong moves we encounter. People grab a household vacuum, point it at the vents, and blow away the dust. It seems logical until you understand what's happening electrically.
Vacuum cleaners generate significant static electricity. When you hold the nozzle near exposed motherboard components, that static charge can arc across sensitive circuits. A single discharge of just a few thousand volts can fry a CPU, corrupt BIOS firmware, or kill a power delivery component.
The damage might not be immediate. Sometimes a weakened component fails weeks later.
Compressed air cans are the safe alternative. They move dust with force, not electrostatic attraction. If you must use a vacuum, keep it at least 6 inches away from any exposed electronics and never use it inside an opened laptop chassis.
The Danger of Liquid Metal on Aluminum Heatsinks
We covered liquid metal briefly in the repasting section, but the risk deserves more emphasis. Liquid metal thermal compounds like Thermal Grizzly Conductive or Cooler Master MasterGel Maker are incredibly effective at transferring heat. They outperform even the best pastes by a wide margin.
But liquid metal is electrically conductive. A single stray droplet landing on a motherboard trace creates a short circuit. It can also chemically react with aluminum, eating away at the heat sink base over time.
Many laptop heat sinks use aluminum fins bonded to copper vapor chambers or heat pipes. Pouring liquid metal into that system risks corroding the aluminum interfaces and causing leaks that spread across the board.
Use liquid metal only if your laptop has a pure copper cold plate and you're experienced with handling it. For everyone else, high-quality pastes like Arctic MX-6 or Thermal Grizzly Kryonaut deliver excellent results without the corrosion and conductivity risks. Kryonaut is non-conductive and safe on all metals, making it the better choice for most gaming laptops.
Ignoring the Problem Until Throttling Ruins Your Gameplay
Some users accept 95°C as "just how gaming laptops are." They shrug it off and keep playing. This attitude has real consequences beyond uncomfortable keyboard temperatures.
When a CPU throttles repeatedly during gaming sessions, it doesn't just reduce your frame rate. The thermal cycling itself, heating up to 95°C and cooling back down, puts mechanical stress on solder joints connecting the CPU to the motherboard. Over months and years, this expansion and contraction can crack micro-solder connections, leading to intermittent failures that are expensive or impossible to repair.
Sustained high temperatures also degrade nearby components. Capacitors near the VRM (voltage regulator module) have a rated temperature lifespan. Every 10°C above their rated operating temperature roughly halves their expected life.
Your CPU might survive, but the capacitors feeding it power may not.
There's also the performance tax. A throttled CPU running at 95°C might drop from 4.5 GHz boost clocks down to 3.0 GHz or lower. That's not a minor stutter.
That's a 30 percent performance loss during the exact moments you need it most. Fixing the root cause early protects both your hardware longevity and your gaming experience.
Overtightening Screws During Disassembly
Opening a laptop requires care, especially with the screws securing the heat sink. These screws thread into small standoff pillars on the motherboard. Apply too much torque and you strip the threads, crack the standoff, or warp the heat sink contact surface.
Each of these outcomes makes repasting harder or impossible. A stripped screw hole means you can't properly secure the heatsink, so thermal contact becomes uneven. A warped heat sink base won't sit flat against the CPU die, leaving gaps that defeat the purpose of fresh thermal paste.
Use a properly sized screwdriver. Apply gentle, steady pressure. Stop as soon as you feel resistance.
The screws on gaming laptop heat sinks typically require only light finger-tight force plus a small additional turn. If a screw won't budge, don't force it. Check for hidden clips or adhesive before applying more torque.
If you're dealing with multiple hardware quirks on your laptop, our guide on fixing USB-C DisplayPort issues covers another common problem area that sometimes appears alongside thermal issues in older machines.
Costs, Tools, and Time Investment for Each Fix
Understanding the real cost of each solution helps you prioritize. Some fixes are free and take minutes. Others require a small investment in tools and parts.
A few cost more if you choose professional service. Here's the full breakdown.
Budget DIY Fixes ($0–$30)
These solutions cost almost nothing and require minimal tool investment:
| Fix | Material Cost | Tool Cost | Time Required |
|---|---|---|---|
| Close background processes | $0 | $0 | 5–15 minutes |
| Adjust power plan settings | $0 | $0 | 2–5 minutes |
| Reposition laptop for airflow | $0 | $0 | 1 minute |
| Enable undervolting | $0 | $0 | 30–60 minutes (testing) |
| Compressed air cleaning | $5–10 | $0 | 10–20 minutes |
| Adjust in-game graphics settings | $0 | $0 | 10–20 minutes |
| Cap framerate in-game | $0 | $0 | 5–10 minutes |
The total cost for all budget fixes combined is under $10 if you already own a Phillips screwdriver. These should always be your first line of defense because they're reversible, risk-free, and often surprisingly effective.
Mid-Range Upgrades ($30–$80)
Once basic fixes don't solve the problem, these interventions require a modest investment:
| Fix | Material Cost | Tool Cost | Time Required |
|---|---|---|---|
| Thermal paste repaste (Arctic MX-4) | $8–12 | $0 (if you own screwdrivers) | 45–90 minutes |
| Thermal paste repaste (Kryonaut) | $12–18 | $0 (if you own screwdrivers) | 45–90 minutes |
| Laptop cooling pad | $15–60 | $0 | 2 minutes setup |
| Replacement laptop fan | $10–25 | $0 (if you own screwdrivers) | 30–60 minutes |
| Isopropyl alcohol + lint-free cloths | $5–8 | $0 | Part of repaste process |
A full repaste with quality materials and a decent cooling pad comes to roughly $30 to $50 total. The time investment is the bigger factor. Opening a laptop for the first time takes longer as you work carefully through each step.
Familiarity cuts that time significantly.
Professional Servicing Costs
If you'd rather not open your own laptop, professional repair shops offer cleaning and repasting services:
| Service | Typical Cost Range | Turnaround Time |
|---|---|---|
| Internal dust cleaning only | $30–50 | Same day |
| Full cleaning and thermal paste replacement | $50–100 | Same day to 2 days |
| Fan replacement + cleaning + repaste | $75–150 | 1–3 days |
| Comprehensive thermal overhaul (both CPU and GPU) | $100–200 | 1–3 days |
Prices vary by region and shop. Major brand service centers (Dell, HP, Lenovo authorized repairs) tend to be on the higher end. Independent repair shops often charge less and may use better thermal compounds than the factory originals.
Always ask what brand of thermal paste they use before authorizing the work. Some budget shops still apply cheap factory-grade paste that will degrade within a year.
Time Estimates for Each Solution
Here's a realistic timeline if you're doing everything yourself, from simplest to most involved:
- Software cleanup and settings adjustments: 15, 30 minutes total
- Compressed air vent cleaning: 15, 20 minutes
- Deep internal cleaning with disassembly: 45, 75 minutes
- Full CPU repaste: 60, 90 minutes (includes disassembly, cleaning, reassembly, and testing)
- Repaste plus fan inspection/replacement: 90, 120 minutes
- Complete thermal overhaul including GPU repaste: 2, 3 hours
Planning an afternoon block for a full repaste job is wise. Rushing the process increases the risk of stripping screws, damaging clips, or applying thermal paste incorrectly. Take your time, work methodically, and verify each step before moving forward.
If you're considering whether to invest in a new machine versus repairing your current one, reading about the best budget gaming laptops under $500 can help you compare the cost of repairs against the price of a solid upgrade. Sometimes the math works out in favor of replacing, especially on older machines where multiple components are degrading simultaneously.
Frequently Asked Questions
Is 95°C Going to Destroy My Laptop?
No, 95°C won't immediately destroy your laptop. Modern CPUs have a maximum junction temperature around 100°C and will throttle heavily before reaching that point. However, sustained operation at 95°C accelerates component aging, reduces CPU boost clock availability, and stresses nearby motherboard components.
Think of it as chronic damage rather than instant failure. Fixing the root cause now prevents long-term reliability problems later.
Will Repasting My Laptop Void the Warranty?
It depends entirely on your manufacturer's warranty terms. Some brands explicitly void warranties if the bottom panel is removed or if thermal paste is tampered with. Others don't care as long as no physical damage occurs during the process.
Check your warranty documentation or contact the manufacturer before opening your unit. If your laptop is still under warranty, consider having an authorized service center perform the repaste instead. This preserves your warranty while still delivering improved cooling performance.
Why Does My Laptop Get Hot at Idle But Cool Under Load?
This usually points to a software issue rather than a hardware problem. If your idle temperatures are unusually high (above 60, 65°C on an empty desktop), something is keeping the CPU busy even when you're not doing anything visible. Background update services, Windows search indexing, or a misbehaving driver can cause this pattern.
Run a Task Manager scan at idle and sort by CPU usage to identify the culprit. Legitimate hardware issues typically show low idle temps with high load temps, not the reverse.
Can I Use Ice Packs or Cold Air to Cool My Laptop?
Don't use ice packs directly on your laptop. Condensation forms when cold surfaces meet warm humid air, and that moisture can short-circuit internal components. Blow cold air from a room air conditioner or a desk fan instead.
These provide steady ambient cooling without the condensation risk. A small USB desk fan pointed at the exhaust vent can also help disperse hot air away from the intake area, improving your overall cooling loop without introducing moisture danger.
Why Do Some Laptops Run Hotter Than Others With the Same Specs?
Thermal performance depends on the cooling solution, not just the CPU model. Two laptops with identical processors can have very different temperatures because of differences in heat pipe count, fan size, heatsink fin density, chassis airflow design, and thermal paste quality. Manufacturers also tune power limits differently.
One brand might allow its CPU to draw 45 watts while another limits the same chip to 35 watts. The higher-wattage laptop runs hotter but may deliver slightly better performance. Thermal design choices matter more than raw specs when it comes to temperature.
Should I Buy a New Laptop Because of Overheating?
Not necessarily. Most overheating issues are fixable with cleaning, repasting, undervolting, and airflow improvements. Only consider a replacement if your laptop has a genuinely inadequate cooling design for the CPU it contains, or if a component like the fan or motherboard is failing and repair costs approach the price of a new machine.
For a laptop that's 2 to 4 years old, investing $30 to $50 in maintenance and optimization usually extends its usable life significantly. Replacement makes more sense for machines older than 5 years where multiple components show signs of wear.
Final Checklist: What to Do First, Second, and Third
You now know the full diagnostic path from software checks to hardware interventions. When you're facing a 95°C spike mid-game, here's the exact order to follow so you don't waste time on the wrong fix.
The 10-Minute Quick Fix Routine
Start here before touching any tools or settings. This catches the most common and easiest-to-resolve issues:
- Open Task Manager and kill any process using more than 5% CPU at idle
- Switch your Windows power plan to Balanced or Power Saver
- Move your laptop to a hard, flat surface with clear vent access
- Close unnecessary browser tabs and disable background recording overlays
- Check your room temperature and improve ventilation if the space is warm
If your temperatures drop below 90°C after these changes, you're done. Save the settings and enjoy cooler gaming.
The 1-Hour Deep Clean and Repaste Plan
If the quick routine didn't bring temps down enough, move to the deeper interventions:
- Download HWInfo64 and run a 15-minute stress test to establish baseline temps
- Blast intake and exhaust vents with compressed air using short bursts
- Open the laptop and clean dust from fan blades and heat sink fins manually
- Remove the heat sink, clean old thermal paste with isopropyl alcohol, and apply fresh paste
- Reassemble carefully and run another stress test to measure improvement
- If temps are still high, enable undervolting through Intel XTU or ThrottleStop
- Test stability at each undervolt increment before locking in your final setting
This sequence addresses the most likely causes in order of impact. Dust cleaning alone often drops temps by 5 to 10 degrees. Adding a proper repaste can push another 5 to 10 degrees off the peak.
Undervolting typically adds another 3 to 8 degrees of reduction on top of that.
When to Stop Trying and Take It to a Professional
Know when further DIY efforts aren't worth the risk. Stop and seek professional help if:
- Your fan makes grinding or clicking noises even after cleaning
- Temperatures remain at 95°C+ after a complete repaste, deep clean, and undervolt
- You notice burned smells, discoloration near the heat sink, or swollen capacitors
- The laptop shuts down randomly even at moderate load temperatures
- You're uncomfortable opening the chassis or handling thermal compound
A qualified repair technician can diagnose fan failures, motherboard-level thermal issues, and sensor problems that are beyond typical user repair. The $50 to $100 service cost is usually far less than replacing a damaged motherboard.
If you've gone through all these steps and your laptop still runs hot, it might be worth reviewing what to expect from the best budget gaming laptop processor choices. Understanding the thermal characteristics of different CPU generations can help you set realistic expectations for your current machine and inform future upgrade decisions.