Ever plugged in a shiny new graphics card only to stare at a black screen? You’re not alone. Figuring out what is a pcie compatibility issue in a gaming pc can feel like solving a riddle with missing pieces.
It’s rarely just one thing going wrong. Usually, it’s a mix of physical space, electrical lanes, or software settings fighting each other.
Most users assume that if the slot fits, everything works. But modern motherboards share resources heavily. A single M.2 drive might steal bandwidth from your GPU slot without warning.
As of 2026, these hidden conflicts remain the top cause of failed builds. Let’s break down exactly where things go sideways and how to fix them step by step.
what is a pcie compatibility issue in a gaming pc
A PCIe compatibility issue occurs when hardware fails to communicate correctly over the PCI Express bus. This happens due to physical size mismatches, shared lane conflicts, or firmware errors. The result is reduced performance, system instability, or a failure to boot.
The Three Types of PCIe Compatibility Failures You’re Likely Facing
Think of PCIe issues falling into three distinct buckets. Knowing which bucket you’re in saves hours of troubleshooting. First, there are physical clearance problems.
These happen when components literally don’t fit together. Second, we have electrical lane sharing conflicts. This is where the motherboard splits its limited data pathways among too many devices.
Third, there are firmware negotiation failures. These occur when the BIOS or UEFI struggles to agree on speeds with the installed hardware.
Physical issues are obvious but frustrating. If your triple-fan GPU hits your RAM heatsink, you have a clearance problem. Electrical issues are sneaky.
Your PC boots fine, but your SSD slows down whenever you game. That’s lane starvation. Firmware issues are the trickiest.
They often manifest as random crashes or "Code 43" errors in Device Manager after a driver update.
We need to tackle these in order. Start with the physical. Then check the wiring.
Finally, look at the software. Skipping steps leads to wasted time. For instance, updating drivers won’t help if the card isn’t seated properly.
And reseating the card won’t fix a bandwidth bottleneck caused by a crowded chipset.
Physical Clearance vs. Electrical Lane Sharing vs. Firmware Negotiation
Let’s define these terms clearly so you know what to look for. Physical clearance refers to the millimeter-perfect alignment of components within your case. It involves the GPU length, cooler height, and cable routing space.
Electrical lane sharing describes how the CPU and chipset distribute their finite number of data paths. Think of it like water pressure in pipes. Too many taps open, and the flow drops.
Firmware negotiation is the handshake protocol between your motherboard’s BIOS and the device’s controller. If they disagree on voltage or timing, the connection fails.
In our research, most beginner builders encounter physical issues first. Intermediate users stumble on lane sharing. Advanced enthusiasts face firmware quirks with overclocking or exotic hardware combinations.
Identifying your experience level helps predict the likely culprit. Don’t let fear stop you. Each type has a straightforward diagnostic path.
We’ll walk through them one by one.
Step 1: Rule Out the Obvious – Will It Actually Fit in Your Case?
Before diving into complex BIOS menus, grab a tape measure. This sounds basic, but it solves more headaches than any software tweak. Manufacturers list GPU dimensions in millimeters.
Your case specs list maximum supported lengths. Compare these numbers strictly. Do not rely on reviews saying "it fits." Cases vary even within the same model year.
Start by measuring your current setup. If you’re building from scratch, measure the empty chassis. Note the distance from the rear PCIe slot bracket to the front fan mount or drive cage.
This is your absolute limit. Now, check the GPU box. Look for "Max Length." Subtract at least 5mm for safety.
Cables need room to breathe behind the tray.
Height matters too. Some low-profile cases restrict vertical space. Ensure your GPU cooler doesn’t hit the side panel glass.
Also, check RAM clearance. Tall memory heatsinks often clash with large air coolers or wide GPU shrouds. If you’re planning a custom loop, account for tube bending radius near the motherboard edge.
Measuring GPU Length, Height, and Cooler Width Against Chassis Specs
Use this quick checklist before buying anything. Write down the numbers. Keep them handy during assembly.
| Component | Measurement Needed | Critical Constraint |
|---|---|---|
| GPU | Total Length (mm) | Distance from rear I/O to front obstruction |
| GPU | Cooler Height (mm) | Side panel clearance + 2mm buffer |
| RAM | Heatsink Height (mm) | Space under CPU cooler fan/shroud |
| PSU Cables | Connector Bulk (mm) | Room behind motherboard tray for routing |
If your GPU is 330mm long and your case supports 320mm, it won’t fit. Period. No amount of BIOS tweaking changes physics.
Sometimes, removing a front intake fan gains those crucial few millimeters. But weigh that against thermal performance. A hotter GPU throttles faster than a slightly cramped one.
See our guide on keeping airflow optimal to balance space and cooling.
Also, consider the power connectors. Newer GPUs use 12VHPWR adapters. These bricks are bulky.
They need space to hang freely without stressing the socket. If your case has tight cable management channels, the adapter might block access to nearby screws. Plan your cable routing early.
Check if your PSU cables are modular. Non-modular cables add clutter that eats up valuable internal volume.
Don’t forget expansion cards. If you plan to install a sound card or capture card later, ensure adjacent slots aren’t blocked by the GPU’s backplate. Many modern GPUs cover two or three slots.
Verify your motherboard layout supports your future upgrades. This foresight prevents painful disassembly months down the line.
Step 2: Check the Motherboard Block Diagram for Hidden Lane Conflicts
This is where most people get stuck. They plug everything in, and suddenly performance tanks. Or worse, a drive disappears entirely.
The culprit is usually shared PCIe lanes. Modern CPUs provide direct lanes to the primary GPU slot and sometimes an M.2 slot. The rest come from the chipset.
When you populate certain ports, the motherboard disables others automatically.
You must consult the manual. Not the website summary. The actual PDF manual.
Look for the "Block Diagram" or "PCIe Configuration" section. It shows a map of connections. Find your specific motherboard model.
Manuals differ even between revisions of the same board. Download the latest version from the manufacturer’s support page.
Identify which M.2 slots share bandwidth with the x16 GPU slot. On many boards, using M.2_2 disables SATA ports 5-8. Using M.2_1 might disable the secondary x16 slot.
Crucially, some high-end boards allow full x16 speed regardless of storage usage. Budget and mid-range boards rarely do. Assume conflict until proven otherwise.
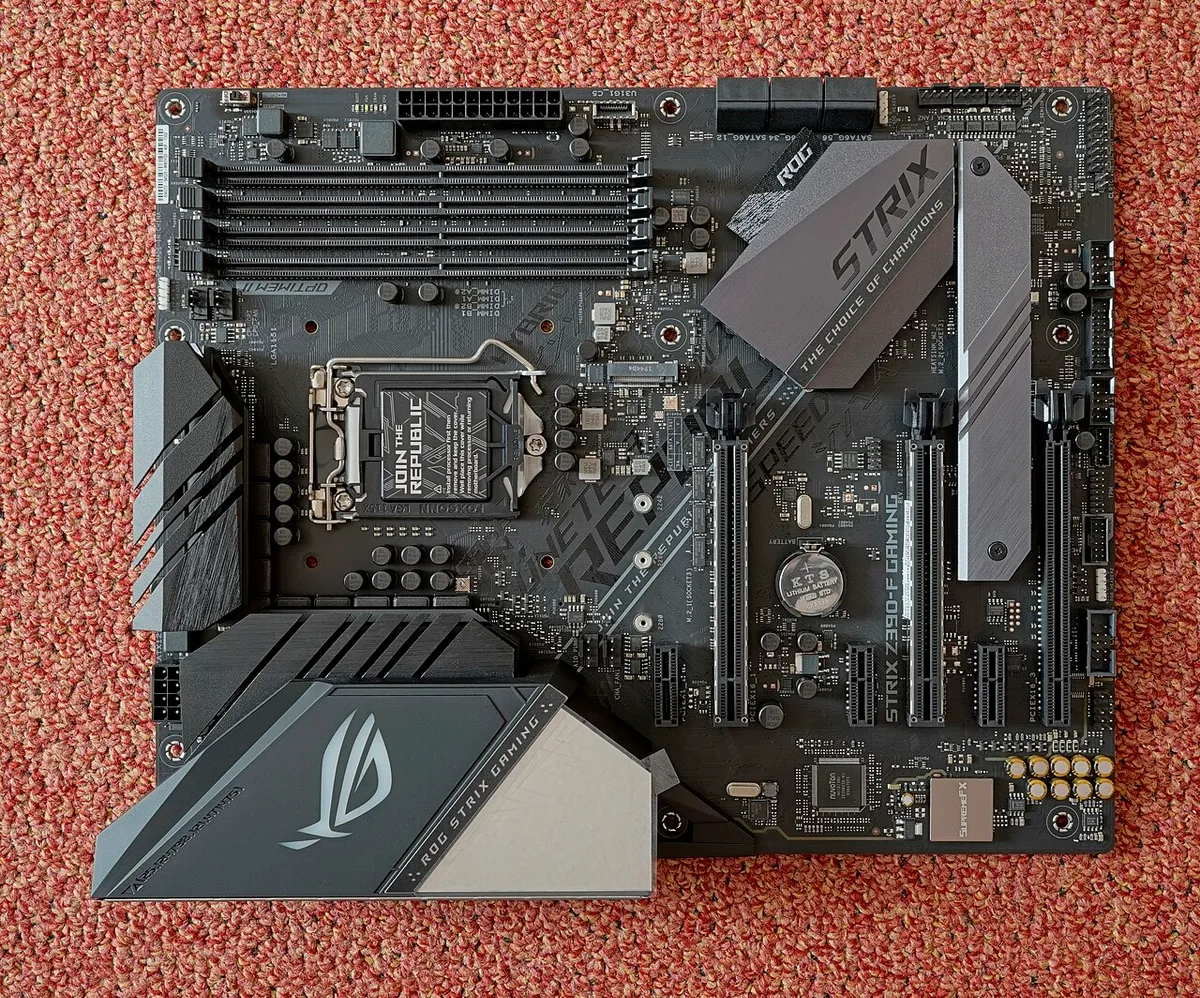
Image source: Wikimedia Commons / PantheraLeo1359531 (CC BY)
Identifying Which M.2 Slots Disable Specific PCIe x16 Lanes
Here’s how to read the diagram effectively. Trace the lines from the CPU to the slots. Lines labeled "Direct" mean no chipset involvement.
These offer the lowest latency. Lines passing through the "Chipset" hub introduce slight delays and share total bandwidth.
For example, an Intel Z790 board might route the primary GPU slot directly from the CPU. It may also route the top M.2 slot directly. However, the bottom M.2 slot connects via the chipset.
If you fill both direct slots, you’re fine. But if you add a third NVMe drive to a chipset-connected slot, watch your SATA ports. They might vanish from BIOS view.
AMD platforms behave similarly. Ryzen 7000 series chips provide 24 lanes. Five go to the chipset.
Sixteen go to the GPU. Two go to a dedicated M.2 slot. The remaining one handles miscellaneous tasks.
If you use a Gen 5 SSD in the dedicated slot, it consumes those two lanes. Ensure your GPU still gets all sixteen. Most boards handle this gracefully, but cheaper X670E variants might bifurcate the GPU slot to x8 if overloaded.
Always prioritize the GPU slot. If forced to choose, leave secondary expansion slots empty rather than starving the graphics card. Gaming relies heavily on GPU bandwidth.
Storage benefits less from marginal lane increases. Use SATA SSDs for bulk storage if M.2 slots cause conflicts. This frees up precious PCIe lanes for your video card.
For more details on component pairing, review our tips on checking GPU and motherboard fit.
Step 3: Verify CPU Generation Support for Your Desired PCIe Speed
Buying a Gen 5.0 GPU for a Gen 3.0 motherboard feels like putting racing tires on a sedan. It works, but you waste potential. PCIe generations dictate raw bandwidth per lane.
Gen 3 offers ~1 GB/s per lane. Gen 4 doubles that to ~2 GB/s. Gen 5 pushes it to ~4 GB/s.
Your CPU and motherboard chipset determine the maximum generation available.
Check your CPU specs first. Intel 11th Gen and newer support Gen 4. AMD Zen 3 and newer support Gen 4.
Only Intel 12th Gen+ and AMD Zen 4+ support Gen 5 on select models. Older CPUs cap at Gen 3. Plugging a Gen 4 card into a Gen 3 slot forces the link to negotiate down.
You lose half your theoretical bandwidth.
Does this hurt gaming? Surprisingly, not much yet. Most titles don’t saturate Gen 3 x16 bandwidth.
Aggregate benchmarks show less than 1% FPS difference in 1080p gaming. At 4K, the gap widens slightly but remains negligible for current hardware. However, productivity workloads like video editing see bigger drops.
Future-proofing matters if you keep PCs for five years.
Why a Gen 4/5 GPU Runs at Gen 3 on Older Chipsets (And When That Matters)
Backward compatibility is a feature, not a bug. PCIe standards ensure older devices work in newer slots and vice versa. The system negotiates the highest common denominator.
If your motherboard is Gen 3 and your GPU is Gen 4, the link settles at Gen 3. The GPU functions normally. Drivers recognize it.
Games run.
But beware of hybrid setups. Some budget B-series motherboards offer Gen 4 for the GPU slot but only Gen 3 for M.2 slots. Others flip this script.
Always verify per-slot capabilities. Don’t assume uniform support across the board. Manufacturer spec sheets list this explicitly.
Look for "PCIe 4.0 Ready" badges. Even then, read the fine print.
When does generation matter significantly? Consider AI workloads or heavy texture streaming. Unoptimized games with massive asset loads can stutter on Gen 3.
Gen 4 alleviates this bottleneck. Gen 5 is currently overkill for consumers. Few drives saturate Gen 4 anyway.
Wait for native Gen 5 adoption before investing heavily. For now, ensuring stable Gen 3 operation suffices for most gamers. Understand your workload needs before upgrading platforms.
Our breakdown of CPU and motherboard pairing helps clarify these generational leaps.
Step 4: Inspect BIOS Settings Before Booting Into Windows
Hardware sits idle without proper software instruction. The BIOS/UEFI controls initial handshakes. Incorrect settings here cause boot loops or unrecognized devices.
Access BIOS immediately after installation. Don’t wait for Windows to load. Press Del or F2 repeatedly during POST.
First, reset to defaults. Load Optimized Defaults. This clears old configurations conflicting with new hardware.
Save and exit. Re-enter BIOS. Now adjust specific parameters.
Locate the "Advanced" tab. Find "PCI Subsystem Settings." Here you control link speed and features.
Enable "Above 4G Decoding." This allows the OS to address memory beyond 4GB limits. Essential for multi-GPU setups or large VRAM cards. Without it, systems may crash or fail to initialize.
Next, enable "Resizable BAR" (ReBAR). This lets the CPU access entire GPU frame buffers at once. Boosts performance in supported titles by 5-10%.
Requires compatible GPU and recent drivers.
Enabling Above 4G Decoding and Resizable BAR for Modern GPUs
These two settings transform legacy behavior into modern efficiency. Above 4G Decoding prevents address space exhaustion. Resizable BAR optimizes data transfer rates.
Both require UEFI mode. Legacy BIOS (CSM) does not support them. Ensure your boot mode is set to UEFI.
Disable CSM (Compatibility Support Module) if present.
After enabling these, save changes. Boot into Windows. Install latest GPU drivers.
Open NVIDIA Control Panel or AMD Adrenalin. Check if ReBAR is active. If disabled, return to BIOS.
Verify secure boot settings. Sometimes Secure Boot interferes with unsigned firmware updates. Temporarily disable it for testing.
Re-enable afterward for security.
Watch for stability. Aggressive settings occasionally cause artifacts. If glitches appear, revert ReBAR.
Keep Above 4G enabled. It poses minimal risk. These tweaks maximize hardware potential without physical changes.
They bridge the gap between silicon capability and software execution. Neglecting them leaves free performance on the table. Treat BIOS configuration as part of the build process, not an afterthought.
Step 5: Diagnose Post-Installation Issues with Link Monitoring Tools
Assumptions kill builds. Verify reality with data. Once booted, monitor actual link status.
Windows Device Manager shows nominal info. It lacks depth. Use specialized utilities instead.
HWiNFO64 is the gold standard. It reads sensor data directly from hardware registers.
Install HWiNFO64. Run in Sensors-only mode. Scroll to the GPU section.
Look for "PCIe Link Width" and "PCIe Link Generation." Confirm it matches expectations. If you expect x16 Gen 4 but see x8 Gen 3, investigate immediately. This discrepancy indicates a fault.
Test under load. Idle states often throttle links to save power. Launch a benchmark like FurMark or 3DMark.
Watch sensors in real-time. Does width drop during stress? Intermittent drops suggest signal integrity issues.
Poor seating or dust accumulation causes this. Clean contacts gently. Reseat the card firmly.
Listen for the click.
Using HWiNFO64 to Confirm Actual Negotiated Bandwidth Under Load
Data tells the truth. Subjective feelings lie. Record baseline metrics before troubleshooting.
Note normal operating temperatures and clock speeds. Deviations highlight problems. For instance, sudden throttling correlates with overheating VRMs.
Check airflow around the GPU. Refer to our advice on managing thermal thresholds if temps spike unexpectedly.
Cross-reference with Event Viewer. Look for WHEA-Logger errors. These indicate hardware-level communication failures.
Frequent errors point to faulty risers or damaged slots. Replace suspect components systematically. Change one variable at a time.
Isolate the root cause precisely.
Finally, document findings. Screenshots prove defects for RMA claims. Manufacturers require evidence.
Clear logs accelerate support processes. Preventative monitoring catches degradation early. Dust buildup reduces contact quality over time.
Schedule periodic checks. Maintain peak performance throughout the PC’s lifespan. Vigilance pays dividends in longevity and consistency.
Common Mistakes That Turn Simple Builds into Troubleshooting Nightmares
Most PCIe issues come from small shortcuts during assembly. One common mistake is daisy-chaining GPU power cables from a single PSU rail. This can cause voltage drops when the card spikes under load.
Use separate cables when the manual recommends them. Another mistake is buying cheap PCIe riser cables. Low-quality risers often fail to maintain signal integrity at higher speeds.
They may work at Gen 3 but fail at Gen 4 or Gen 5.
Dust and poor seating also cause intermittent drops. Always push the card until the retention clip clicks. Check that the bracket screws are snug but not over-tightened.
If you see random crashes, inspect the sudden voltage dips under load before blaming the GPU. Power delivery problems often look like compatibility failures.
Daisy-Chained Power Cables, Cheap Risers, and Ignoring PSU Transients
Cheap risers are a false economy. They can corrupt data or force the link to renegotiate downward. If you need a riser for a vertical mount, buy a certified Gen 4 or Gen 5 model.
Match the riser rating to the slot speed. Do not use an old Gen 3 riser with a new Gen 4 card.
PSU transient spikes are another hidden cause. Modern GPUs can demand power in milliseconds. Older or low-quality power supplies may trip protection circuits.
This looks like a black screen or reboot. Check the PSU wattage and transient response rating. A quality unit matters more than raw wattage alone.
Quick Reference: PCIe Generation Performance Impact on Gaming FPS
Generational gains are smaller than many expect. Most current games do not saturate Gen 3 x16 bandwidth. Gen 4 helps with large texture streaming and faster load times.
Gen 5 is mainly useful for future storage and compute workloads. Use this table as a quick sanity check before upgrading.
| PCIe Generation | Bandwidth Per Lane | Typical Gaming Impact | Best For |
|---|---|---|---|
| Gen 3.0 | ~1 GB/s | Baseline for most titles | Older CPUs and budget builds |
| Gen 4.0 | ~2 GB/s | Small FPS gain at 4K | Current GPUs and fast NVMe drives |
| Gen 5.0 | ~4 GB/s | Minimal current gaming gain | Future-proofing and pro workloads |
Per PCI-SIG specifications, each generation doubles the raw transfer rate. Real-world gains depend on the game engine and asset size. If your build is stable at Gen 3, do not force an upgrade just for marketing labels.
Stability beats theoretical bandwidth.
FAQs About PCIe Compatibility in Gaming PCs
Can a Gen 4 GPU run in a Gen 3 motherboard slot?
Yes. The link negotiates down to Gen 3 automatically. Performance loss is usually small in games.
Heavy productivity workloads may see larger drops. Update the BIOS before testing.
Why does my GPU show x8 instead of x16 in HWiNFO64?
This often means lane sharing or a firmware limit. Check the motherboard manual for M.2 conflicts. Reseat the card and verify full insertion.
Some boards also drop to x8 when multiple devices are active.
Do I need Above 4G Decoding for a single gaming GPU?
Usually yes for modern cards. It helps the system address large memory spaces correctly. Enable it in BIOS under PCI settings.
Keep CSM disabled for best compatibility.
Are PCIe riser cables safe for gaming PCs?
They are safe when rated correctly. Use a riser that matches your slot generation. Avoid unshielded or uncertified cables.
Poor risers can cause signal loss and crashes.
Will a PCIe compatibility issue damage my hardware?
Most issues do not cause physical damage. They reduce performance or prevent booting. Forcing unstable BIOS settings can risk components.
Revert to defaults if crashes occur.
How do I know if my M.2 SSD is stealing GPU lanes?
Read the motherboard block diagram in the manual. Look for shared lanes between M.2 slots and the GPU. If bandwidth drops under load, test with the SSD removed.
Compare results in HWiNFO64.