Getting a balanced gaming rig isn't about throwing money at the most expensive parts. It’s about matching horsepower to your monitor’s demands. Many builders overspend on CPUs for 4K setups or starve their GPUs at 1080p.
That mismatch wastes cash and causes stuttering.
We’ve seen countless forums filled with regret over unbalanced specs. The fix is simpler than it looks. You just need a logical workflow that starts with your display.
As of 2026, resolution targets dictate component hierarchy more than ever. Let’s walk through the exact steps to get this right.
how to balance gaming pc components for a target resolution
Start by picking your GPU based on pixel count. Higher resolutions demand more video memory and raw compute power. Next, choose a CPU that feeds data fast enough to avoid bottlenecks.
At 1080p, the CPU matters more. At 4K, the GPU does the heavy lifting. Finally, match RAM speed and PSU wattage to these choices.
This ensures stability without wasted spend.
Stop Guessing: The Real Cost of a Mismatched Build
Why do so many builds feel wrong after assembly? Usually, it’s because the components weren’t chosen as a system. They were picked in isolation.
A powerful graphics card paired with an older processor creates a traffic jam. The GPU waits for instructions. Frames drop.
Input lag spikes.
Conversely, pairing a top-tier CPU with a budget GPU at high resolutions leaves potential on the table. The processor sits idle while the graphics card struggles. Both scenarios waste money.
Aggregate reviews report that bottleneck mismatches can reduce effective performance by 15-30%. That’s significant.
Think of it like a highway. Your CPU is the entry ramp. Your GPU is the main lane.
If the ramp is narrow, cars pile up before hitting the open road. If the main lane is congested, widening the ramp doesn’t help. You need proportionality.
This imbalance affects more than just average frame rates. It ruins frametime consistency. Games might show 60 FPS on average but spike down to 20 FPS during intense scenes.
That feels choppy. It breaks immersion. Competitive players notice it instantly.
Single-player enthusiasts suffer too.
We often see users upgrade one part expecting magic. They swap a GPU but keep the old CPU. Or they boost RAM capacity but ignore speed.
These partial fixes rarely solve systemic imbalances. True harmony requires planning every link in the chain. From socket compatibility to thermal headroom, everything connects.
Ignoring this leads to frustration. You’ll tweak settings endlessly. Drivers won’t fix hardware limits.
The solution isn’t software patches. It’s better initial selection. Let’s define where you’re aiming first.
Identify Your Target Resolution and Refresh Rate First
What should you prioritize when building? Start with your monitor. Not your wallet.
Not your favorite brand. Your display defines the workload. A 1080p screen asks for different hardware than a 4K panel.
Resolution determines pixel load. More pixels mean more work for the GPU. Refresh rate dictates timing pressure.
Faster refresh rates require consistent frame delivery. Miss a deadline, and you see tearing or stutter.
Here’s how these variables shift the priority:
| Target Setup | Primary Bottleneck Risk | Component Focus |
|---|---|---|
| 1080p @ 144Hz+ | CPU / Memory Latency | Fast single-core CPU, low-latency RAM |
| 1440p @ 144Hz | Balanced GPU/CPU | Mid-high tier GPU, modern multi-core CPU |
| 4K @ 60-120Hz | GPU / VRAM Capacity | Top-tier GPU, sufficient VRAM (12GB+) |
At lower resolutions, the CPU processes game logic faster relative to rendering time. The GPU finishes frames quickly. Then it waits.
The CPU becomes the limiter. You need high clock speeds and efficient architecture.
At higher resolutions, the GPU spends longer drawing each frame. The CPU has ample time to prepare commands. Here, raw graphical throughput dominates.
VRAM capacity prevents texture streaming issues.
Don’t guess your needs. Check your current monitor specs. Are you upgrading soon?
Plan for that future state. Building for today’s 1080p screen when you plan to buy 4K next year is inefficient.
Consider esports titles versus AAA games. Counter-Strike or Valorant rely heavily on CPU speed even at 1080p. Cyberpunk 2077 taxes the GPU relentlessly at any setting. Know your primary genre. It influences the balance point.
Once you lock in resolution and Hz, move to the biggest dollar item. That’s usually the graphics card. But don’t pick it blindly.
Use the pixel math we discussed.
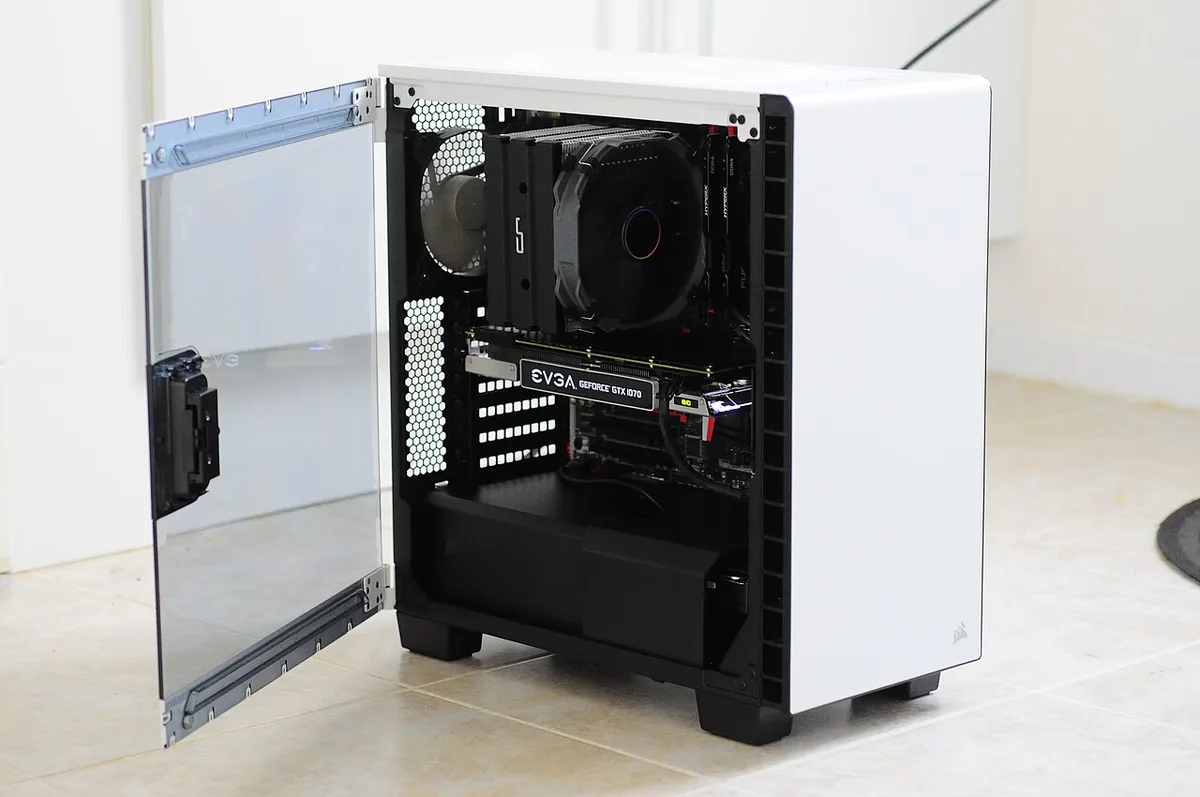
Image source: Wikimedia Commons / BornaKia (CC BY-SA)
Step 1: Lock In the GPU Based on Pixel Count
How do you select the right graphics card? Match its theoretical output to your resolution target. Don’t chase benchmarks alone.
Look at VRAM and bus width.
For 1080p, mid-range cards suffice. You don’t need flagship silicon. A card with 8GB VRAM handles textures well.
Ensure it supports modern upscaling tech like DLSS or FSR. These features extend lifespan.
At 1440p, step up significantly. This is the sweet spot for many gamers. You need stronger rasterization units. 12GB VRAM is becoming the minimum standard for comfort.
Older 8GB cards may struggle with ultra-texture packs.
4K demands brute force. Only top-tier consumer GPUs handle native 4K at high framerates. Ray tracing overhead increases here.
Prioritize RT cores if available. Otherwise, focus on pure shader performance.
Check manufacturer specifications for recommended pairings. NVIDIA and AMD provide guidance on their developer portals. NVIDIA Official Technical Documentation outlines driver optimizations per generation.
These docs highlight which cards scale best at specific resolutions.
Avoid overspeccing for low resolutions. Buying a $1,000 GPU for a 1080p 60Hz monitor is wasteful. The card will run at 20% utilization.
Save that money for better cooling or storage.
Underspeccing hurts too. A weak GPU at 4K forces low settings. You lose visual fidelity.
The experience degrades. Find the middle ground.
Look at price-per-frame metrics. Divide cost by expected FPS in your target games. This reveals value.
Sometimes last-gen flagships offer better value than new mid-rangers. Compare carefully.
Remember PCIe bandwidth. Newer cards use Gen 4 or Gen 5 interfaces. Ensure your motherboard supports them.
While backward compatible, missing lanes can throttle performance slightly. See our guide on PCIe compatibility issues for details.
With the GPU locked, turn attention to the brain of the operation. The CPU must feed this beast adequately. Neglecting this step ruins the investment.
Step 2: Pair the CPU to Prevent Bottlenecks at Lower Resolutions
Which processor matches your GPU? It depends entirely on resolution. At 4K, almost any modern six-core chip works.
The GPU takes the lead. At 1080p, the CPU drives the car.
High-refresh competitive play amplifies this effect. Running 240Hz at 1080p stresses the CPU severely. Game physics, AI, and draw calls happen on the processor.
Slow single-thread performance caps your framerate.
Intel and AMD both offer strong options. Recent architectures emphasize IPC improvements. Look for models with robust cache sizes.
L3 cache helps store frequently accessed data. Reducing latency boosts smoothness.
Don’t assume more cores equal better gaming. Eight cores are plenty for most titles. Twelve or sixteen help productivity tasks.
For pure gaming, frequency and architecture matter more. Check independent benchmark databases for verified results.
Pairing a Ryzen 7 with an RTX 4090 at 1080p makes sense. Pairing an i3 with the same GPU creates a severe bottleneck. The disparity widens at lower resolutions.
Use online tools cautiously. "Bottleneck calculators" often mislead. They rely on static averages.
Real-world variance differs by title. Instead, read detailed technical analyses from trusted engineering sources. Our article on avoiding GPU bottlenecks explains dynamic load balancing.
Ensure socket compatibility. AM5 and LGA 1700 represent current platforms. Future upgrades depend on chipset longevity.
Verify BIOS support before purchase. Some boards need updates to recognize newer chips. Learn how BIOS version impacts compatibility.
Thermal design plays a role here. High-end CPUs generate heat. Under sustained loads, throttling reduces clocks.
This mimics a bottleneck. Invest in adequate cooling. Air towers or AIO liquid coolers keep frequencies stable.
Balance isn’t just electrical. It’s thermal too. A hot CPU slows down.
A cold GPU runs faster. Manage both environments equally.
Next, address the supporting cast. Memory and power supply keep the system alive. Ignore them at your peril.
Step 3: Size RAM, Storage, and PSU for Stability
What else balances a build? Random Access Memory and Power Delivery. People overlook these until crashes occur.
Then it’s too late.
RAM speed affects CPU-bound scenarios. At 1080p, slow memory hinders frame times. Aim for DDR5 kits rated 6000MT/s or higher.
CL30 or CL32 latencies are ideal. Check your motherboard’s Qualified Vendor List (QVL). Not all sticks work seamlessly.
Read about motherboard QVL memory lists to ensure stability.
Capacity matters less than speed for gaming. 16GB remains sufficient for most titles. 32GB offers headroom for multitasking or heavy mods. Background apps consume resources. Close them during play for best results.
Storage speed impacts loading times. NVMe SSDs eliminate asset streaming stalls. Ensure your board supports Gen 4 or Gen 5 drives.
SATA connections bottleneck large file transfers. Verify NVMe support beforehand.
Now, consider the Power Supply Unit (PSU). Undersizing causes shutdowns under peak load. Transient spikes exceed rated wattage momentarily.
A quality unit handles these bursts gracefully.
Calculate total system TDP. Add GPU and CPU maximums. Include peripherals.
Multiply by 1.5 for safety margin. This covers aging capacitors and inefficiencies. Gold certification minimizes waste heat.
Do not cheap out here. Bad PSUs damage other components. Voltage ripples degrade electronics over time.
Stick to reputable brands with long warranties. Manufacturer specs confirm reliability ratings.
Cooling solutions tie into power efficiency. Fans draw minimal energy. Pumps add slight load.
Account for them in calculations. Proper airflow maintains component longevity. Dust accumulation raises temperatures.
Regular cleaning preserves performance. See tips on cleaning cooling components.
Case clearance affects installation ease. Large GPUs and tall coolers compete for space. Measure dimensions before buying.
Avoid forcing parts into tight spots. Stress damages connectors.
These elements form the foundation. Together, they support the core processing units. Get them right, and the system sings.
Get them wrong, and it stumbles.
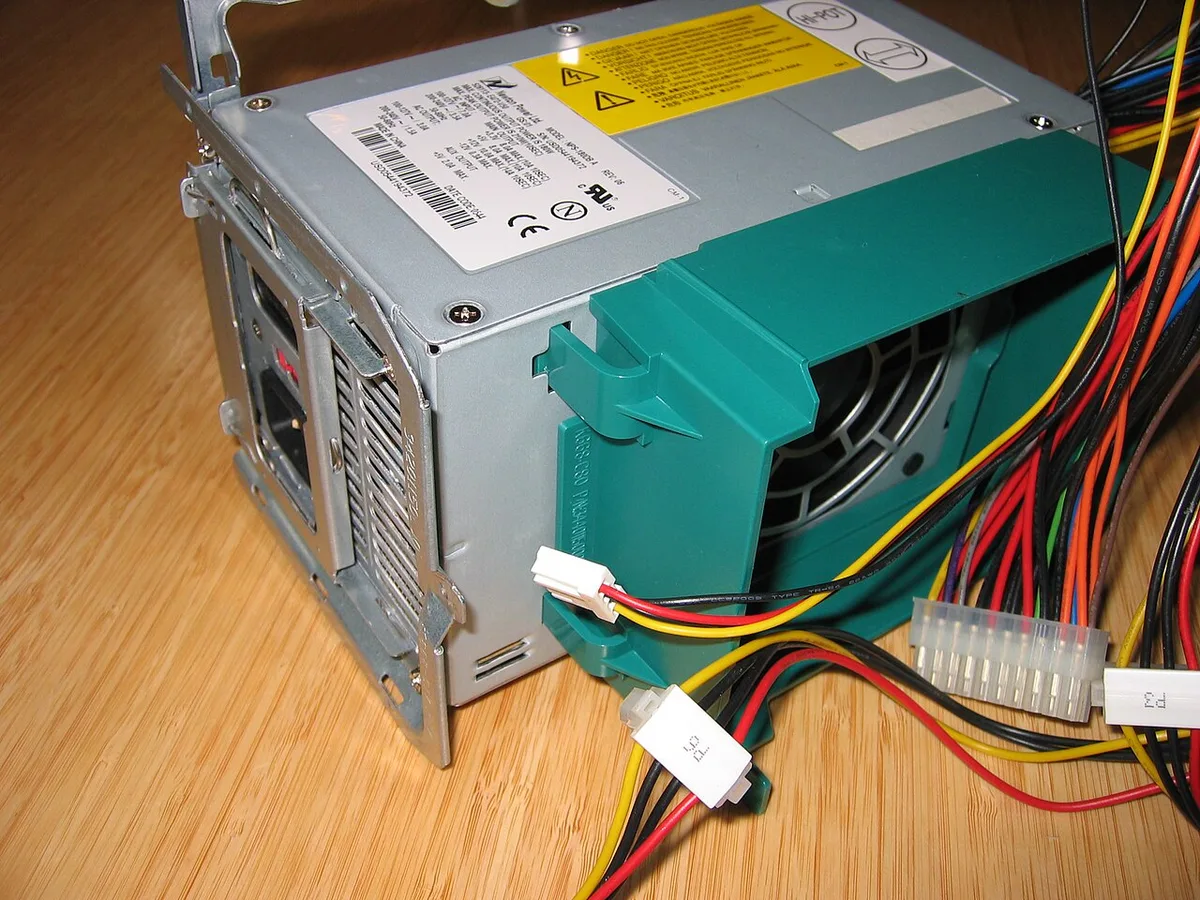
Image source: Wikimedia Commons / Hans Haase (CC BY-SA)
The 1080p vs. 1440p vs. 4K Decision Matrix
Which resolution gives you the best bang for your buck? It depends on where your budget sits and what games you play. We’ve mapped out three distinct tiers to simplify this choice.
Each tier has specific hardware requirements that differ significantly from the others.
At 1080p, you’re looking at a CPU-centric build. The goal is high frame rates for competitive advantage. You don’t need massive VRAM.
A mid-range GPU with 8GB or 12GB suffices. Focus spending on a fast processor with strong single-core performance. This setup excels in esports titles like Fortnite or Apex Legends.
Move up to 1440p, and the balance shifts. This is often called the "sweet spot." It offers sharper visuals without crushing your wallet. Here, the GPU takes precedence again.
You’ll want 12GB to 16GB of VRAM. Pair it with a solid mid-to-high-end CPU. The difference in clarity over 1080p is noticeable.
Yet, it doesn’t demand the extreme power of 4K.
Finally, there’s 4K UHD. This tier is purely GPU-driven. Pixel count quadruples compared to 1080p.
Your graphics card must handle immense rasterization loads. VRAM becomes critical; 16GB is the practical minimum today. Upgrading your CPU yields diminishing returns here.
Spend heavily on the graphics subsystem instead.
Consider these factors when choosing your target:
- Monitor Cost: High-refresh 4K panels remain expensive.
- Game Support: Not all titles optimize well for native 4K.
- Upscaling Tech: DLSS and FSR make higher resolutions viable on weaker hardware.
If you stick to older monitors, upgrading components won’t help visually. Match your internal specs to your external display capabilities. Don’t buy a Ferrari engine for a bicycle chassis.
Conversely, don’t starve a sports car with small tires.
Our research indicates that most users find 1440p provides the longest relevance. It bridges the gap between accessibility and fidelity. However, if you prioritize competitive ranking, 1080p remains king.
For cinematic immersion, 4K delivers unmatched detail. Choose based on your primary gaming identity.

Image source: Wikimedia Commons / Unknown authorUnknown author
Common Pitfalls That Waste Money or Cause Stutters
What mistakes do builders make most often? Several recurring errors plague even experienced enthusiasts. Identifying them early saves both cash and headaches.
These aren’t just minor annoyances. They fundamentally undermine system stability and performance.
First, ignoring thermal constraints is a major issue. Many pack high-TDP components into cramped cases. Heat builds up rapidly.
Components throttle their speeds to protect themselves. This creates unpredictable frame drops. Always check cooler height clearance before purchasing.
Verify case airflow paths too. Poor ventilation negates expensive hardware investments.
Second, mismatched RAM profiles cause instability. Users enable XMP or EXPO settings incorrectly. Or they mix kits from different manufacturers.
This leads to boot failures or random crashes. Stick to validated memory lists provided by motherboard vendors. If unsure, consult resources on checking RAM compatibility.
Consistency matters more than raw speed sometimes.
Third, undersizing the power supply unit remains common. Builders calculate average load but forget transient spikes. Modern GPUs draw sudden bursts of power.
A marginal PSU trips its protection circuits. The system shuts down unexpectedly during intense scenes. Buy a unit with at least 20% headroom above calculated needs.
Quality brands matter here. Cheap units lack proper regulation components.
Fourth, overlooking PCIe lane allocation hurts multi-GPU or NVMe setups. Some motherboards share lanes between slots. Adding a second drive might reduce GPU bandwidth.
While rare in modern consumer boards, it still happens. Check manual diagrams carefully. Ensure your primary slot runs at x16.
Secondary devices shouldn’t interfere with critical data transfer.
Fifth, assuming future-proofing means buying top-tier now. Technology moves fast. Flagship parts depreciate quickly.
Buying last-gen high-end gear often makes more sense. You get similar performance for half the price. Wait for sales cycles.
Timing purchases around new releases can save hundreds. Don’t pay premium prices for launch hype unless necessary.
Avoiding these traps requires diligence. Research every part individually. Cross-reference specifications.
Ask community forums about known issues. Preparation prevents regret later.
Pro Tips for Future-Proofing Without Overspending
How do you stay relevant longer without breaking the bank? Strategic planning beats brute-force spending every time. There are smart ways to extend hardware life.
These tactics maximize value while minimizing immediate costs.
Start by prioritizing upgradeable platforms. Choose chipsets that support next-generation CPUs. AM5 and LGA 1700 offer varying degrees of longevity.
Check manufacturer roadmaps. Knowing which socket lasts longer helps decisions. Avoid proprietary connectors if possible.
Standard ATX forms allow easier swaps later.
Invest in modular PSUs. These cables detach easily. When you replace your GPU, you likely keep the same PSU.
Modular designs reduce clutter inside the case. Better airflow results from tidier wiring. Look for 80 Plus Gold ratings as a baseline.
Platinum offers efficiency gains but costs more. Balance cost against electricity bills.
Focus on cooling infrastructure first. Good fans and heatsinks last years. Swap them rarely.
Buy quality air coolers or robust AIOs initially. They handle heat dissipation efficiently. This protects sensitive silicon from degradation.
Dust filters prevent clogging. Clean them regularly to maintain static pressure. See our guide on reducing temps effectively for more insights.
RAM capacity is another area for foresight. Start with 32GB if budget allows. Games increasingly use more memory.
Background apps consume resources too. Having spare slots lets you add sticks later. Dual-channel configurations double bandwidth.
Fill two slots evenly for best results. Speed matters less than dual-channel operation for general use.
Storage strategy impacts long-term satisfaction. Use an NVMe SSD for OS and active games. Keep secondary storage for archives.
Gen 4 drives offer great speed per dollar. Gen 5 exists but generates excessive heat currently. Wait for maturation before adopting newest standards.
Capacity grows cheaper yearly. Buy what you need now plus 20% extra.
Don’t neglect BIOS updates. Manufacturers fix bugs and improve compatibility via firmware. Regular checks ensure smooth operation.
Enable Above 4G Decoding for large VRAM usage. Adjust fan curves for noise control. Small tweaks yield big comfort improvements.
Treat software maintenance as seriously as hardware selection.
These steps create a resilient system. You adapt to changing demands without total rebuilds. Smart choices today pay dividends tomorrow.
Frequently Asked Questions About Component Balance
Does a stronger CPU always improve gaming performance?
No. At high resolutions like 4K, the GPU limits performance mostly. A stronger CPU adds little benefit there.
However, at 1080p with high refresh rates, CPU power matters greatly. Game logic and physics run on the processor. So context determines necessity.
Match CPU strength to your resolution target specifically.
How much VRAM do I really need for 1440p gaming?
12GB serves as the comfortable minimum for modern AAA titles. Older games run fine on 8GB. But texture packs and ray tracing increase demand. 16GB provides better headroom for future releases.
Aggregate reviews suggest 12GB balances cost and capability well. Going below risks stuttering in newer environments. Consider game library preferences when deciding.
Can I reuse my old PSU with a new GPU?
Sometimes yes, but check wattage and connectors carefully. Newer cards may require different cable types. Ensure total system draw stays within limits.
Transient spikes can trip protections on aging units. If your current PSU lacks 80 Plus certification, consider replacing it. Safety outweighs savings here.
Verify pinouts match your new hardware requirements strictly.
Is DDR5 worth the price over DDR4 yet?
For new builds in 2026, DDR5 is recommended. Motherboard support is widespread now. Prices have stabilized closer to DDR4 levels.
Performance gains appear primarily in CPU-bound scenarios. At 4K, differences shrink noticeably. Still, forward compatibility favors DDR5.
It handles higher frequencies better. Check your motherboard QVL list before committing to either standard type.