Learning how to install a graphics card in a gaming pc is mostly about patience, fit, and visual checks. The card must sit fully in the PCIe x16 slot, lock in place, and get the right power. Rushing any of those steps can bend pins, crack a slot, or leave you with no display.
Manufacturer specifications indicate that most modern GPUs need a PCIe x16 slot, a compatible power supply, and enough case clearance. As of 2026, many mid-range cards still use standard 8-pin PCIe connectors, while newer high-end models may use 12VHPWR or 12V-2×6. Check your exact card and power supply before you buy or install.
how to install a graphics card in a gaming pc
How to install a graphics card in a gaming pc starts with power off. Unplug the system and ground yourself. Seat the card firmly in the top PCIe x16 slot.
Connect PCIe power, then boot and install drivers.
Why Installing a GPU Is More Visual Than It Looks
A graphics card install looks simple until you are holding a heavy card over a tiny latch. The real work is visual. You are checking alignment, slot position, cable direction, and clearance all at once.
Photos help because the important details are small. The PCIe slot latch sits at the end of the slot, not always in plain sight. The retention screw hole must line up with the case bracket.
The power connector may need a straight cable path, not a sharp bend.
In our research, the most common beginner errors are not electrical. They are physical. The card is half seated, the latch is not clicked, or the display cable goes into the motherboard instead of the GPU.
A quick visual check before power-on prevents most of these.
If you are building from scratch, follow the correct assembly order so the GPU goes in after the CPU, cooler, and RAM are already secure. You can read more about that in the right build sequence.
What You Need Before You Open the Case
Preparation saves time and protects parts. Clear the desk, remove jewelry, and work on a hard surface. A clean static-safe work area matters more than fancy tools.
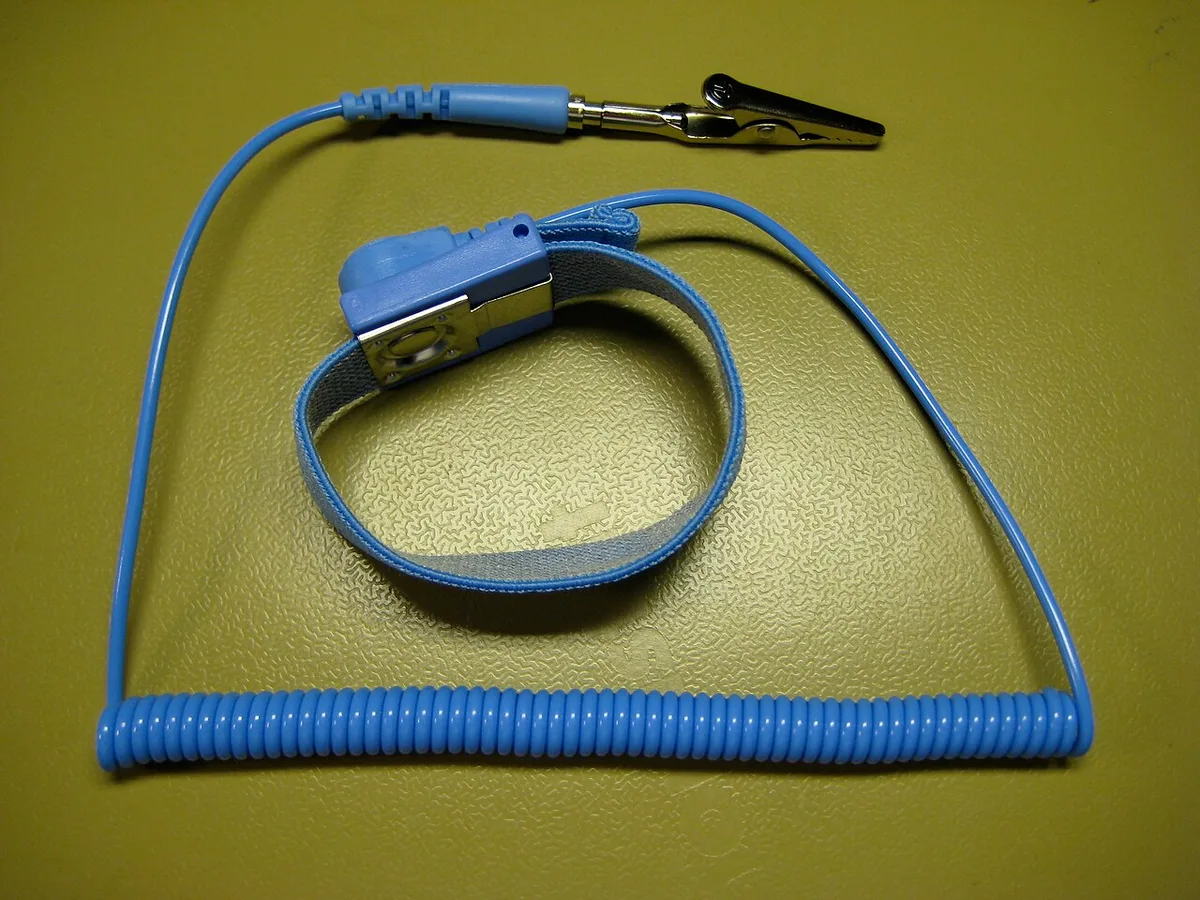
Image source: Wikimedia Commons / Kms (CC BY)
Image source: Wikimedia Commons / Multicherry (CC BY-SA)
| Item | Why It Matters | Practical Note |
|---|---|---|
| Phillips screwdriver | Removes case and slot screws | Magnetic tips help small screws |
| Anti-static strap or mat | Reduces ESD risk | Clip to bare metal on the case |
| GPU retention screw | Locks the card to the case | Keep the spare in the motherboard box |
| PCIe power cables | Feeds the GPU | Match 6-pin, 8-pin, or 12VHPWR |
| Display cable | Connects GPU to monitor | Use DisplayPort or HDMI as needed |
Check your fit and clearance checks before opening the box. A card that is too long can hit the front fan or radiator. A case with no vertical clearance can scrape the side panel.
Also confirm PSU wattage headroom. A 650W supply may be fine for a 250W card, but a 450W supply may not. Leave margin for CPU spikes and future upgrades.
The Step-by-Step Install (With Visual Cues)
Work slowly and let each step click or seat before moving on.
- Power down the PC and flip the PSU switch off.
- Unplug the power cord and hold the case power button for five seconds.
- Remove the side panel and place it somewhere safe.
- Find the top PCIe x16 slot, usually closest to the CPU.
- Remove the slot cover or covers that match the GPU width.
- Press the PCIe slot latch gently to release any old card.
- Lift the old card straight up if you are replacing one.
- Align the new GPU with the slot and the rear bracket.
- Lower it evenly until the gold fingers disappear into the slot.
- Press until you hear or feel the latch click.
- Install the retention screw snug, not tight.
- Route PCIe power cables without sharp bends.
- Reinstall the side panel.
- Connect the monitor to the GPU, not the motherboard.
The visual cue that matters most is the latch. If it has not moved back into place, the card is not fully seated. Do not force it.
Remove and try again with better alignment.
If you are upgrading an older board, read about slot and clearance match first. Older PCIe generations can still run newer cards, but they may limit bandwidth.
Key Identifiers: Slot, Latch, and Power Connectors
The top PCIe x16 slot is the main GPU slot on most gaming boards. It is the longest slot and usually sits directly under the CPU socket area. Secondary slots may be shorter or share bandwidth with other devices.

Image source: Wikimedia Commons / D-Kuru (CC BY-SA)
The PCIe slot latch is a small plastic tab at the end of the slot. It locks the card after insertion. Some boards have a quick-release button instead.
Either way, you should feel or hear it engage.
Power connectors are the next visual checkpoint. Standard 8-pin connectors have a clip that faces the card. 12VHPWR and 12V-2×6 connectors need full insertion and a gentle cable bend. The PCI-SIG standard body publishes PCIe specifications, and GPU makers publish exact connector guidance.
Check both the PCI-SIG site and your GPU maker install guide before forcing any cable.
A good install also pairs well with a clean CPU and cooler setup. If you are doing a full build, see basic build tools and a clean static-safe work area before you begin.
Common Visual Mistakes That Break Builds
Most GPU failures during install are easy to spot if you know what to look for.
- The card sits slightly crooked in the slot.
- The PCIe latch is open or half engaged.
- The retention screw is missing, causing sag.
- The display cable is plugged into the motherboard.
- PCIe power cables are loose or only partly seated.
- A large card hits a front fan or radiator.
- The card bends under its own weight without a support bracket.
- A 12VHPWR connector is bent too close to the plug.
- The case side panel presses against the card cooler.
- Dust or debris blocks the slot contacts.
GPU sag is a slow problem, not just a cosmetic one. A heavy card can strain the slot over time. Use an anti-sag bracket or vertical mount if your case supports it.
Cable direction also matters. If the power cable fights the card, the connector may back out during transport. Route it along the case edge and leave slack.
Do not zip-tie it tight against the plug.
If you are choosing parts for a target resolution, balance the GPU with the CPU so neither becomes the bottleneck. A balanced pairing helps avoid wasted money and uneven frame pacing. See GPU and CPU pairing guidance for that step.
Power and Clearance Checks Before First Boot
Before pressing power, inspect every physical connection one last time. The card should sit level, the PCIe latch should be closed, and the retention screw should be snug. Power cables should not pull sideways on the connector.
Leave real power headroom. A card rated at 250W can spike higher for short bursts, especially on newer platforms. Manufacturer guidance and PSU calculators are the best sources for exact wattage.
| GPU TDP | Suggested PSU | Practical Note |
|---|---|---|
| 150W to 200W | 550W to 650W | Good for mid-range builds |
| 250W to 350W | 750W to 850W | Better for high-end cards |
| 400W+ | 1000W+ | Check 12V rail capacity too |
Check PSU compatibility if you are unsure about wattage. Also confirm cooler and case fit so a large GPU does not block airflow.
Connect the monitor to the GPU, not the motherboard. Enter BIOS and set the primary display to PCIe if needed. If the system does not POST, power off, unplug, and reseat the card before changing settings.
Driver Setup and Post-Install Verification
Once BIOS detects the GPU, boot into Windows or your OS. Download the driver from the GPU maker, not a random mirror. If you are replacing an old card, clean old drivers first with a trusted removal tool.
Install the driver, reboot, and verify the card name in Device Manager. Then open GPU-Z or the maker's control panel to check clock speed, memory, and temperature. Run a short benchmark and watch for artifacts, crashes, or unusual fan noise.
| Check | What You Want to See | Red Flag |
|---|---|---|
| Device Manager | Correct GPU name | Unknown device or code 43 |
| GPU-Z | Expected clocks and memory | Missing or wrong values |
| Temperatures | Stable under load | Sudden spikes or throttling |
| Display | Full resolution and refresh | Black screen or flicker |
If performance looks wrong, check the PCIe link speed in BIOS. A card running at x8 or x4 may still work, but it can reduce performance in some games. Resizable BAR can also need a BIOS setting.
Real Scenarios: SFF, Prebuilt, and Upgrade Builds
Small form factor builds need the most planning. Measure GPU length against case clearance, including front fans and radiators. A riser cable or vertical mount can help, but only if the case supports it.
Prebuilt PCs often use proprietary parts. The power supply may lack PCIe cables, and the case may have limited airflow. Check GPU and motherboard match before buying a card for an OEM system.
Upgrade builds bring their own cleanup work. Remove the old driver, check the PSU, and inspect the slot for dust. If the old card was heavy, look for slot wear or a bent bracket before installing the new one.
Frequently Asked Questions
Why is my GPU not detected after install?
Power off and reseat the card until the latch clicks. Check that PCIe power cables are fully inserted. Enter BIOS and make sure the primary display is set to PCIe.
If the board has an iGPU, disable it only after confirming the new card works.
Can I use a new GPU on an older motherboard?
Yes, in many cases. PCIe is backward compatible, so a newer card can run in an older slot. Performance may drop if the slot only supports PCIe 3.0 or fewer lanes.
Check BIOS support and physical clearance first.
Do I need to uninstall old drivers?
Yes, if you are replacing a GPU from a different maker. Old drivers can cause black screens, stutter, or detection errors. Use a clean removal tool in safe mode, then install the new driver and reboot before testing.
How much PSU wattage do I need?
Add the CPU and GPU TDP, then leave 20 to 30 percent headroom. A 300W GPU and 150W CPU usually need at least a 650W supply. Check the PSU's 12V rail rating, not just the total wattage.
Is vertical GPU mounting safe?
It can be safe if the case supports it and airflow is good. Use a quality riser cable and keep the card away from hot components. Watch temperatures because vertical mounts can trap heat near the backplate.
What if there is no display after install?
Check the monitor cable on the GPU, not the motherboard. Reseat the card and power cables. Try a different cable or port.
If still blank, test the monitor with another device before assuming the GPU is dead.
Final Verdict: When to DIY and When to Get Help
DIY install makes sense when your parts are compatible, your case has room, and you can follow each physical step slowly. Most users can do it with a screwdriver, patience, and a clean workspace.
Get help if the PSU lacks cables, the card does not fit, or the system shows physical damage. Bent pins, a cracked slot, or a melting connector are not normal install issues. Stop immediately and contact the manufacturer or a qualified technician.
A clean install is mostly about verification. Seat the card, power it correctly, connect the display to the GPU, and confirm the driver. Do those four things well, and most gaming PC GPU upgrades go smoothly.