Learning how to apply thermal paste when building a gaming pc is one of those steps that looks simple but trips up almost every first-time builder. Get it wrong and you'll see high idle temps, loud fans, or thermal throttling the moment you launch a game. Get it right and your CPU runs cooler, quieter, and more stable for years.
The good news is the process is straightforward once you know what to look for. Manufacturer specifications indicate a small, precise amount is all you need, and the real skill is in the cleanup and mounting pressure, not the paste itself. Let's walk through it step by step with the visual cues that actually matter.
how to apply thermal paste when building a gaming pc
How to apply thermal paste when building a gaming pc starts with clean surfaces. Apply a small pea-sized dot to the center of the CPU. Seat the cooler straight down without twisting.
Tighten screws in a cross pattern. Boot up and check temps.
Why Thermal Paste Application Is a Visual Task
Thermal paste is a thermal interface material, or TIM. It fills microscopic air gaps between the CPU's integrated heat spreader and the cooler base. Air insulates.
Paste conducts. That single fact drives the whole job.
The problem is you can't see the gap once the cooler is mounted. A diagram of the assembly would show the IHS, a thin paste layer, and the cooler base pressed together. In real life, all you see is a CPU sitting in a socket and a cooler about to drop on top.
So the skill is visual inference. You judge paste amount, placement, and spread by reading cues before and after mounting. Cooler base shape matters.
CPU die layout matters. Mounting pressure matters. Per manufacturer thermal interface material research, contact pressure and coverage uniformity are the two biggest factors in thermal resistance.
Different cooler bases change the picture. A flat, polished copper base spreads paste evenly under pressure. A base with exposed heat pipes, common on budget tower coolers, leaves tiny channels that need slightly more paste to fill.
AIO pump blocks often have a pre-applied pad or paste you may need to remove first.
If you've ever wondered how thermal paste actually works, the short version is simple. It is not glue. It is not a conductor of electricity in most consumer formulas.
It is just a filler that beats air at moving heat. Understanding that keeps you from overthinking the application.
What Good CPU and Cooler Contact Looks Like Before Paste
Before any paste touches metal, inspect both surfaces. The CPU's integrated heat spreader should be flat, clean, and free of fingerprints. The cooler base should be smooth and even.
A visual check of this contact zone would show two flat planes ready to mate.
Look for scratches, dents, or oxidation. A deep scratch on the IHS can channel paste away from the center. A warped cooler base, common on cheaper units, will never make full contact no matter how much paste you add.
If you see either, address it before proceeding.
Cleanliness is the next check. Skin oils reduce thermal conductivity. Dust acts like insulation.
Use 90 percent or higher isopropyl alcohol and a lint-free wipe. Coffee filters work well because they leave no fibers behind. Wipe in one direction, not circles, so you don't grind debris into the surface.
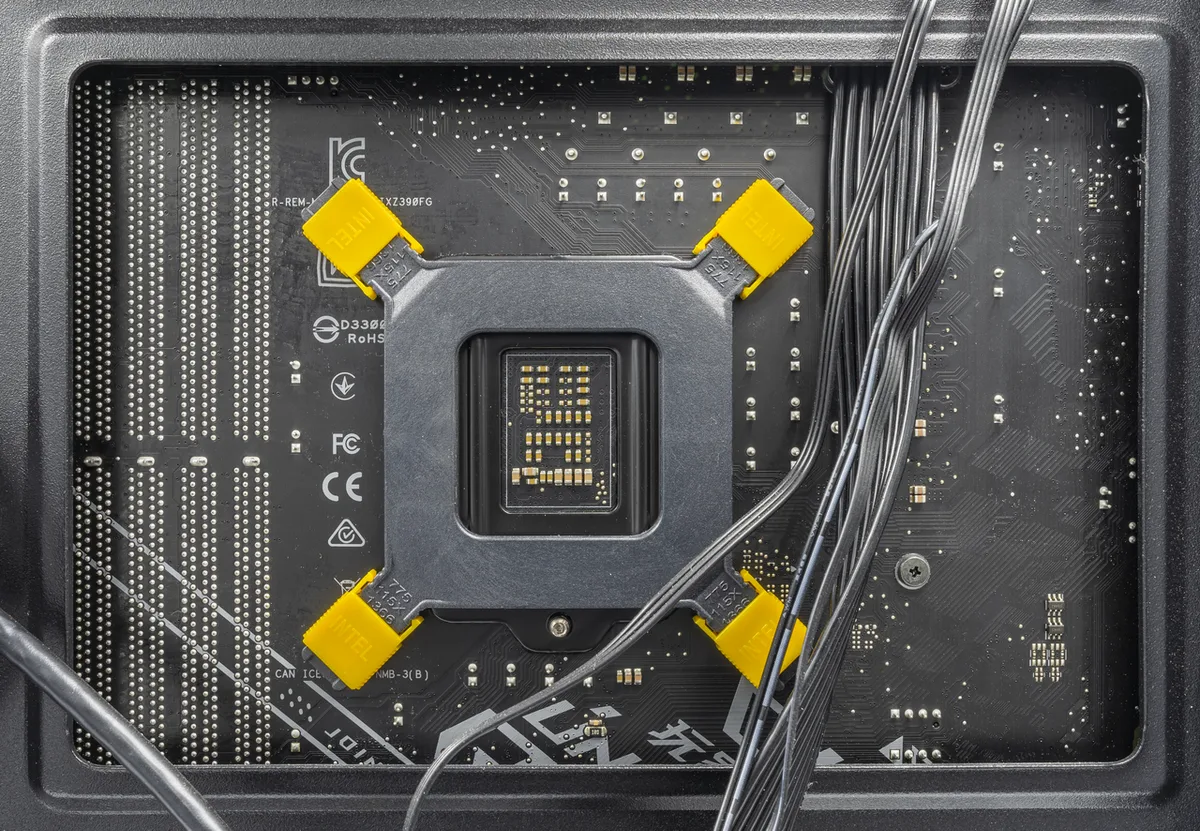
Image source: Wikimedia Commons / PantheraLeo1359531 (CC BY)
Stock coolers often ship with pre-applied paste on the base. If you're reusing one, remove that old paste completely. Old paste dries, cracks, and performs worse than a fresh application.
A visual inspection of the base would show a gray or silver film that needs wiping away.
This is also the right time to confirm cooler and case clearance before you commit. A cooler that doesn't fit the case forces you to remount later, and every remount means re-cleaning and re-pasting.
How Much Thermal Paste to Use: Bead, Line, and Spread Visuals
The most common question in any build thread is how much paste to use. The honest answer: less than you think. A pea-sized dot in the center is the standard starting point for most CPUs and coolers.
The reason is physics. Mounting pressure spreads the paste outward. Too much creates a thicker layer, and thicker layers insulate more than they conduct.
Aggregate user reviews report that over-application is the single most common beginner mistake, and it often shows up as worse temps, not better.
Here is a simple comparison of the three popular methods:
| Method | Best For | Visual Cue | Risk |
|---|---|---|---|
| Pea dot | Most CPUs with flat cooler bases | Small dome in center | Low, forgiving |
| Thin line | Large rectangular dies, like some Ryzen chiplets | Line across the middle | Medium, needs even pressure |
| X pattern | Very large IHS or direct-die setups | Two crossing lines | Medium, can leave corners dry |
The pea dot works because the cooler base is flat and circular or square. Pressure pushes the paste radially. By the time the cooler seats, the paste covers the die area with a thin, even film.
The line method suits rectangular dies. AMD's chiplet designs place heat across a wider area, so a center line spreads more naturally under a rectangular base. Intel's current designs are more square, so the dot still wins.
The X pattern is the least common and the riskiest. It can work on very large surfaces, but it is easy to get uneven coverage. Most builders never need it.
One exception: direct-die cooling. If you've removed the IHS, the exposed silicon is small and fragile. That setup needs a tiny amount, roughly the size of a grain of rice, and a spreader.
Per Intel thermal solution documentation, direct-die setups are not recommended for most users.
For a deeper look at how often to reapply paste, the short version is every two to three years for a daily-driven gaming rig, sooner if temps climb.
Step-by-Step Application With Visual Cues
Here is the full process in order. Each step has a visual cue to confirm you're on track.
- Power down and unplug. Remove the side panel. Ground yourself by touching the case.
- Remove the old cooler. Twist gently if it resists, but never force it. If it's stuck, warm the CPU slightly by booting for a minute first.
- Clean the IHS and cooler base with isopropyl alcohol. Wait for it to fully evaporate. The surface should look matte and streak-free.
- Inspect both surfaces. No scratches, no debris, no residue. This is your last chance to catch a problem.
- Apply the paste. Use the pea dot for most builds. Place it dead center on the IHS. Do not spread it manually unless the cooler base is textured.
- Lower the cooler straight down onto the CPU. No twisting, no sliding. A twisting motion pushes paste to one side and traps air.
- Tighten the mounting screws. Start with one corner, then the opposite corner, then the remaining two. This cross pattern seats the cooler evenly.
- Check for squeeze-out. A tiny ring of paste around the edge is normal. Paste spilling onto the socket area is not.
- Boot and monitor. Watch idle temps for the first few minutes. A sudden spike means poor contact.
The visual cue for step 6 is the most important. When you lower the cooler, the paste should spread visibly under the base if the cooler is transparent or has a window. On a standard cooler, you feel slight resistance as the paste compresses, then the cooler settles flat.
If you're fighting high temps after a clean install, thermal throttling causes often trace back to mounting pressure, not paste. Worth reading before you re-paste again.
For broader lowering temps without performance loss, paste is just one lever. Case airflow and fan curves matter just as much.
How to Seat and Tighten the Cooler for Even Paste Spread
This is where most builds go wrong. The paste can be perfect and the mount can still ruin it. Cooler seating is a pressure problem, not a paste problem.
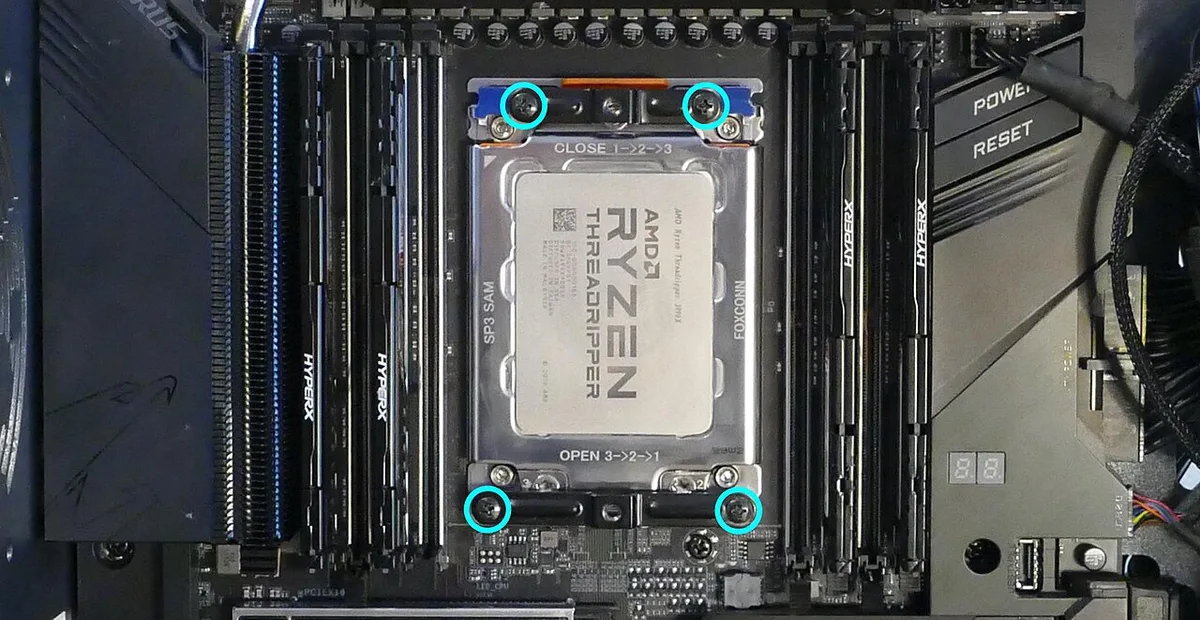
Image source: Wikimedia Commons / System76 (CC BY-SA)
Start by confirming the mounting hardware is correct. Backplates, brackets, and retention frames vary by socket. AMD AM5 and Intel LGA 1700 use different hole patterns.
A visual check of the bracket would show the correct orientation marks facing up. If the bracket is flipped, the cooler tilts and contact suffers.
Lower the cooler straight down. Align the screws with the bracket holes before applying any pressure. Once the screws catch, finger-tighten all four corners first.
This holds the cooler level while you work.
Then tighten in a cross pattern. Top-left, bottom-right, top-right, bottom-left. A quarter turn at a time.
Stop when you feel firm resistance. Do not crank it down. Over-tightening warps the IHS and can crack the CPU substrate.
A visual check after tightening would show the cooler sitting flat and parallel to the motherboard. If one corner is higher than the others, loosen and reseat. Uneven pressure is the leading cause of paste pump-out, where paste migrates to the edges over weeks of thermal cycling.
Pump-out is a real phenomenon. Heat cycles expand and contract the paste. Under uneven pressure, the paste walks outward.
Eventually the center dries out and temps climb. This is why even mounting pressure matters more than paste brand.
If you're chasing safe CPU temps while gaming, a proper mount is half the battle. The other half is airflow and fan curves.
For users considering liquid metal as an alternative, know that it conducts electricity and requires a different mounting approach. It is not a drop-in swap for standard paste.
As of 2026, most modern CPUs and coolers still use the same mounting principles. The hardware has evolved, but the physics has not. Clean surfaces, right amount, even pressure.
That formula has not changed.
One final note on external guidance. Intel's thermal solution documentation at intel.com covers paste application for their processors, and AMD's installation guides at amd.com do the same for Ryzen. Both agree on the core method: small amount, center placement, even pressure.
Following the manufacturer's spec for your specific socket is always the safest path.
Key Identifiers That the Paste Spread Correctly
You can't see the paste after mounting. So you read the signs instead. A visual check of a well-mounted cooler would show the cooler base sitting flat and parallel to the motherboard.
The cooler should not rock or tilt when you press gently on opposite corners.
Temperatures are your next identifier. Idle temps on a modern gaming CPU should land between 30 and 45 degrees Celsius in a typical room. Load temps during gaming should stay below the thermal throttle point, which is usually 95 to 100 degrees for most modern chips.
If you're seeing idle temps above 50 degrees, contact is likely poor.
Fan behavior tells the same story. Fans that ramp to high RPM at idle mean the cooler is working harder than it should. A visual check of fan speed curves would show low, steady RPM at idle and a gradual ramp under load.
Sudden spikes suggest the paste layer is too thick or uneven.
Sound is a secondary cue. A cooler that clicks, rattles, or vibrates may be mounted unevenly. That unevenness shifts paste to one side and leaves the other side dry.
One more identifier: the spread pattern after removal. If you ever take the cooler off, the paste should cover the entire die area in a thin, even film. A visual check would show a square or rectangle of paste matching the CPU die shape, with no thick globs and no dry spots.
That pattern confirms your method worked.
Common Visual Mistakes and How to Fix Them
The most common mistake is using too much paste. A visual check would show paste squeezing out the sides in a thick ring. That ring insulates instead of conducting.
The fix is simple: clean both surfaces and reapply with half the amount.
Too little paste is the opposite problem. The cooler base lifts off the CPU and you see dry metal patches where paste never reached. Temps run high and uneven.
Add a slightly larger bead and remount.
Twisting the cooler during seating is another frequent error. A visual check would show paste smeared to one side of the IHS. The center runs dry and one edge floods.
Always lower straight down and never rotate.
Uneven screw tightening leaves one corner higher than the others. A visual check from the side would reveal a tilted cooler. Loosen all screws, reseat the cooler, and tighten in a cross pattern.
Reusing old paste is a silent killer. Old paste turns chalky and cracks. A visual check of the base would show a dull, dry film instead of a fresh glossy layer.
Scrape and clean it fully before reapplying.
Contamination ruins the job too. Fingerprints, dust, and leftover alcohol residue all reduce conductivity. A visual check would show smudges or streaks on the IHS.
Clean again with fresh alcohol and a lint-free wipe.
If you're dealing with high temps after a clean install, thermal throttling causes often trace back to one of these mistakes. Worth checking before you re-paste again.
Thermal Paste vs. Pads, Liquid Metal, and Pre-Applied Options
Thermal paste is not your only option. Each alternative fits a different situation. The right choice depends on your cooler, CPU, and comfort level.
Thermal pads are pre-cut sheets of thermal material. They work well for GPUs and VRMs where paste would pump out. A visual check would show a pad cut to size and placed between the chip and heatsink.
They are easier to apply but less efficient than paste for CPUs.
Liquid metal is a gallium-based alloy with much higher thermal conductivity than standard paste. It flows into microscopic gaps better. But it conducts electricity and can corrode aluminum.
A visual check would show a shiny silver pool that spreads under its own weight. It is not a drop-in swap. Intel and AMD both caution against it for most users.
Pre-applied paste ships on many stock and aftermarket coolers. It saves a step but degrades over time. A visual check of a new cooler base would show a gray or silver film already in place.
If you're building fresh, you can use it. If you're reusing a cooler, remove and replace it.
Phase-change pads are a newer option. They melt slightly at operating temperature and fill gaps like paste. They are cleaner to apply than liquid metal but pricier than standard paste.
Here is a side-by-side comparison:
| Option | Conductivity | Electrical Risk | Ease of Use | Best For |
|---|---|---|---|---|
| Standard paste | Good | None | Easy | Most gaming builds |
| Thermal pads | Fair | None | Very easy | GPUs, VRMs |
| Liquid metal | Excellent | High | Hard | Experienced builders |
| Pre-applied paste | Fair | None | Easiest | First-time builds |
| Phase-change pads | Very good | None | Easy | Premium builds |
For a deeper look at liquid metal as a thermal interface material, the short version is that it rewards careful work and punishes carelessness.
When to Reapply Thermal Paste and What to Check
Thermal paste does not last forever. It dries, pumps out, and loses conductivity over time. Knowing when to reapply saves you from chasing ghost temps.
The general rule is every two to three years for a daily-driven gaming rig. That timeline shortens in hot climates or dusty environments. A visual check of your temps over time would show a gradual upward trend of 3 to 5 degrees per year.
Here are the signs it is time to reapply:
- Idle temps creep up 5 degrees or more from your baseline
- Load temps hit the thermal throttle point during normal gaming
- Fan speeds stay high at idle
- You removed the cooler for any reason
- The paste is more than three years old
If you removed the cooler, always reapply. Breaking the seal introduces air gaps. Even if the paste looks fine, the contact layer is disrupted.
Before reapplying, clean thoroughly. Old paste leaves residue that fresh paste cannot bond to. A visual check of the IHS would show a matte, uniform surface after cleaning.
If you see streaks or shine, clean again.
For a full breakdown of how often to replace thermal paste, that guide covers storage conditions, paste quality, and environmental factors in detail.
While you're at it, cleaning dust from cooling components pairs well with a re-paste. Dust insulates the heatsink fins and works against your fresh paste.
Frequently Asked Questions
How much thermal paste should I use on a gaming CPU?
Use a pea-sized dot in the center of the CPU. That amount is enough for most processors and coolers. Too much paste insulates and raises temps.
Too little leaves dry spots. Manufacturer specifications from Intel and AMD both recommend a small central application.
Can I reuse thermal paste already on a cooler?
No. Once a cooler is removed, the paste seal breaks. Air gaps form and old paste dries out.
Always clean both surfaces and apply fresh paste before remounting. Reusing paste leads to higher temps and uneven contact.
Does the application pattern matter?
Yes. A pea dot works for most CPUs with flat cooler bases. A thin line suits rectangular dies like some AMD chiplets.
An X pattern is rarely needed and risks uneven coverage. Match the pattern to your CPU die shape and cooler base.
What temperature should I see after applying new paste?
Idle temps between 30 and 45 degrees Celsius are normal in a typical room. Load temps during gaming should stay below 95 degrees. If idle temps exceed 50 degrees, recheck your mounting pressure and paste amount.
Is liquid metal better than standard thermal paste?
Liquid metal has higher thermal conductivity but conducts electricity and can corrode aluminum. It is riskier and harder to apply. Standard paste is safer and sufficient for most gaming builds.
Liquid metal suits experienced builders only.
How do I know if I applied too much paste?
Paste squeezing out in a thick ring around the cooler base is the main sign. Temps may also run higher than expected. Clean both surfaces and reapply with roughly half the previous amount.
1 thought on “How to Apply Thermal Paste When Building a Gaming PC”
Comments are closed.