Bench testing is how you test a gaming pc before closing the case. You power on with minimal parts, catch faults while everything is easy to reach, and only add components once each stage passes. Skipping this step is the top reason builders end up rebuilding from scratch.
Manufacturer installation guides recommend verifying POST before mounting hardware in the chassis. A standard ATX power supply must deliver 12V, 5V, and 3.3V rails within plus or minus 5 percent tolerance. Let's walk through the workflow that keeps your first boot from becoming a teardown.
how to test a gaming pc before closing the case
Power on the motherboard outside the case with just the CPU, cooler, one RAM stick, and PSU connected. Watch the debug LEDs. If all four clear, enter BIOS and confirm hardware detection.
Add the GPU, storage, and fans one at a time, retesting after each. Once idle temps and voltages look normal, mount everything and close the case.
Why Closing the Case Before Testing Costs You Hours
Cable management takes 30 to 60 minutes on a typical build. If you discover a fault after routing everything, you undo all of it. Bench testing flips that order.
You validate first, then organize.
Many builders skip bench testing because they trust their parts. But a misplaced standoff or half-seated cable is not a part defect. It is an assembly error.
Those errors hide behind neatly routed cables and a closed side panel.
Testing outside the case also gives you space to see debug LEDs clearly. You can hear fan bearings, spot bent pins, and feel loose connectors. None of that is easy with the board buried in a chassis.
As of 2026, most mid-range motherboards include four debug LEDs labeled CPU, DRAM, VGA, and BOOT. These light in sequence during POST. A stuck LED tells you exactly which stage failed.
The Minimal Bench Setup: What You Actually Need to Test
To bench test, you need the motherboard, CPU, CPU cooler, one RAM stick, and the PSU. That's it. No GPU, no storage, no case fans.
This minimal config isolates the most common failure points.
Place the motherboard on its cardboard box or an anti-static mat. The box works fine if you avoid the silver anti-static bag, which can cause shorts. Connect the 24-pin ATX and 8-pin EPS power cables.
Install the CPU and cooler. Seat one RAM stick in the primary slot, usually A2.
You'll also need a way to power on. Either short the power pins on the front panel header with a flathead screwdriver, or wire the case's power button temporarily. A screwdriver works in seconds.
Keep these items nearby: thermal paste, a Phillips screwdriver, and your motherboard manual. The manual tells you which RAM slot is primary and where the debug LEDs sit.
Here's what the minimal bench setup looks like:
| Component | Required? | Notes |
|---|---|---|
| Motherboard | Yes | On its box or anti-static mat |
| CPU | Yes | Installed with cooler |
| CPU cooler | Yes | Thermal paste applied |
| One RAM stick | Yes | In the primary slot (usually A2) |
| PSU | Yes | 24-pin ATX plus 8-pin EPS connected |
| GPU | No | Added after first POST |
| Storage | No | Added after GPU test |
| Case fans | No | Added last |
Skipping the GPU during first boot is smart if your CPU has integrated graphics. You can confirm POST and enter BIOS without a discrete card. If your CPU lacks integrated graphics, you must install the GPU before the first power-on.
Before you start, prep your workspace to reduce ESD risk. A clean, well-lit surface prevents dropped screws and bent pins. Use a PSU with UL safety certification for peace of mind.
Condition Variables That Change Your Test Path
Your test path changes based on a few key variables. The first is whether your CPU has integrated graphics. With iGPU, you can POST without a discrete GPU.
Without it, the GPU becomes a mandatory part of the minimal build.
RAM configuration matters too. Single-channel with one stick is enough to test POST. But if you're running a dual-channel kit, test with one stick first, then add the second once the first passes.
This isolates a bad stick quickly.
BIOS version is another variable. A new CPU on an older motherboard may need a BIOS update before it POSTs. Some boards support BIOS flashback without a CPU installed.
Others require a compatible older CPU to flash first.
Power supply quality affects the test too. A failing PSU may spin up but deliver unstable voltage. If components behave erratically, swap in a known-good PSU before blaming other parts.
Finally, ambient temperature affects thermal results. A room at 28 degrees Celsius will show higher idle temps than one at 20 degrees. Account for this when judging cooler performance.
Step-by-Step First Boot Workflow
Follow this workflow for your first boot. Each step builds on the last.
- Inspect the motherboard. Check for stray standoffs, loose screws, or debris. Look for bent CPU pins on AMD sockets or damaged LGA pads on Intel boards.
- Install the CPU. Align the triangle marker on the CPU with the socket. Lower it gently. Never force it. For more detail, see our guide on installing the CPU.
- Apply thermal paste. A pea-sized dot in the center works for most coolers. For application tips, check out our thermal paste guide.
- Mount the cooler. Tighten in a cross pattern for even pressure. Uneven pressure causes hot spots. Our guide on mounting the cooler covers mounting pressure in detail.
- Seat one RAM stick. Push until both retention clips click. Use the primary slot, usually A2. For slot selection help, see our guide on seating RAM correctly.
- Connect power. Plug in the 24-pin ATX and 8-pin EPS. Push until the retention clips engage fully. Our guide on connecting motherboard power walks through each connector.
- Power on. Short the power pins or use the case button. Watch the debug LEDs.
- Read the LEDs. CPU, DRAM, VGA, BOOT. They light in sequence. A stuck LED tells you where the fault is.
- Enter BIOS. If all LEDs clear, press DEL or F2. Confirm the CPU, RAM, and any installed storage appear.
- Check temperatures. Idle CPU temp should sit 10 to 20 degrees above ambient. If it's 80 degrees at idle, reseat the cooler.
If the system POSTs and BIOS looks correct, you've passed the first gate. Move on to adding the GPU.
Per Intel processor installation guides, never force a CPU into its socket. The retention mechanism should close with light pressure. If it doesn't, recheck alignment.
No-POST Decision Tree: CPU, DRAM, VGA, or BOOT?
If the system doesn't POST, the debug LEDs tell you where to look. Each LED corresponds to a stage. Here's how to read them.
CPU LED stuck: The processor isn't initializing. Check that the CPU is fully seated. On AMD sockets, inspect for bent pins.
On Intel LGA sockets, check for debris or damaged pads. Reseat the cooler if mounting pressure is uneven. Verify the 8-pin EPS cable is fully connected.
DRAM LED stuck: Memory isn't detected. Remove and reseat the RAM stick. Try a different slot.
Test with a different stick if you have one. Check your motherboard manual for the primary slot. Some boards require slot B2 instead of A2.
VGA LED stuck: The graphics card isn't initializing. If using integrated graphics, remove the discrete GPU and test with iGPU. If using a discrete GPU, reseat it in the PCIe slot.
Verify the PCIe power cables are connected. Try a different PCIe slot if available.
BOOT LED stuck: All hardware passed, but the system can't find a boot device. This is expected if no storage is installed yet. Install your NVMe or SATA drive and retry.
If storage is installed, check that it's detected in BIOS.
Work through each stage in order. Don't skip ahead. A DRAM fault can masquerade as a CPU fault if the CPU LED lingers before handing off to DRAM.
Adding the GPU, Storage, and Fans One at a Time
Once POST passes, add one component, then test. This isolates faults. Start with the GPU.
Install it in the top PCIe x16 slot. Push until the retention clip clicks. Connect PCIe power cables fully.
If your GPU uses 12VHPWR or 12V-2×6, seat the connector until it locks. Our guide on installing a graphics card covers seating and retention. Our guide on connecting GPU power covers connector orientation.
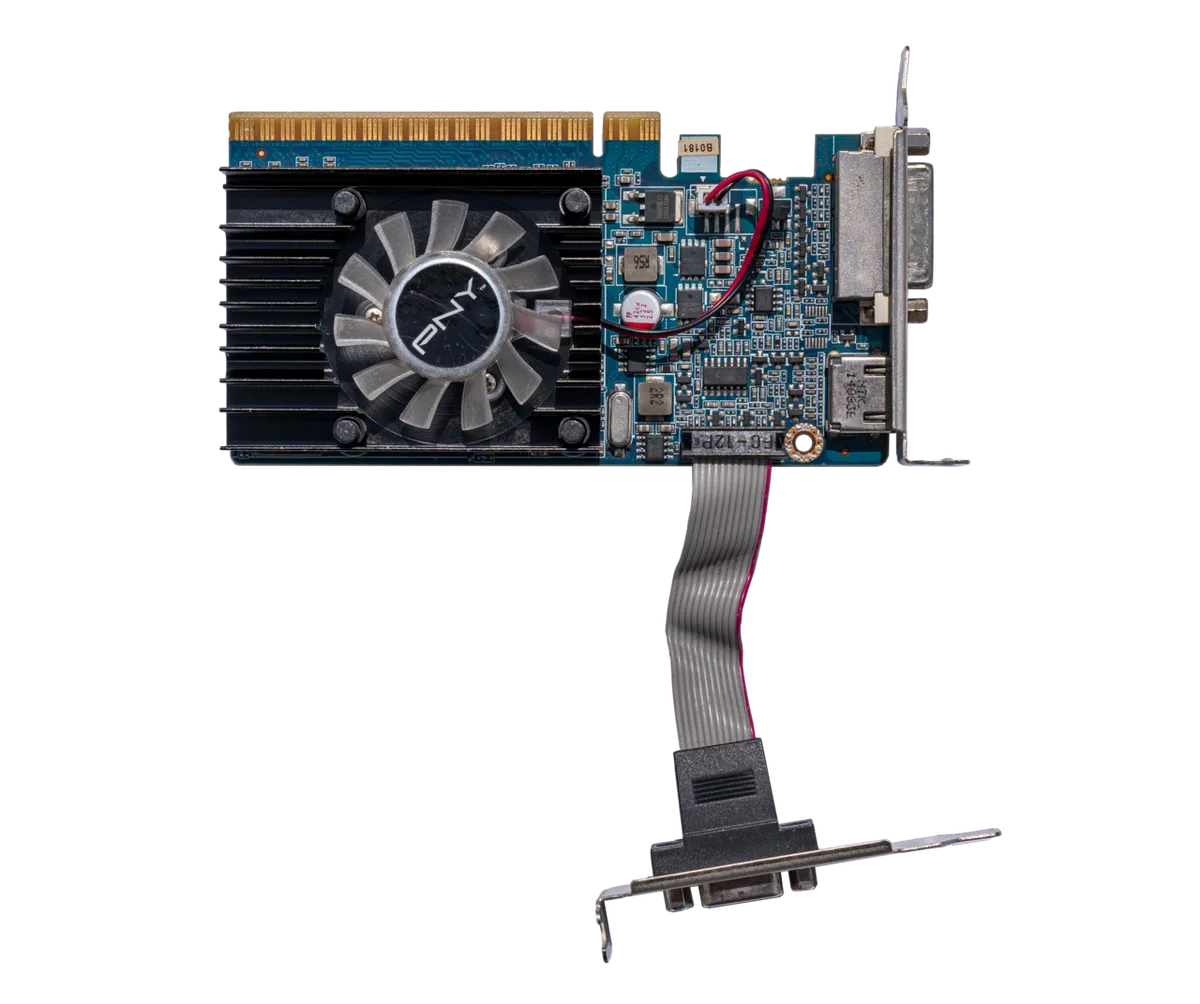
Image source: Wikimedia Commons / PantheraLeo1359531 (CC BY)
Power on and watch debug LEDs again. The VGA LED should clear quickly. If it stays lit, remove the GPU and inspect the slot and connector.
Enter BIOS and confirm the GPU appears. Check idle temperature. Then shut down.
Add storage next. For NVMe, align the notch and push into the M.2 slot. Secure with the standoff screw.
For SATA, connect both data and power. Our guide on installing an M.2 NVMe SSD covers slot selection and heatsinks. Power on and confirm the drive appears in BIOS.
Add case fans last. Mount them with airflow direction correct. Connect PWM headers.
Our guide on installing case fans covers orientation and header placement. Test fan speeds in BIOS or monitoring software.
Then add front panel cables. Connect power, reset, LED, and USB headers. Our guide on connecting front panel cables shows pin layouts.
Test the power button and reset button. If the system boots and all components appear, you are ready for thermal validation.
Thermal and Power Validation Before Cable Management
Before routing cables, confirm thermals and power. Idle CPU temperature should sit 10 to 20 degrees above room temperature. GPU idle temp usually sits 30 to 45 degrees.
If idle temps are high, check cooler mounting and paste.
Run a short stress test. Ten to thirty minutes of Cinebench, Prime95, or FurMark is enough. Watch peak CPU and GPU temps.
Most gaming CPUs should stay below 90 degrees under sustained load. Most GPUs should stay below 85 degrees.
Monitor voltage rails during load. The 12V rail should stay between 11.4 and 12.6 volts. The 5V rail should stay between 4.75 and 5.25 volts.
The 3.3V rail should stay between 3.14 and 3.47 volts.
Check fan behavior too. CPU cooler fans should ramp under load. Case fans should respond to temperature curves.
If a fan spins but moves no air, it may be reversed or blocked.
If all values look normal, shut down and disconnect power. Now you can route cables and mount the board in the case. If anything is off, fix it while parts are still accessible.
Common Mistakes That Turn a Simple Test Into a Rebuild
Many builders test with the board on a metal surface. That risks shorts. Use the motherboard box or an anti-static mat.
Never use the silver anti-static bag.
Some builders cable manage before testing. That hides faults and adds work. Test first, organize later.
Another mistake is installing all RAM sticks at once. If one stick is bad, you won't know which. Test with one stick, then add the rest.
A half-seated 24-pin ATX connector causes random shutdowns. Push until the clip locks. The same applies to the 8-pin EPS and PCIe power connectors.
Uneven cooler mounting pressure creates hot spots. Tighten screws in a cross pattern. Stop when resistance increases.
Overtightening can crack the CPU or motherboard.
Finally, don't ignore debug LEDs. If the CPU LED stays lit, don't assume the CPU is dead. Check power, seating, and BIOS version first.
Work through the stages in order.
Final Decision Guide: When It's Safe to Close the Case
Close the case only when every check passes. Use this checklist.
- The system POSTs every time you power on.
- All debug LEDs clear in sequence.
- BIOS detects CPU, RAM, GPU, and storage.
- Idle temps are normal for your room.
- Load temps stay within safe limits during a short stress test.
- Voltage rails stay within tolerance under load.
- All fans spin and respond to curves.
- Front panel power and reset buttons work.
- USB ports and audio jacks respond.
If any item fails, fix it before closing. A fault found after cable management costs an hour or more. The same fault found on the bench costs minutes.
If you used a temporary screwdriver power-on, wire the front panel switch before final mounting. Keep standoffs matched to your motherboard form factor. Extra standoffs in the wrong spot can short the board.
Once everything passes, mount the board, route cables, and close the panel. Power on one last time to confirm nothing shifted during mounting.
Frequently Asked Questions
Do I need a GPU to bench test a gaming PC?
If your CPU has integrated graphics, you can POST without a discrete GPU. Test the CPU, RAM, and PSU first. Add the GPU afterward to isolate graphics faults.
If your CPU lacks integrated graphics, install the GPU before the first power-on.
Can I test on the motherboard box?
Yes. The cardboard box is a safe, non-conductive surface. Avoid the silver anti-static bag because it can cause shorts.
Keep the board on the box until testing is complete.
How long should I stress test before closing?
Ten to thirty minutes is enough for basic validation. Watch peak temps and voltage rails during the test. If temps stay stable and no errors appear, you're good to proceed.
Longer runs are optional for burn-in.
What if the CPU debug LED stays on?
Check the 8-pin EPS connection first. Then reseat the CPU and cooler. On AMD, inspect for bent pins.
On Intel, check for debris. Verify BIOS supports your CPU. Work through each item before replacing parts.
Should I install all RAM before testing?
No. Start with one stick in the primary slot. If it passes, add the rest one at a time.
This quickly identifies a bad stick or wrong slot. It also confirms dual-channel population later.