Learning how to build a gaming pc without damaging components is mostly about patience and gentle handling. Most parts are sturdier than they look, but one bent CPU pin or forced connector can ruin an expensive build. The good news is that nearly every mistake is preventable with the right prep and a calm pace.
Manufacturer specifications indicate that electrostatic discharge can damage sensitive semiconductors at voltages you cannot even feel. A few basic habits and a clean workspace remove most of that risk. We'll walk through the damage hotspots first, then the safe build order.
how to build a gaming pc without damaging components
Work on a clean, grounded surface with an anti-static strap. Seat the CPU with zero downward force. Install RAM until it clicks.
Route cables without bending pins. Test the system outside the case first.
Why Small PC Building Mistakes Get Expensive Fast
PC parts are not fragile in normal use, but they are unforgiving during assembly. A motherboard standoff in the wrong hole can short a trace. A GPU yanked without releasing the latch can snap the PCIe slot.
A CPU cooler tightened unevenly can crack the processor die.
The cost gap between a careful build and a rushed one is steep. A mid-range CPU and GPU together can exceed $800 as of 2026. Replacing either because of a preventable slip hurts more than a slow afternoon of careful work.
Damage also hides well. A partially seated RAM stick may boot once, then fail under load. A pinched fan cable may overheat a component months later.
That delayed failure is why rushed builders often blame the wrong part.
The fix is simple in theory. Read both manuals before touching anything. Handle parts by their edges.
Never force a connector that resists. If something feels wrong, stop and recheck alignment.
Core Parts and Where Damage Usually Happens
Every component has a specific failure mode during assembly. Knowing the hotspots keeps your hands gentle in the right places. The table below maps the common ones.
| Component | Common Damage Point | Safe Handling Habit |
|---|---|---|
| CPU | Bent pins or socket contacts | Align triangle markers, drop in with no pressure |
| Motherboard | Shorts from wrong standoffs | Match standoffs to case manual holes |
| RAM | Cracked PCB or bent pins | Press evenly until both latches click |
| GPU | Bent PCIe slot or sag | Support the card, release the latch fully |
| PSU | Wrong modular cables | Use only cables that came with that unit |
| Storage | Stripped M.2 screw | Hand-tighten, then quarter-turn with screwdriver |
CPU sockets deserve the most respect. Intel LGA sockets have hundreds of tiny pins that bend if you angle the chip. AMD PGA designs put pins on the CPU itself, so one drop means a new processor.
Always lift the retention lever fully and lower it only after the chip sits flat.
Motherboards flex more than people expect. Carry them by the edges, never by the center. The soldered capacitors and slots can crack under uneven pressure.
Lay the board on its anti-static bag or an ESD-safe mat while you prep.
GPUs are heavy and long. Their weight stresses the PCIe slot if left unsupported. A simple support bracket or even a small block under the far end prevents sag over time.
When removing one, press the slot latch completely before pulling.
Power supplies are electrically safe when off, but their cables are not interchangeable across brands. Mixing modular cables can send wrong voltages to a drive or board. Always pair the PSU with its own included cable set.
Risk Factors That Raise the Chance of Damaging Components
Some builds are harder than others. Small cases, custom loops, and used parts all raise the odds of a slip. Knowing the risk factors helps you slow down where it matters.
- Dry winter air. Low humidity raises static discharge risk. Ground yourself before handling parts.
- Cramped Mini-ITX cases. Tight cable runs increase pinched wires and bent pins.
- Used or refurbished parts. Unknown history means hidden damage. Inspect pins and slots closely.
- Aftermarket coolers. Heavy tower coolers need even mounting pressure to avoid cracking the die.
- Custom cable sleeving. Forcing stiff cables can bend motherboard pins.
- First-time builders. Speed and unfamiliarity combine into forced connectors.
- Pets or kids nearby. A bumped elbow can drop a GPU onto concrete.
ESD is the silent one. You can damage a part without seeing or feeling a spark. The ESD Association notes that sensitive devices can fail at under 100 volts, far below human perception.
That is why a grounded mat and strap matter even in a carpeted room.
Cable routing is the other hidden risk. Front panel headers have tiny pins that bend if you push at an angle. USB 3.0 and HD Audio connectors are keyed, but they still need gentle, straight pressure.
If a connector resists, flip it and check orientation before pushing again.
Safe Build Setup Before Opening the Box
Preparation prevents more damage than any tool. A clean, grounded, well-lit workspace turns a risky build into a calm one. Do this before cutting any tape.
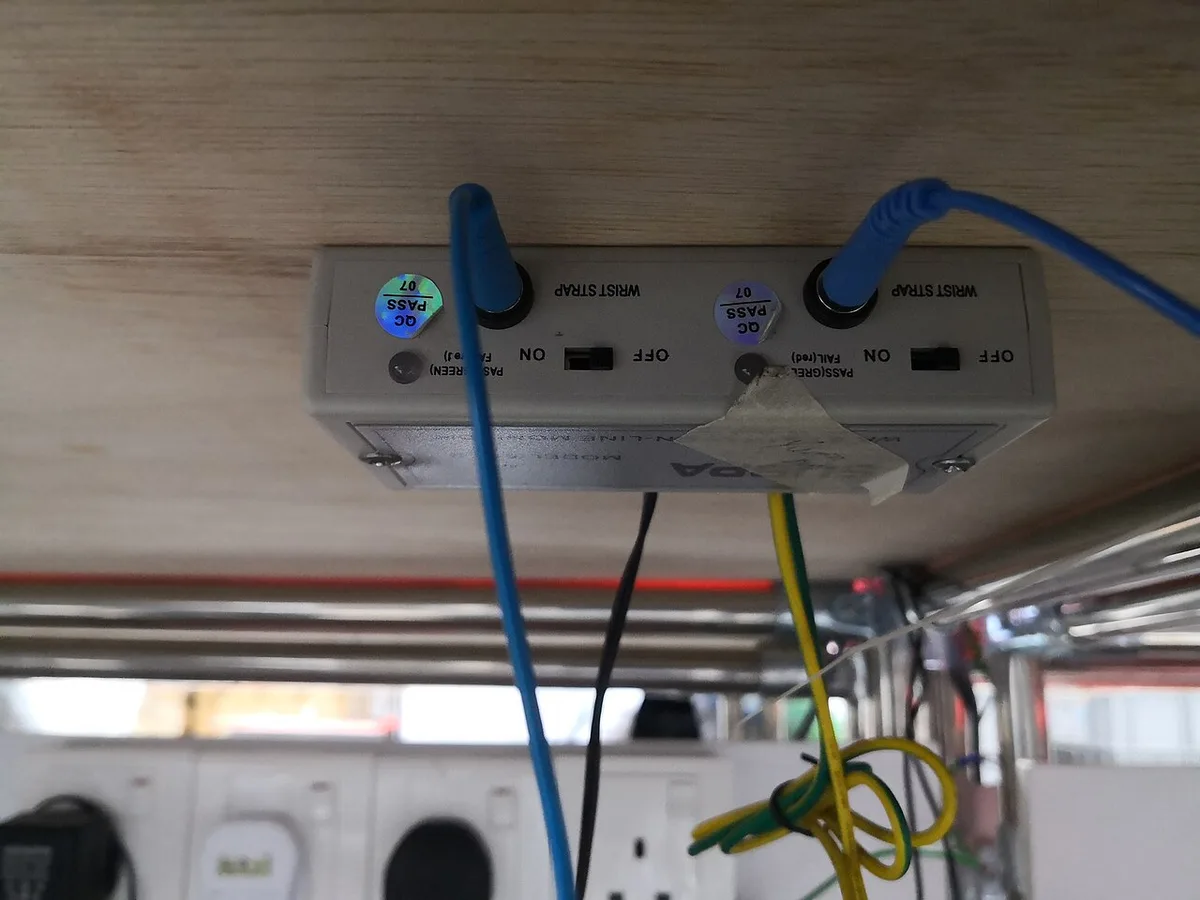
Image source: Wikimedia Commons / Encik Tekateki (CC BY-SA)
- Clear a large table with room to lay out parts.
- Use an anti-static mat and wrist strap grounded to the case or PSU.
- Keep drinks, pets, and carpet fibers away.
- Open the case manual and motherboard manual together.
- Sort screws by type in labeled cups or a magnetic tray.
- Check all parts against your order before starting.
Grounding is the single biggest protection. Clip the strap to bare metal on the case, then touch the PSU shell to equalize charge. If you lack a strap, touch a grounded metal object often, especially after walking around.
Lighting matters more than people think. A headlamp or desk lamp angled across the board reveals misaligned pins and standoff holes. Shadows hide bent contacts that cost hundreds later.
Screw organization saves parts too. A Phillips #2 screwdriver fits most PC screws, and a magnetic tip prevents drops inside the case. Never use an electric drill.
Hand torque gives you the feedback to feel when a screw seats.
For a deeper walkthrough, workspace prep for a gaming PC build covers grounding and layout in detail. Essential tools for the build is worth a look before you start.
CPU, Cooler, and Motherboard Installation Without Damage
This stage carries the highest risk and the highest reward. Done gently, it sets up a stable system for years. Done rushed, it can kill the two most expensive parts.
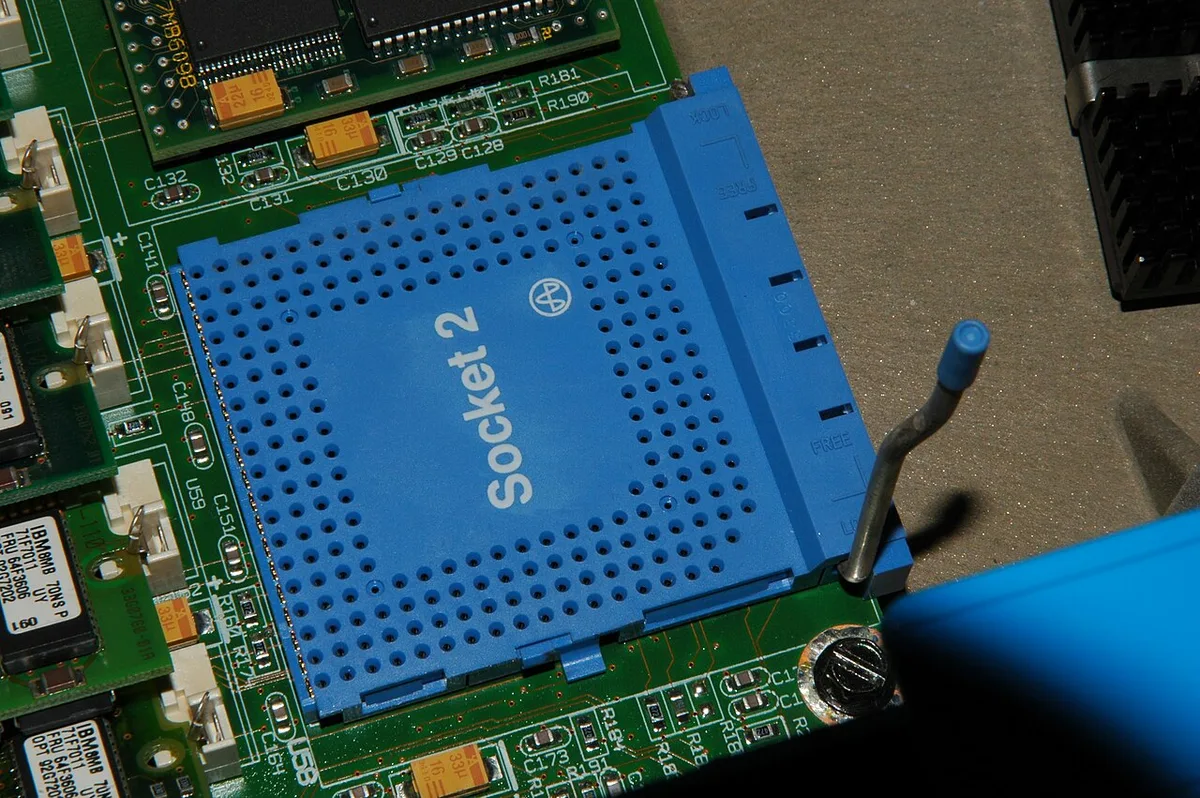
Image source: Wikimedia Commons / Joshua Biggs (CC BY-SA)
Start with the CPU outside the case. Open the socket lever fully. Match the triangle on the CPU corner to the triangle on the socket.
Lower the chip straight down with zero sideways motion. It should seat under its own weight.
If it does not drop in, lift it and recheck orientation. Never press down to force it. Pressing can bend socket pins or crack the die.
Once seated, close the retention arm. It takes firm pressure, which is normal and safe.
Apply thermal paste next. A pea-sized dot in the center spreads evenly under cooler pressure. Too much paste squeezes out and insulates poorly.
Applying thermal paste when building walks through amounts and patterns.
Mount the cooler with even, alternating pressure. Tighten screws in a cross pattern, a few turns at a time. Stop when you feel resistance, not when the screwdriver slips.
Installing a CPU cooler in a gaming PC covers torque and mounting styles.
Now place standoffs in the case. Match them to the motherboard form factor holes only. Extra standoffs under the board cause shorts.
A full guide to installing a CPU into a motherboard pairs well with this step.
Lower the board onto the standoffs at an angle, engaging the I/O shield first. Then press gently and secure with screws. Do not overtighten.
Snug is enough. Connecting motherboard power cables comes right after, before adding the GPU.
RAM, Storage, GPU, and Cable Connection Safety
With the board mounted, the remaining parts are mostly plug-and-play. Still, each has a specific wrong way to fail. Gentle, keyed, and straight is the rule.
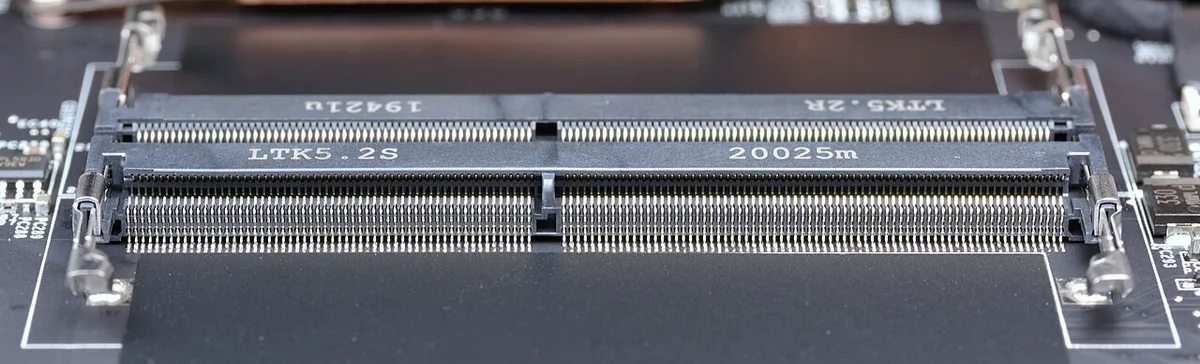
Image source: Wikimedia Commons / D-Kuru (CC BY-SA)
RAM installs with firm, even downward pressure. Open both slot latches first. Align the notch in the module with the key in the slot.
Press straight down until both latches snap closed. If one side lifts, press that side again. Do not rock the stick.
Check your motherboard manual for the correct slots. Dual-channel pairs are usually slots two and four, not one and three. Wrong slots still work but cost performance.
Installing RAM in the correct slots covers the population rules.
M.2 SSDs need a gentle hand too. Remove the heatsink screw, slide the drive in at a slight angle, then press it flat. Hand-tighten the tiny screw.
Overtightening strips the thread or cracks the PCB. Installing an M.2 NVMe SSD shows the angle and screw torque.
GPU installation is the last big mechanical step. Release the PCIe slot latch fully. Align the card with the slot and the rear bracket.
Press down with even pressure until the latch clicks. Support the far end with a bracket or stand. Installing a graphics card and connecting GPU power cables safely cover the details.
Cables are where builders rush and break things. Front panel headers are tiny and easy to bend. Connecting front panel case cables shows the pin layout.
Power cables are keyed and should slide in straight. If a 24-pin or EPS connector resists, check orientation before pushing.
Case fans need airflow direction checked before mounting. Installing case fans covers orientation and cable routing. Keep fan cables away from blades and hot heatsinks.
Before closing the case, do a first boot on the test bench. Connect only CPU, RAM, and GPU. If it POSTs, add storage and cables one at a time.
This isolates any damage to the last thing you changed.
First Boot, BIOS Checks, and Stress Testing
The first power-on is where hidden assembly mistakes surface. Keep the build minimal at first. Connect only the CPU, cooler, one RAM stick, GPU, and PSU.
Leave storage and extra fans for later.
Place the board on a non-conductive surface if you are testing outside the case. A cardboard box works well. Never run it on carpet or a metal table.
Watch for spinning fans and debug LEDs within the first few seconds.
If nothing happens, do not panic. Check the PSU switch, the 24-pin and EPS connectors, and the front panel power pins. Reseat the RAM and try one stick at a time.
Clear CMOS if the board seems stuck.
Once POST succeeds, enter the BIOS. Confirm the CPU model, memory size, and boot order. Check idle temperatures.
A stock cooler should keep a modern CPU under 50 C at idle in a cool room.
Save settings and boot into the operating system. Install chipset and GPU drivers before gaming. Then run a short stress test to confirm stability.
Fifteen to thirty minutes is enough for a first check.
Monitor temperatures during the test. Stop immediately if the CPU or GPU exceeds its documented thermal limit. Sudden shutdowns often mean a cooler is loose or paste is missing.
Log every change you make. If stability drops later, you can trace the last modification. This habit turns random failures into clear troubleshooting steps.
When to Stop and Get Professional Help
Some problems are not worth fixing at home. Bent CPU pins, cracked motherboards, and shorted traces can spread damage if you keep experimenting. Stop and seek help when the risk exceeds the part cost.
A burning smell or visible smoke means power down immediately. Unplug the PSU and do not retry. Inspect cables and standoffs before reconnecting anything.
Repeated power cycling can turn a small short into a dead board.
Stripped standoffs or cooler screws are another stop point. Forcing them can ruin threads in the motherboard or case. A repair shop can re-thread or replace hardware safely.
If the system refuses to POST after reseating RAM, cables, and cooler, the issue may be deeper. A technician can test with known-good parts. This isolates a dead CPU, board, or PSU without guesswork.
Warranty terms matter here. Many manufacturers void coverage for visible physical damage. If a part arrived damaged, document it with photos before opening it.
Contact the retailer or maker first.
Used parts raise the stakes. Unknown history can hide cracked dies or degraded capacitors. If a used CPU or GPU fails on first boot, stop testing and evaluate replacement cost versus repair.
Damage-Prevention Checklist and Verified Takeaways
A short checklist prevents most assembly damage. Run through it before and after the build. It takes minutes and saves expensive parts.
| Stage | Check | Pass Criteria |
|---|---|---|
| Before build | Grounding setup | Strap clipped to case or mat grounded |
| Before build | Screw sorting | Labeled cups by type |
| CPU install | Pin and socket check | No bent pins, flat seating |
| Cooler install | Mounting pressure | Even, snug, not stripped |
| Motherboard | Standoff match | Only holes for your form factor |
| RAM | Slot population | Correct slots per manual |
| GPU | Slot latch | Clicked and fully released on removal |
| Cables | Orientation | Keyed connectors straight and seated |
| First boot | POST result | Debug LEDs clear, BIOS visible |
| Stress test | Temperatures | Under documented limits |
The biggest verified takeaway is simple. Gentle handling beats speed every time. Most damage happens during the last ten percent of assembly, when builders rush to finish.
Keep the manuals open the entire time. Manufacturer installation steps exist for a reason. Skipping them is the fastest way to strip a thread or bend a pin.
Plan the build in stages. Install CPU and RAM before the board goes in the case. Add the GPU last.
This order reduces handling and keeps heavy parts away from fragile sockets.
Finally, treat every connector as keyed. If it does not slide in smoothly, stop and rotate it. Force is never the right answer with PC parts.
Frequently Asked Questions
What is the most common way to damage a PC during a build?
The most common damage comes from forcing connectors or overtightening screws. Bent CPU pins, stripped motherboard threads, and cracked RAM slots usually happen when builders push past resistance. Slow down, check orientation, and use hand torque only.
Can static electricity really destroy PC parts?
Yes. Sensitive components can fail at voltages far below what you can feel. The ESD Association documents damage thresholds under 100 volts for some devices.
Ground yourself with a strap and mat before handling parts.
Should I build a PC on carpet?
No. Carpet increases static discharge and can trap screws. Use a hard, clean table with an anti-static mat.
If you must work on carpet, ground yourself often and avoid shuffling your feet.
How tight should CPU cooler screws be?
Tighten until you feel firm resistance, then stop. Do not use tools with extra leverage. Uneven pressure can crack the CPU die or warp the motherboard.
Follow the cooler manual torque guidance if it lists one.
What should I do if my PC will not POST?
Power down and unplug. Reseat the RAM, CPU, and GPU. Check the 24-pin and EPS power cables.
Try one RAM stick in different slots. If it still fails, seek professional testing with known-good parts.
Is it safe to reuse old thermal paste?
No. Old paste dries and loses conductivity. Remove it fully with isopropyl alcohol and apply fresh paste.
Reusing paste raises CPU temperatures and can cause throttling or shutdowns.